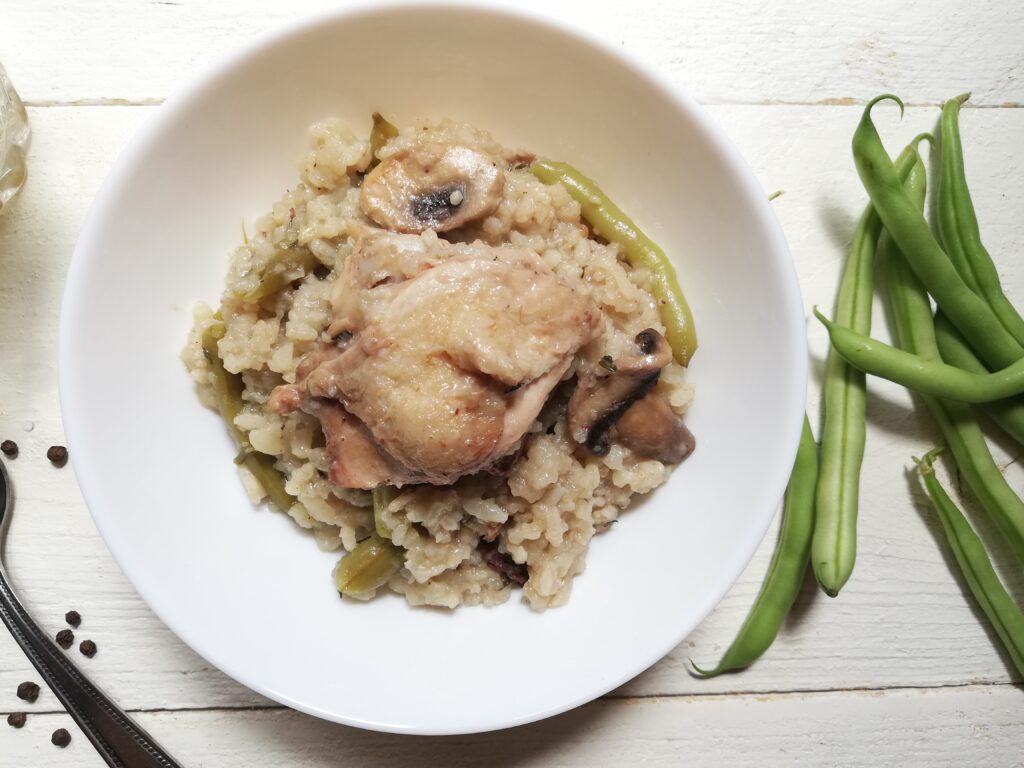
Easy Oven-Baked Risotto with Chicken and Vegetables (No-Stir Recipe)
This chicken, mushroom, and green bean risotto is an easy, oven-baked dinner that’s protein-packed and full of comforting flavor. It’s perfect for busy weeknights—especially when it’s cold or rainy outside and you’re craving something cozy and satisfying. Made completely from scratch with real food ingredients, this no-stir risotto recipe delivers all the creamy, delicious texture you love without spending half an hour at the stove.
What Is Baked Risotto?
Baked risotto is a hands-off twist on the traditional Italian dish, made by combining Arborio rice, chicken, mushrooms, and vegetables in one cozy casserole. Because it’s baked in the oven and covered, it doesn’t need the constant stirring that stovetop risotto requires—making it simpler, more forgiving, and perfect for busy family dinners. Once it’s in the oven, you can practically forget about it while the magic happens. Another thing to love? It’s a true one-pot meal, with protein, starch, and veggies all in one dish—meaning fewer dishes to wash and more time to relax after dinner.
Why You’ll Love This Recipe
- It’s mostly hands-off. The only active work is the prepping of the veggies and meat. Once assembled, it bakes in the oven without the need to stir it or check on it at all.
- Creamy, comforting, and healthy. Made from scratch with homemade bone broth, chicken, mushrooms, and fresh vegetables – no processed ingredients.
- Customizable. You can use whatever veggies you have on hand. Just remember to pre-cook any that require longer cooking, such as green beans, broccoli, or carrots, or cut them up really small so they cook to softness in the oven.
- Perfect for families. This risotto is a mild flavored, cozy dinner, perfect for the whole family. You can also adapt it to include whatever veggies your kids are willing to eat.
- Make-ahead friendly. You can prepare and assemble all the ingredients earlier in the day, refrigerate, and bake when ready. Because it bakes in the oven under foil (or in a covered casserole), it does not need to be stirred or checked at all. Just pop it in the oven and set your timer on, then let it bake while you attend to other things.
- No wine needed. If you prefer to cook without alcohol, this risotto gives you a rich, creamy flavor (thanks to the addition of good quality homemade broth) without using wine.
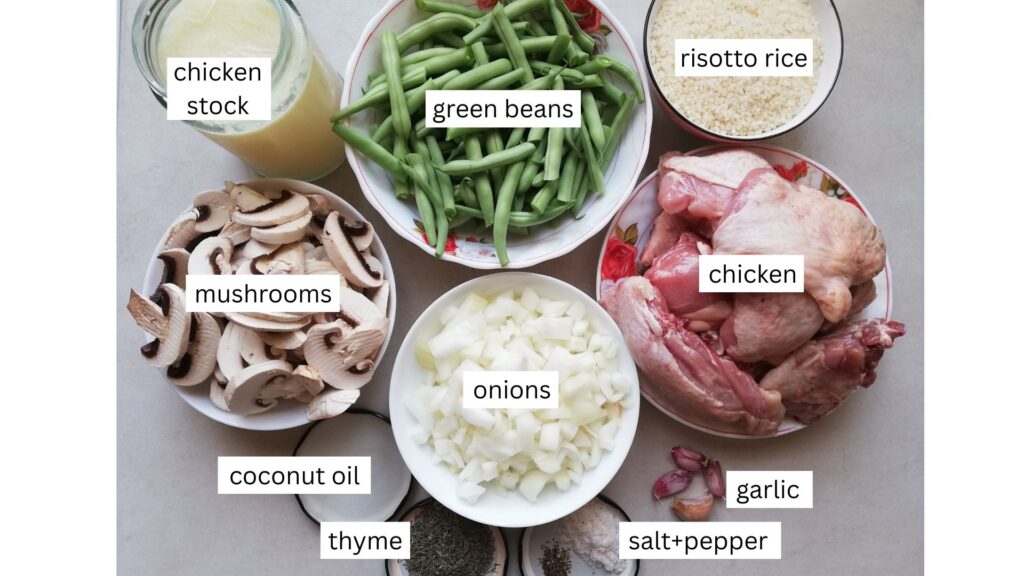
Ingredients You’ll Need
How to Make Baked Risotto Step by Step
Step 1
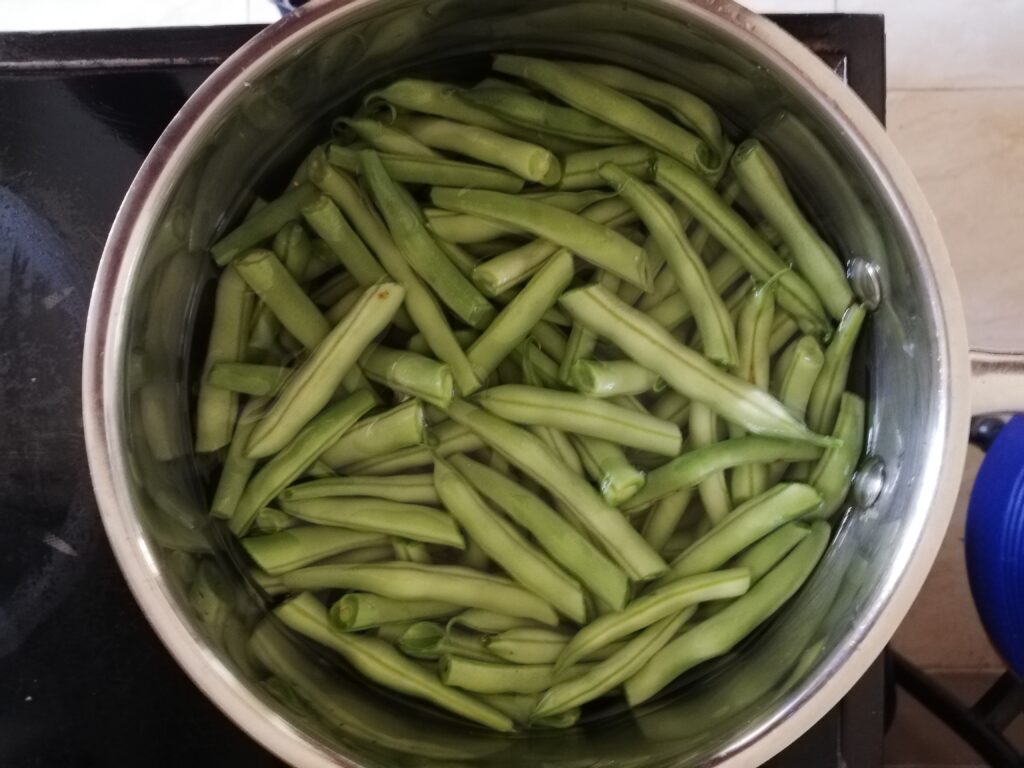
Preheat your oven to 180°C (350°F). In a medium pot, bring water to a simmer and add the green beans. Cook for about 15 minutes, or until they’re just tender (al dente). Drain well and set aside while you prepare the rest of the risotto.
Step 2
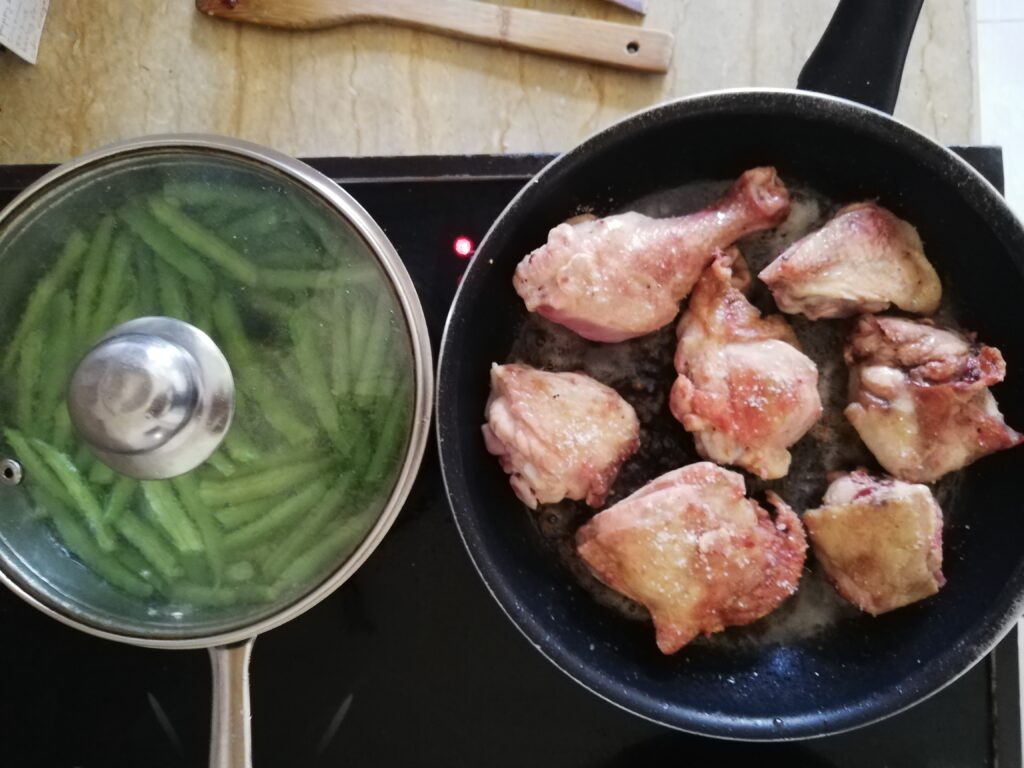
While the beans are cooking, heat a large skillet over medium heat and brown the chicken in 1 tablespoon of coconut oil, working in batches if needed so the pan isn’t overcrowded. Cook for about 6–7 minutes on each side, until the chicken is golden and cooked through. Season generously with salt and black pepper, then transfer the chicken to your oven-safe casserole dish.
Step 3
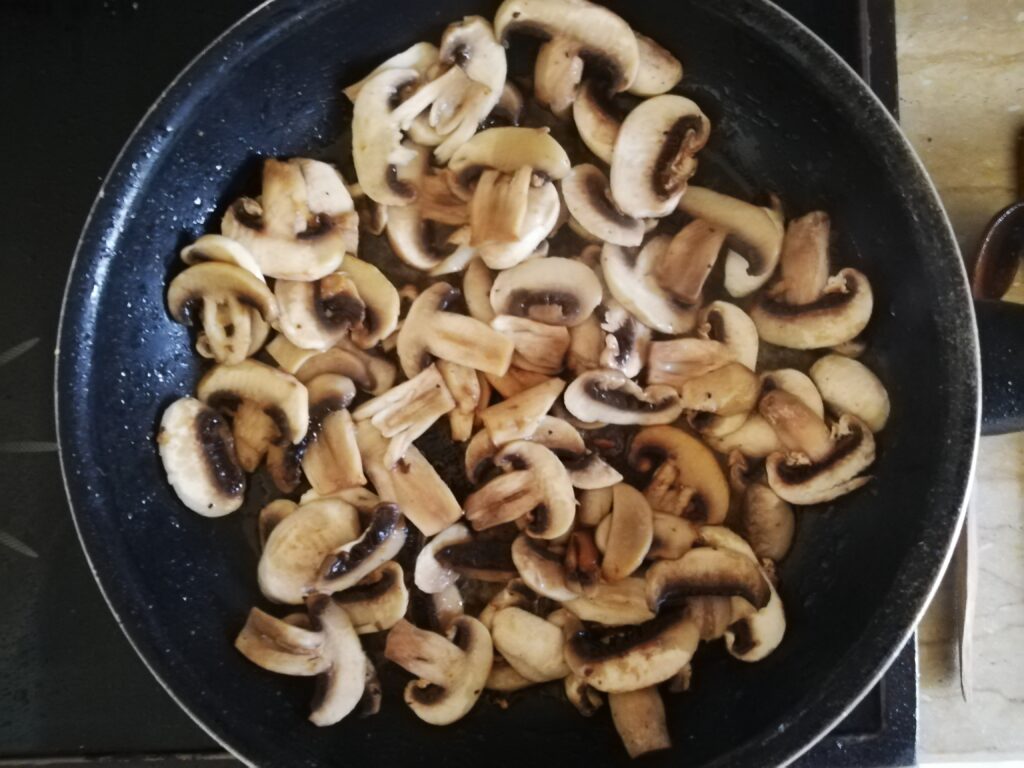
Add a bit more oil to the same pan and sauté the mushrooms over medium heat until they turn golden and release their juices. Season well with salt and pepper.
Step 4
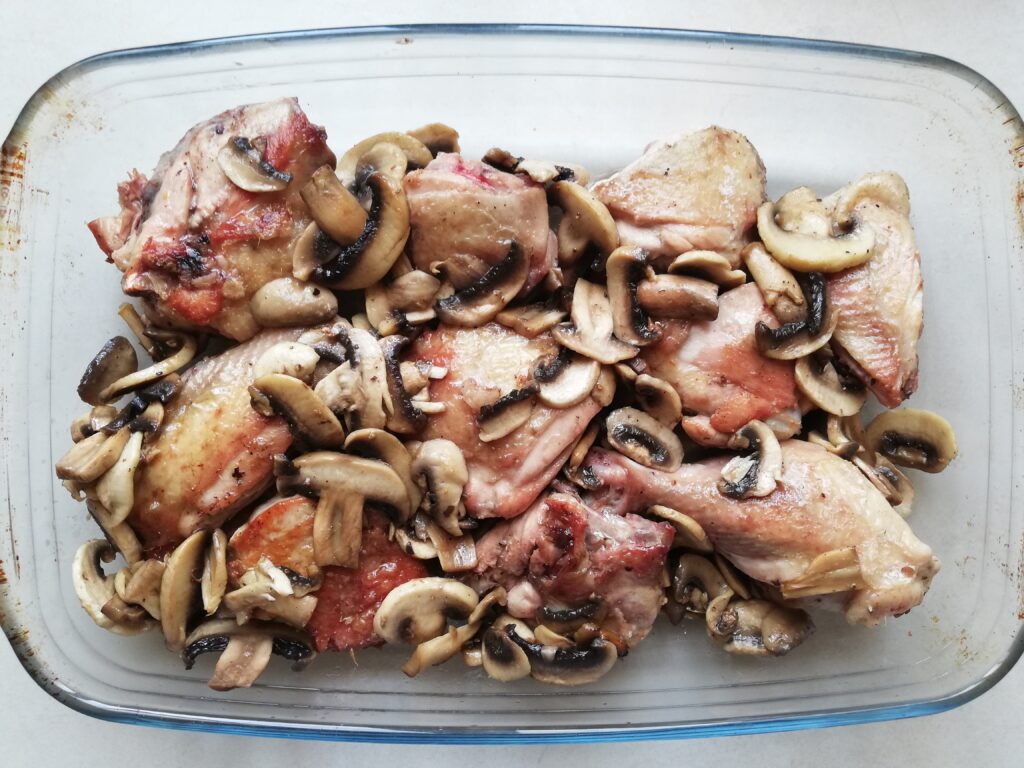
Add the sautéed mushrooms to the casserole dish, spreading them evenly over the chicken.
Step 5
Next, sauté the onions and garlic in the same pan until softened and fragrant. (I like to blend the onions and garlic before cooking because my kids don’t enjoy visible onion pieces, but that’s completely optional—you can simply chop them very finely instead.)
Step 6
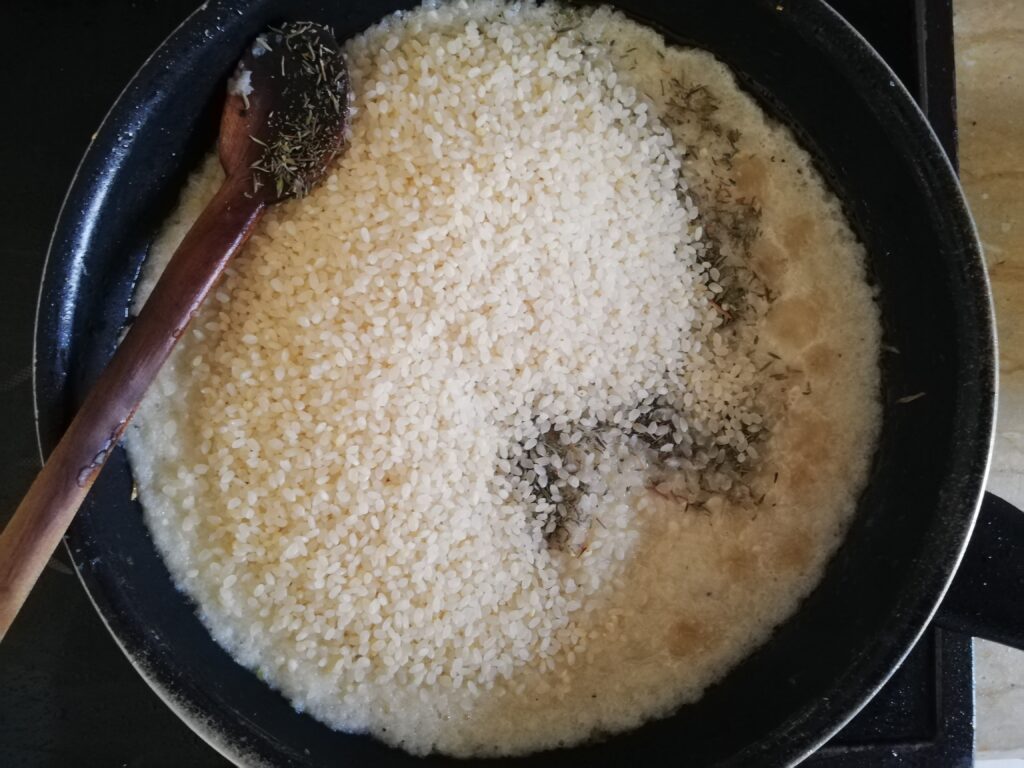
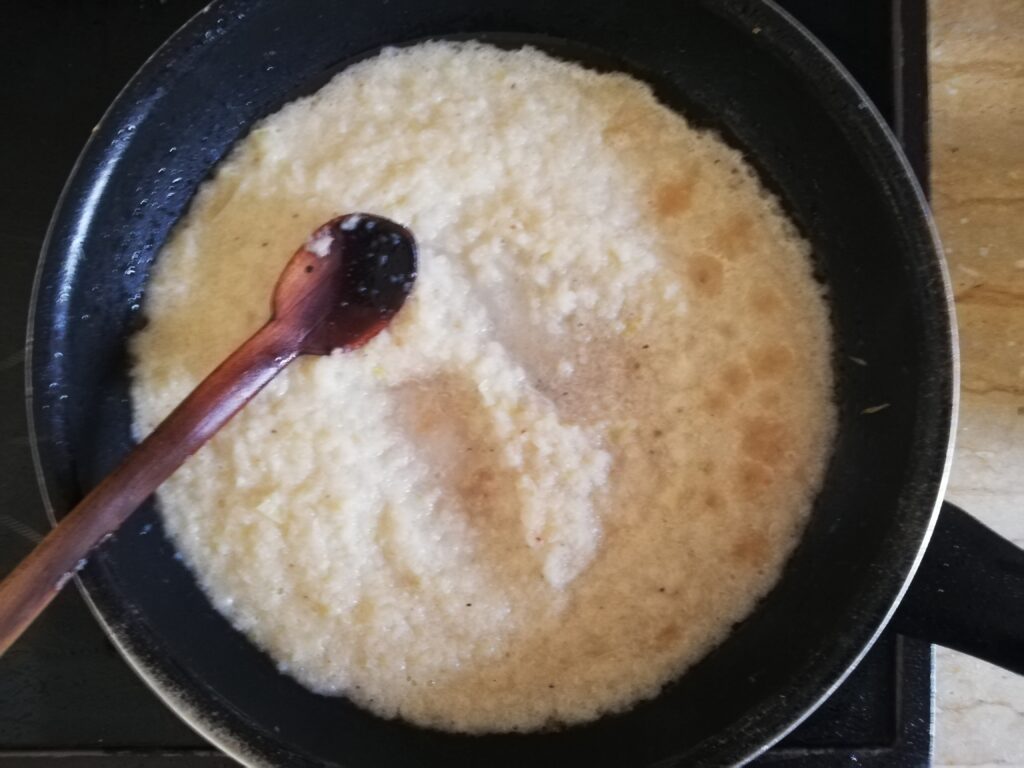
Once the onions and garlic are soft, add a little more oil to the pan, then stir in the risotto rice and thyme. Let the rice toast gently in the oil for about a minute, stirring to coat each grain. Pour in about 2 cups of hot stock to deglaze the pan, scraping up any flavorful bits stuck to the bottom.
Step 7
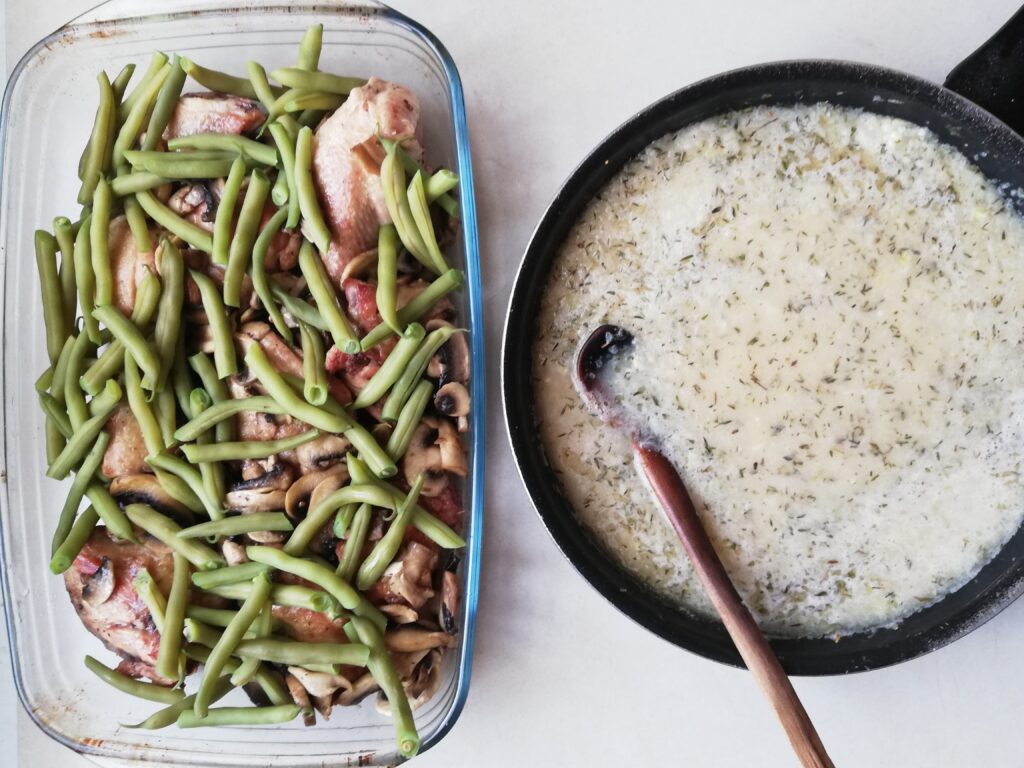
Arrange the pre-cooked green beans over the chicken in the casserole dish, then pour the onion, rice, and stock mixture evenly over the chicken and vegetables. Make sure everything is spread out so the rice cooks evenly.
Step 8
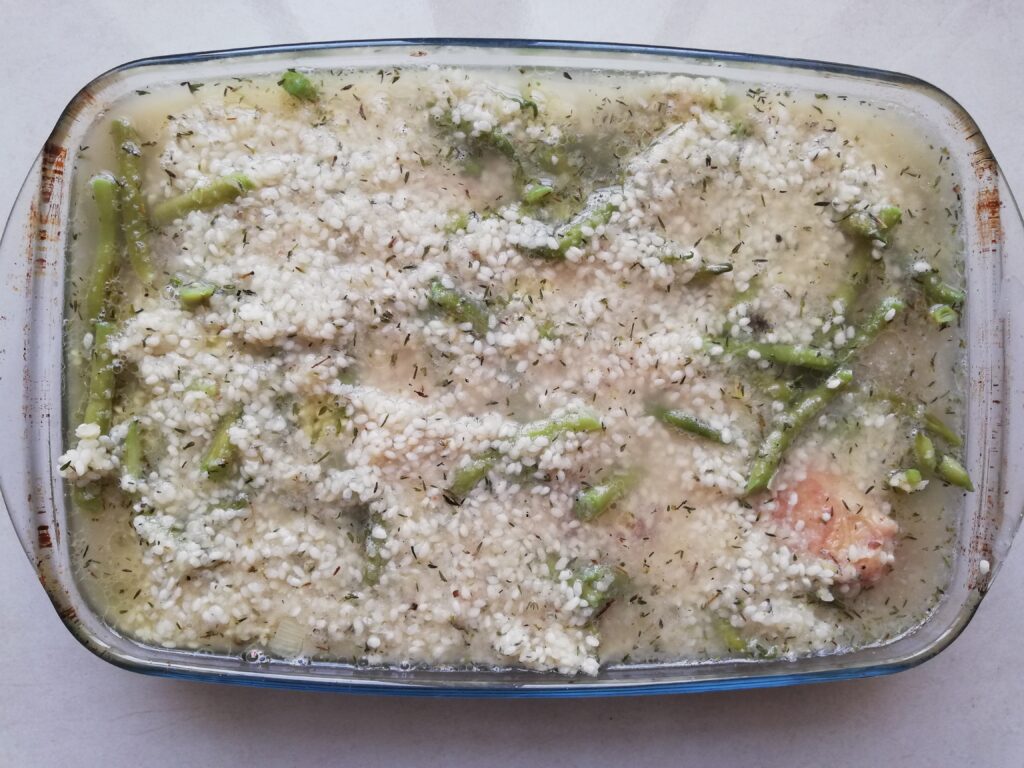
Pour the remaining hot stock evenly over the casserole, then gently pat the mixture down to create an even layer. It will look quite runny at this stage—don’t worry, the rice will soak up most of the liquid as it bakes in the oven.
Step 9
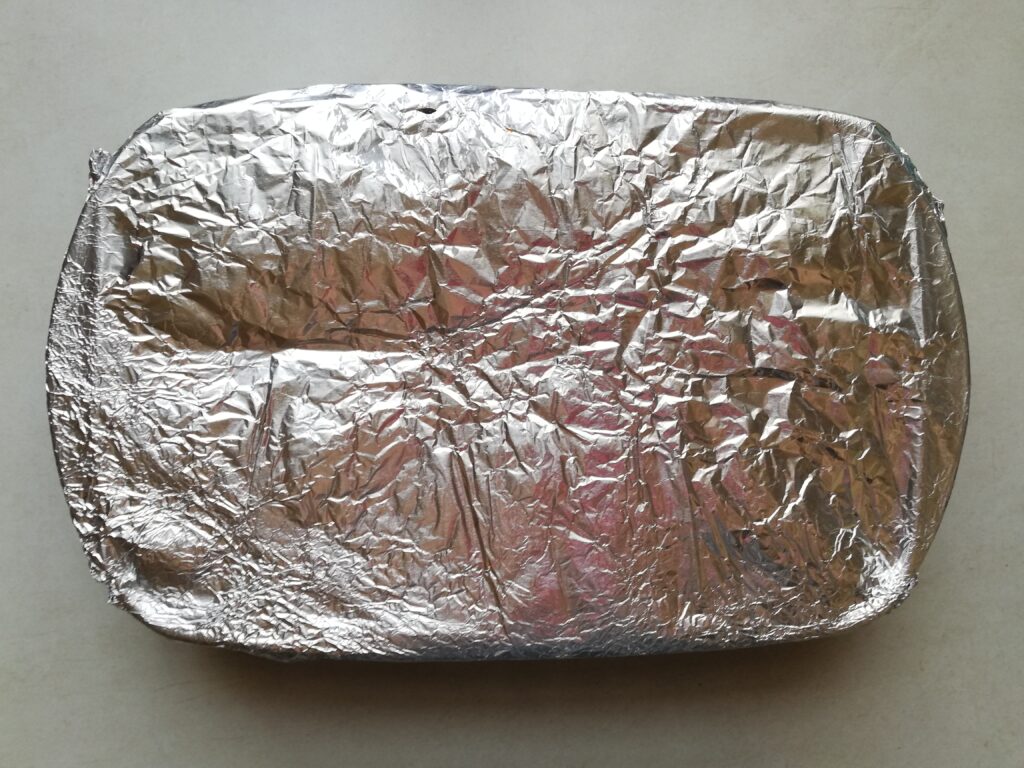
Cover the casserole dish tightly with foil to trap the steam and keep the risotto from drying out. Place it on the middle rack of the preheated oven and bake for about 40 minutes, until the rice is tender and most of the liquid has been absorbed.
Step 10
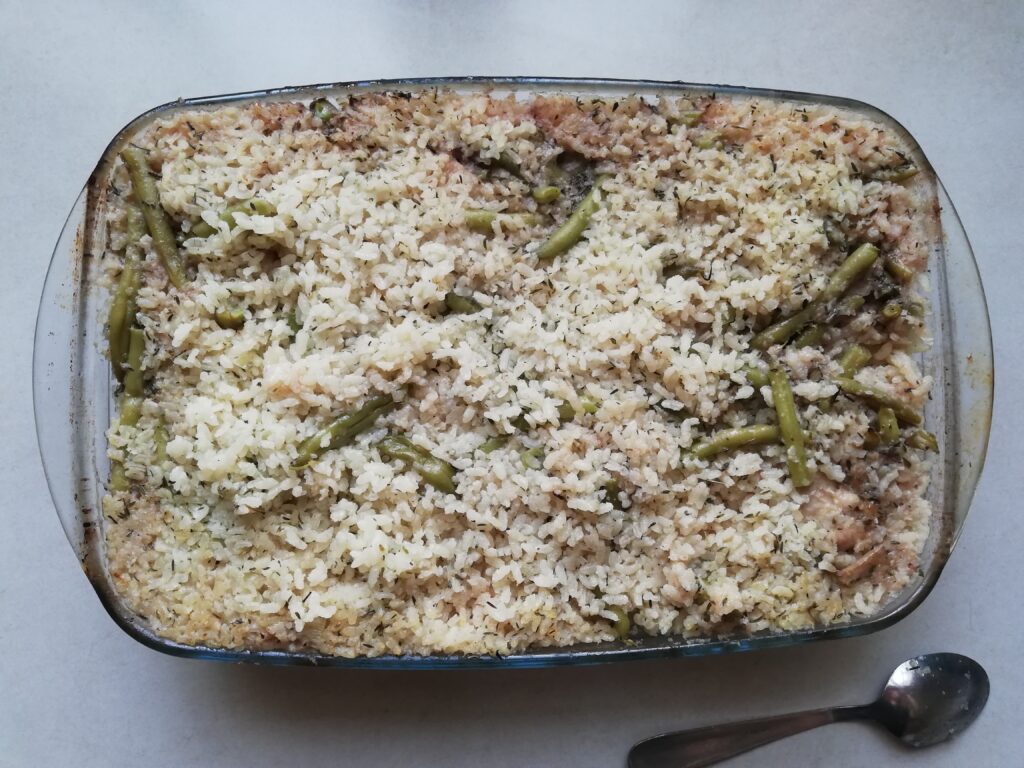
Remove the casserole from the oven. The rice should have absorbed most of the stock and be soft, creamy, and tender. Stir in the finely grated cheese and chopped parsley (if using), then serve the risotto right away while it’s warm and comforting.
How to Serve Baked Risotto

This baked risotto is a complete one-pot meal, so it doesn’t really need any sides. If you’d like to add something extra, it pairs beautifully with a small serving of fermented vegetables, a crisp green salad, or a slice of warm sourdough garlic bread.
Make-Ahead, Storage & Reheating Tips
- How long will risotto last in the fridge?
This risotto will last in the fridge for 3-4 days.
- Can risotto be made ahead?
You can prep all the ingredients the day ahead and assemble them in the casserole dish, then bake it for dinner the next day, making this baked risotto a great dish for cozy family dinners or make-ahead lunches.
- Can risotto be frozen?
You can freeze risotto, though keep in mind that rice tends to soften after freezing. I often freeze leftover risotto, and it usually turns out fine—just be aware that if it stays in the freezer too long, the texture can become a bit soft or slightly mushy. For best results, enjoy it within a month or so.
- Can risotto be reheated?
The best way to reheat risotto is to warm it gently on the stove in a large non-stick pan, with a splash of broth to prevent it sticking to the bottom of the pan and burning.
Baked Risotto FAQs
- Can I use regular rice for risotto?
Yes, you can, however your risotto will not have the same creamy texture as if you used Arborio rice (also called risotto rice).
- What’s the risotto rice to broth ratio?
The ratio I have used is 1 part rice to 3 parts stock. You can easily make a double or triple batch of this recipe by adjusting the amount of risotto rice and stock (and increasing the amount of veggies or meat of course). Always use 3 cups of stock/broth per cup of risotto rice.
- Can I make risotto without wine?
Yes. Wine is often added to risotto to enhance the flavor, but is not essential. I always just use some extra stock to replace wine in risotto recipes.
- How long does baked risotto take?
Baking time for this recipe is around 40 minutes. Prep time depends on the veggies you choose to use in this recipe. If your veggies are already pre-cooked, the only prep required is the browning of the chicken which takes about 15 minutes (or a little longer if your frying pan is small and you need to brown it in batches).
Final Thoughts
I hope you love this comforting cold-weather risotto recipe! A homemade risotto is such an easy, wholesome dinner that you can adapt to any season—think asparagus and fresh peas in spring, or pumpkin and mushrooms in the fall. If you give this recipe a try, I’d love to hear how it turned out for you!
Want more from-scratch, real food recipes like this one? Subscribe to my newsletter for new recipe updates and exclusive access to my subscriber-only eBooks and kitchen guides.
More Delicious Chicken Dinners
Mexican Style Chicken Liver Pâté
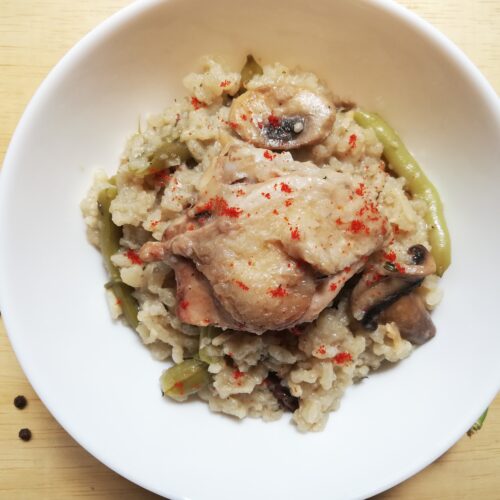
Baked Risotto with Chicken and Vegetables
Equipment
- large oven-safe casserole dish
Ingredients
- 3 cups green beans
- 3 tbsp coconut oil
- 4 chicken legs, cut into 3 pieces
- 2 tsp unrefined salt, divided
- ½ tsp freshly ground black pepper
- 3½ cups mushrooms
- 2 cups finely chopped onions
- 4 cloves garlic
- 1½ cups arborio rice
- 2 tsp dried or fresh thyme
- 4½ cups hot chicken stock
To serve
- ⅓ cup grated Parmiggiano cheese
- ½ cup finely chopped fresh parsley (optional)
Instructions
- Preheat oven to 180°C (350°F). Bring a pot of water to a simmer, add green beans, and cook for about 15 minutes until just tender. Drain and set aside.
- While the beans cook, heat a large skillet over medium heat and brown the chicken in batches for 6–7 minutes per side, until golden and cooked through. Season with salt and pepper and transfer to an oven-safe casserole dish.
- Add a little more oil to the same pan and sauté the mushrooms until golden. Season and add them to the casserole with the chicken.
- In the same pan, sauté the onions and garlic until softened. (You can blend or finely chop them if you prefer a smoother texture.)
- Add a bit more oil, then stir in the risotto rice and thyme. Toast for about 1 minute, then pour in 2 cups of hot stock to deglaze the pan, scraping up any browned bits.
- Arrange the green beans over the chicken, then pour the onion, rice, and stock mixture evenly over the top.
- Pour in the remaining hot stock and gently pat the mixture to make an even layer. It will look runny—don’t worry, the rice will absorb it while baking.
- Cover tightly with foil and bake on the middle rack of your oven for about 40 minutes, until the rice is tender and creamy.
- Remove from the oven, stir in the grated cheese and parsley (if using), and serve warm.
Notes
- Dairy-free option: Omit the cheese or use a dairy-free alternative; the risotto will still be creamy from the starch in the rice.
- Make ahead: You can assemble the casserole a few hours ahead, cover, and refrigerate until ready to bake.
- Freezing: Leftovers can be frozen for up to one month, though the rice may soften slightly after thawing.
- Reheating: Reheat gently on the stovetop with a splash of broth or water to loosen the texture.


