How to Ferment Honey at Home (Easy Fermented Lemon Ginger Turmeric Honey)
Learning how to ferment honey is one of the easiest ways to create delicious, naturally probiotic treats your family will love—without spending hours in the kitchen. If you’re a busy mom trying to build traditional kitchen skills, this is a simple, forgiving ferment that even kids enjoy.
Honey fermentation requires only a few simple ingredients and very little active time, so it fits easily into your natural kitchen rhythm. Even if you’re new to fermentation, this is a skill you can pick up quickly and use again and again.
In this tutorial, you’ll learn how to ferment honey safely at home, how to use it in everyday recipes, and how to store it for maximum shelf life. You’ll also get a step-by-step fermented lemon, ginger, and turmeric honey recipe to help you start your first batch with confidence.
Once you understand the basic process and ratios for honey fermentation, you can start experimenting with your favorite fruits, spices, and herbs to create your own fermented honey recipes.
Why You’ll Love This Recipe
- Easy for beginners: Fermented honey is one of the simplest ferments to start with.
- Few ingredients needed: Uses only a few simple, real ingredients.
- Preserves seasonal flavors: Gently preserves fresh fruit, herbs, and spices.
- Flexible batch sizes: Can be made in small batches to fit your time and needs.
- Builds confidence: Experimenting with flavors helps you learn traditional fermentation.
- Versatile in the kitchen: Stir into warm tea, drizzle over yogurt, or spoon onto pancakes and waffles.
- Child-friendly: Mild flavor makes it enjoyable for kids.
- Natural remedy: Can be used as a gentle, soothing aid for colds and flu.
What Is Fermented Honey?
Fermented honey is raw honey that has undergone a gentle fermentation process, usually by adding fresh, moist ingredients. This small addition of moisture activates the natural yeasts—and tiny amounts of beneficial bacteria—present in raw honey. These microorganisms feed on the sugars, producing mild acids and a little carbon dioxide, which is why your honey may bubble slightly as it ferments.
Pure raw honey on its own will not ferment, since its extremely low moisture content keeps it naturally shelf-stable for years when stored properly. By adding fresh fruit, herbs, or other moist ingredients, you raise the honey’s moisture just enough to start fermentation. Because the sugar content is still high and the moisture level remains low, the process is slow and mild—your honey won’t suddenly turn into alcohol or vinegar.
The result is a fermented honey that still tastes very much like raw honey, but with a thinner texture, a pleasant tang, and the flavors of whatever fresh fruit, herbs, or spices you’ve added. I’ve been making jars of fermented honey since I first learned this technique from a fermentation group in 2017, and I never tire of experimenting with new flavor combinations.
Fermented Honey vs. Infused Honey
This is a point that often confuses beginners. If you mix dried lemon, dried ginger, and turmeric with raw honey and let it sit for several weeks, you’ll end up with a flavorful infused honey—but it won’t ferment. The dried ingredients simply don’t have enough moisture to activate the natural yeasts and bacteria in the honey.
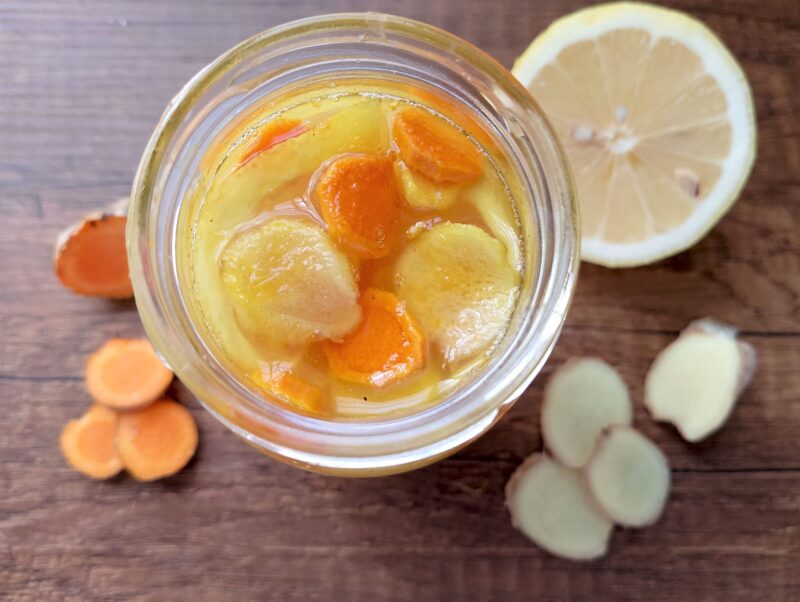
In contrast, using fresh lemon, ginger, and turmeric (as in the recipe below) makes a big difference. When mixed with raw honey, the moisture from the fresh ingredients activates the microbes naturally present in the honey. After a few days, you’ll have thinner, pourable, flavorful fermented honey. The yeasts feed on the sugars, producing mild acids and carbon dioxide in a gentle fermentation process—similar in principle to traditional ferments like sauerkraut or kefir.
Infused honey = dried fruit, herbs, or spices are simply steeped in honey for flavor.
Fermented honey = added fresh ingredients release moisture, allowing natural fermentation to occur.
Why Ferment Honey?
There are many reasons why fermented honey has become so popular among fermentation enthusiasts. Below are the four main reasons I love making honey ferments at home—and why you might enjoy adding them to your kitchen too.
More Complex Flavor
For me, the biggest reason to make fermented honey is the flavor. Even without other benefits, it’s worth it! Raw honey is naturally delicious, and its taste varies depending on the nectar source. When I lived in Yorkshire, we often enjoyed local heather honey. My grandma in Eastern Europe always recommended linden honey, made by bees collecting from linden trees. Here in North Africa, wildflower honey is popular, and we recently discovered thistle honey—thistles thrive in the dry, nutrient-poor soils and hot summers here.
Fermenting honey elevates the flavor to another level. As the honey ferments, it slowly absorbs the sweet, sour, or pungent notes of fresh ingredients like lemon, ginger, or herbs. Keeping a few small jars of fermented honey on hand adds variety to oatmeal, yogurt, pancakes, and more.
Thinner, Easier-to-Use Texture
Fermentation makes honey thinner and more pourable. This makes it easier to stir into herbal teas, drizzle over yogurt or oatmeal, or mix into salad dressings. Unlike raw honey, it’s no longer sticky or “gluey,” so you can use it more easily in everyday recipes.
Health Benefits
Enhanced flavor isn’t the only benefit. While raw honey already contains antioxidants, vitamins, and minerals, fermenting it encourages the growth of naturally occurring yeasts and beneficial bacteria. This turns your fermented honey into a probiotic-rich food. Adding ingredients like garlic, ginger, lemon, or fresh herbs creates a gentle, child-friendly home remedy during cold and flu season.
Natural Food Preservation Method
Fermentation creates a mild acidic environment that preserves the fresh ingredients while extracting their flavors and properties. While it’s not ideal for storing large quantities of produce, it’s perfect for small seasonal treats. A jar of fresh blueberries in honey in the middle of winter becomes a delightful, preserved snack when fruit is scarce!
Ingredients
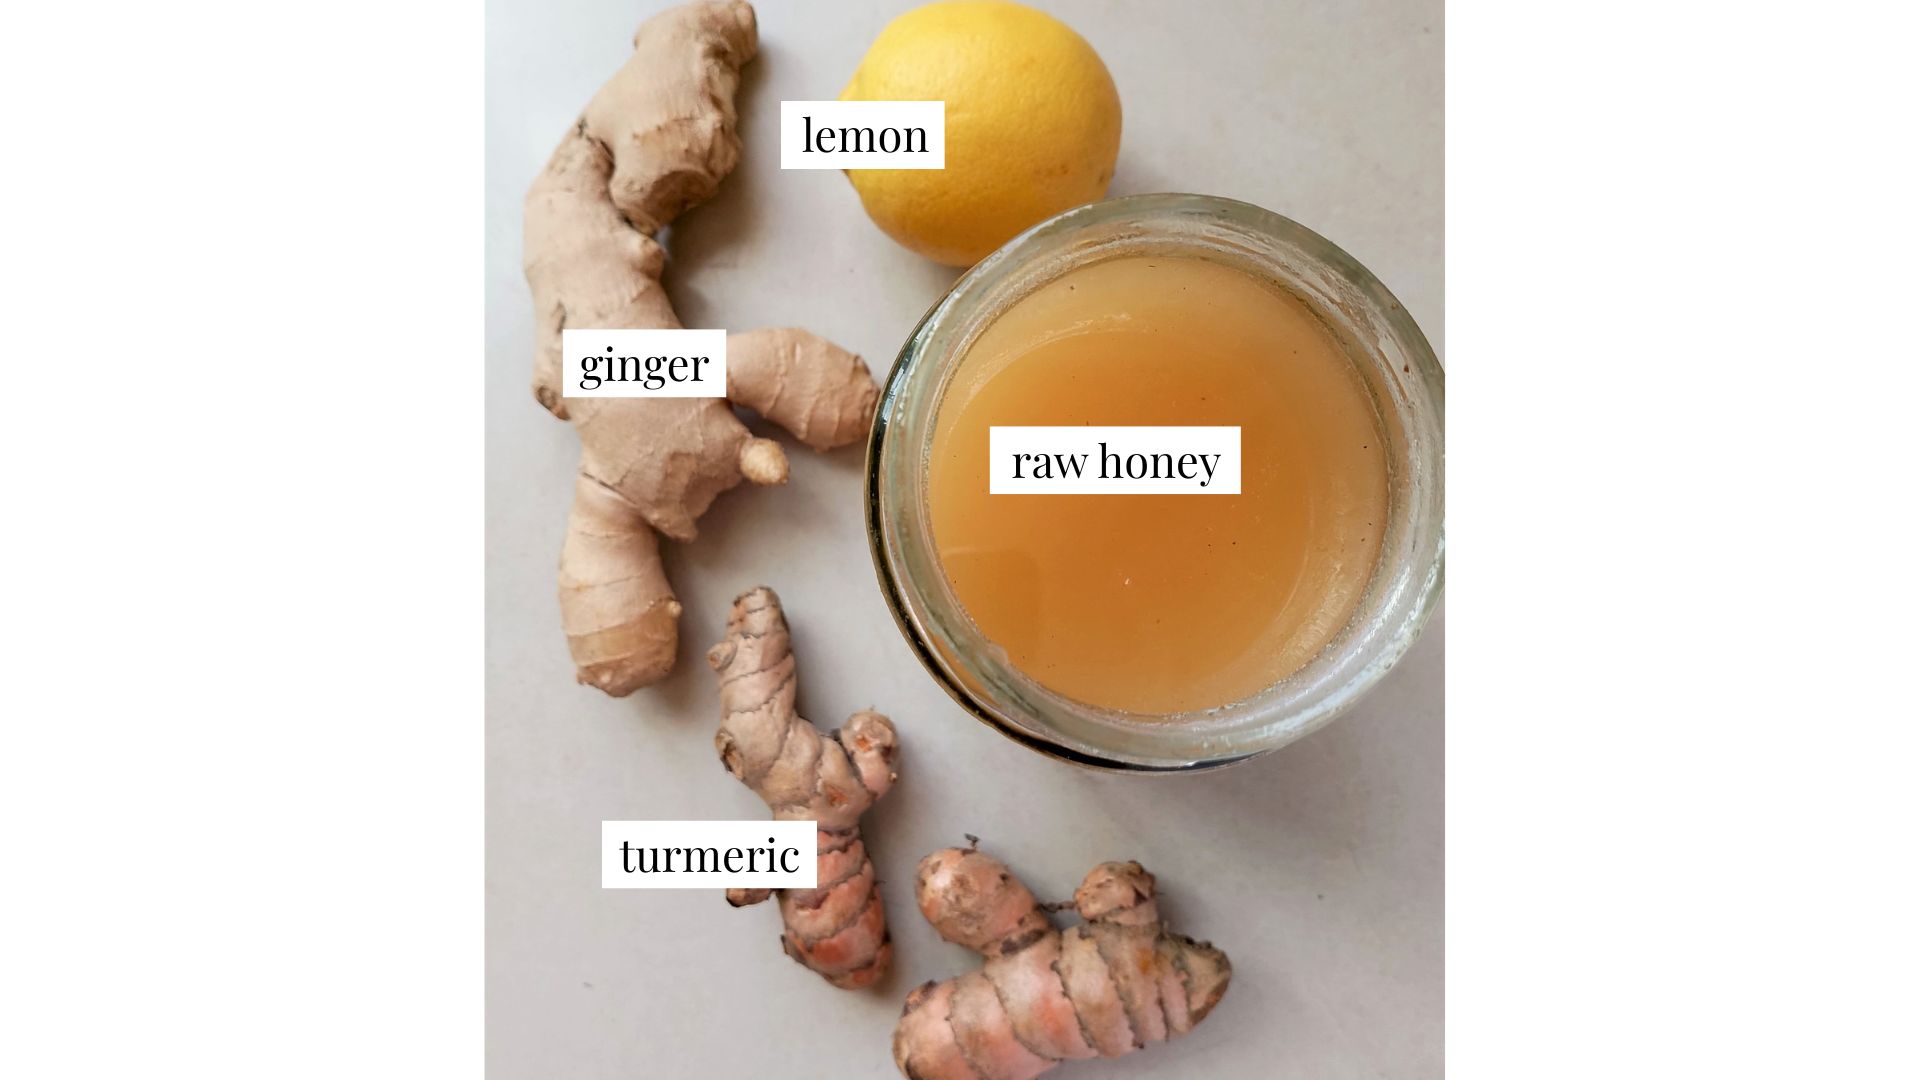
Raw honey:
- Clear raw honey is easiest to mix with fresh ingredients.
- Set honey (crystallized) will also work if warmed slightly in a water bath to make it pourable.
Fresh fruit:
- I typically use sliced fresh lemon, but most fresh fruit works beautifully.
- Examples: chopped apples, berries (elderberries are excellent for immune-boosting ferments), cubed orange, or lime.
- Larger fruit should be sliced thinly or chopped so it ferments evenly.
Fresh herbs and spices:
- This recipe uses fresh turmeric and ginger.
- Other options: raw peeled garlic, sliced onions, fresh chilies, or any aromatic herbs.
Note on dried ingredients:
- Dried fruit and spices can be added to raw honey, but the result will be an infused honey rather than a true fermented honey, since dried ingredients lack the moisture needed to kickstart fermentation.
- You can combine dried spices with fresh ingredients for flavor—for example: chopped apple + cinnamon stick, or orange + cloves + star anise.
Unpeeled vs. peeled citrus:
- For best flavor, use organic unpeeled citrus.
- Non-organic citrus peel may contain pesticides, waxes, or other residues—if using non-organic, remove the peel.
- I’ve tried both peeled and unpeeled citrus: peeled citrus gives a subtle flavor, while unpeeled organic citrus adds a bright, punchy taste.
Fermentation ratio and yield:
- This recipe yields about 1 cup of fermented honey.
- My ratio: 1 part fresh ingredients to 1.5 parts honey (adjust slightly depending on size and juiciness of your ingredients).
- Goal: the honey should just cover the fruit, herbs, and spices for optimal fermentation.
- This ratio creates a potent, flavorful fermented honey.
Tools & Equipment
- Clean glass jar with lid: a simple quart jar with a lid is enough. You can clean, dry and reuse an old mayo or peanut butter jar. The size of your jar depends on how much fermented honey you want to make (I’m using a pint jar in this recipe).
- Spoon: just an ordinary metal spoon to add the honey into the jar.
- Knife and cutting board: any larger fresh fruit and spices will need to be sliced thinly or chopped.
- You don’t need fermentation weights, airlocks, or any other fancy gear for this recipe.
You can find the full ingredient list with exact measurements in the recipe card below.
How to Ferment Honey: Step-By-Step Method
Step 1
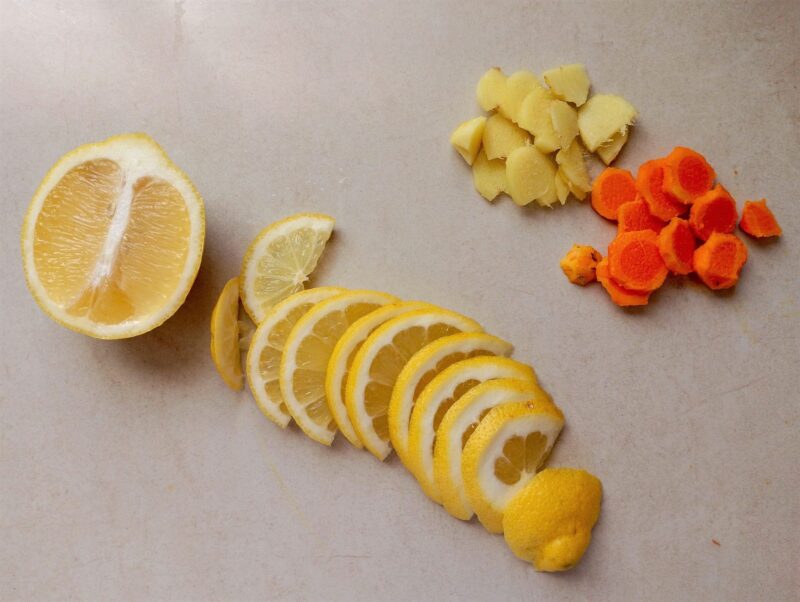
Wash your lemon thoroughly and slice it into thin half-moons. Slice the fresh turmeric and ginger into rounds. Peeling is optional—unpeeled turmeric and ginger will ferment perfectly—but I usually peel them because they look nicer in photos.
Step 2
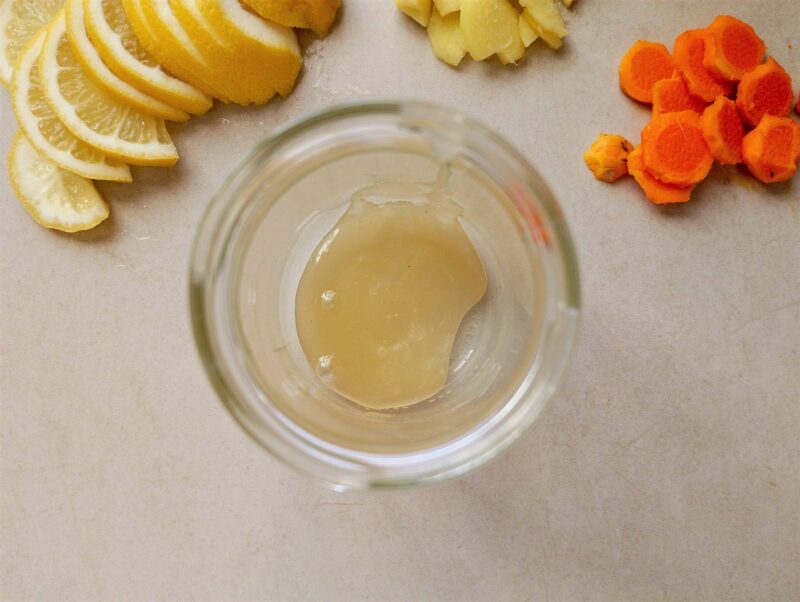
Spoon a small amount of raw honey into the bottom of your jar, just enough to create a base for the fresh ingredients.
Step 3
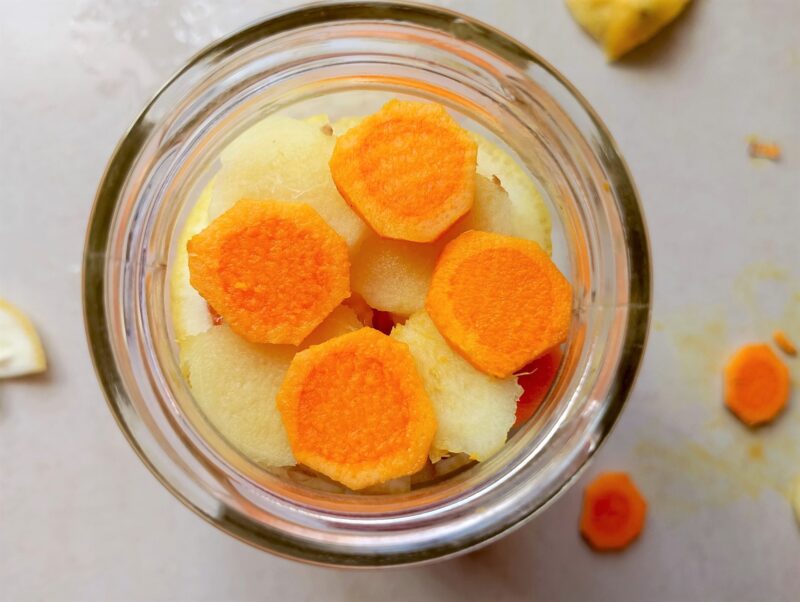
Add the lemon, ginger, and turmeric slices to the jar, layering them evenly until you reach the neck. Arrange them so they sit nicely, and try to keep the pieces fairly uniform for even fermentation.
Step 4
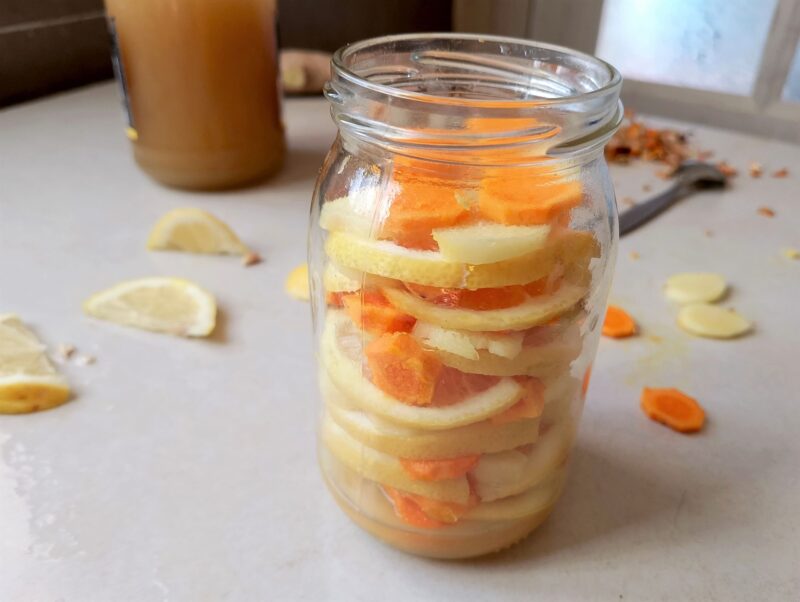
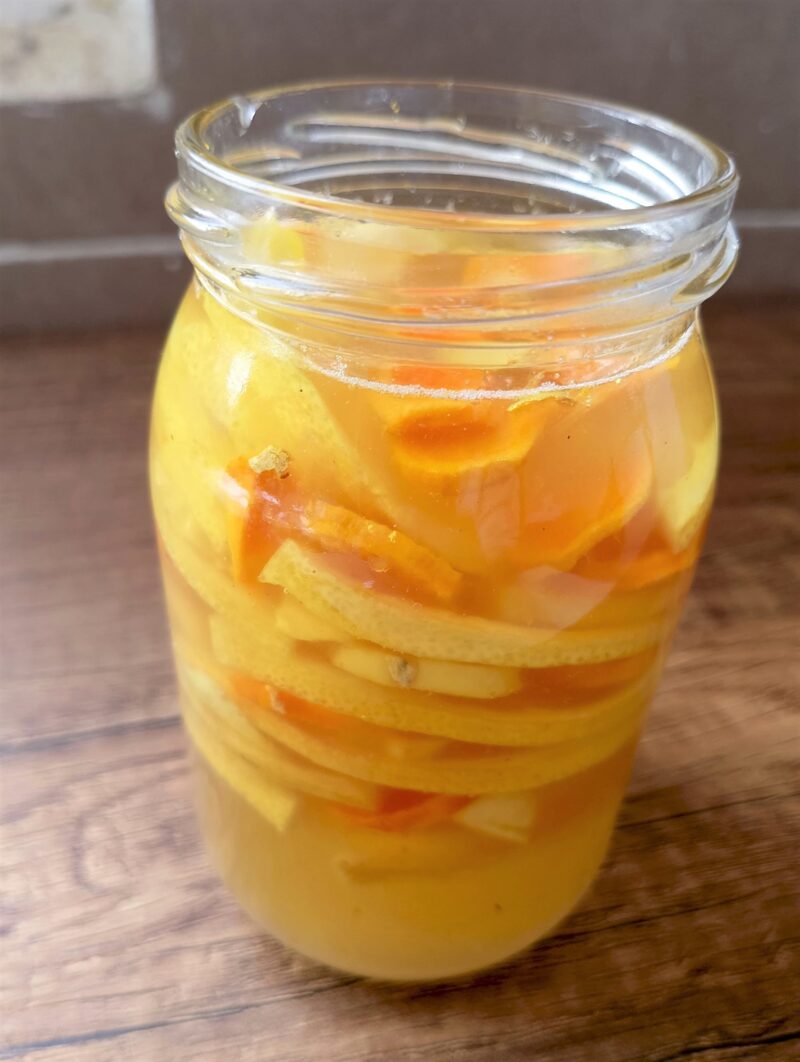
It’s easiest to see the layers from the side of the jar. Gently pack the fresh ingredients so they sit snugly but not too tightly—light packing helps the honey fully coat the fruit, ginger, and turmeric and allows the fermentation to proceed evenly.
Step 5
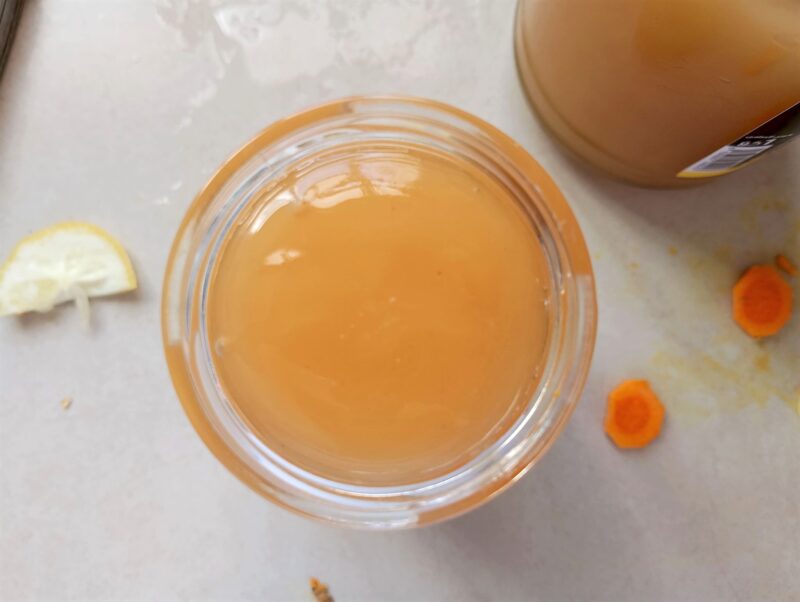
Pour honey over the layered ingredients until they are completely covered, leaving about 1–2 inches of headspace at the top of the jar. As the honey ferments, the fresh ingredients will release moisture, causing the liquid level to rise slightly. Leaving this space prevents overflow and keeps your countertop clean during fermentation.
Step 6
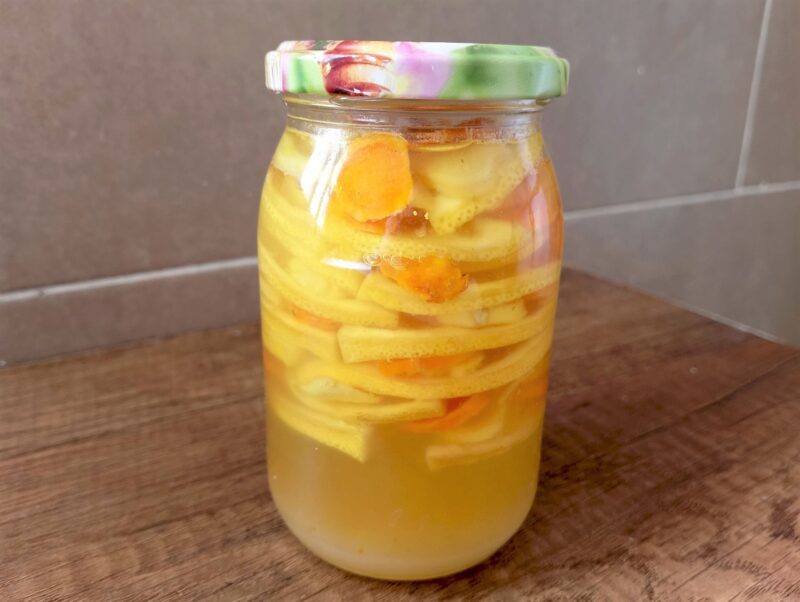
Tighten the lid on the jar and place it somewhere warm and dry, out of direct sunlight, to ferment for 5–7 days. I keep mine on the counter so I can keep an eye on it. Once a day, gently stir the jar to release any air bubbles and make sure all the ingredients stay submerged in the honey. It’s normal for the fruit and spices to float to the surface—daily stirring prevents them from going moldy. There’s no need to “burp” the jar. Honey ferments aren’t very bubbly, and canning lids allow any air to escape naturally, so your jar is safe from exploding.
How to Know When Your Fermented Honey Is Ready
Your fermented honey is ready to use when you notice the following signs:
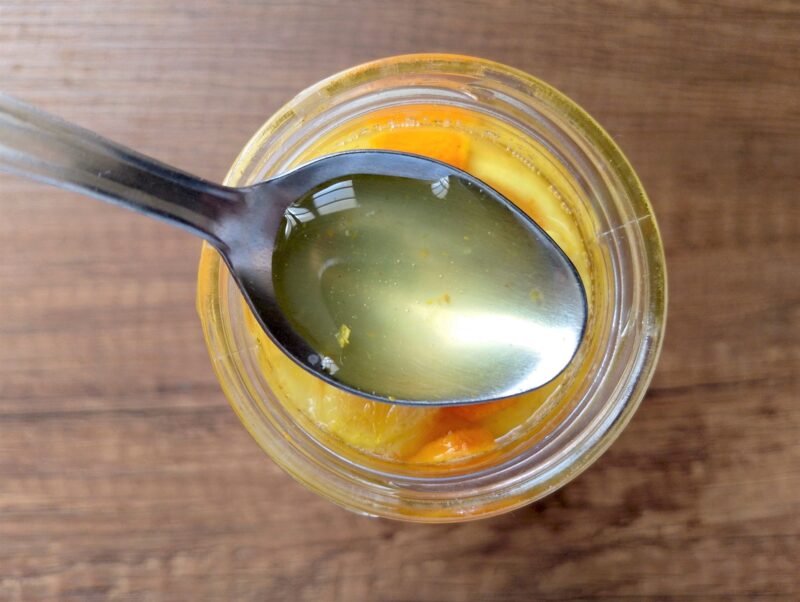
- The honey has thinned and become more pourable.
- It has developed a strong aroma from the fruit, herbs, or spices you added.
- Light bubbling may appear, showing that fermentation is active.
Most fermented honey is ready after about 5–7 days, although you can let it ferment a little longer if you prefer a stronger flavor.
Once you see these signs, transfer the jar to the refrigerator or a cool pantry for long-term storage. Over time, the lemon slices will slowly candy, while the ginger and turmeric soften and continue infusing the honey with flavor.
I generally don’t recommend keeping fermented honey at room temperature once it’s ready to use. In a warm kitchen, fermentation may continue too quickly, which could cause the honey to over-ferment and develop alcohol.
Serving Ideas
Fermented honey is wonderfully versatile. The honey itself becomes thinner and lightly tangy, while the fruit, herbs, or spices infusing it soften and release their flavor. Here are some simple ways to use it in your kitchen:
- Stir into herbal tea for a naturally sweet, lightly probiotic drink.
- Spoon into warm lemon water for a simple morning tonic.
- Drizzle over yogurt or kefir for a quick nourishing snack.
- Add to oatmeal or porridge for gentle sweetness and extra flavor.
- Take by the spoonful during cold season. This is one of those remedies kids are usually happy to take. When my children have a cold or sore throat, I give them a few spoonfuls throughout the day.
- Whisk into homemade salad dressings to add depth and a hint of sweetness.
- Keep in mind that high heat destroys some of the health benefits of raw honey, so for full benefits use it in dishes where it’s not going to be heated, so for example stirring it into hot tea is not ideal.
The fruit in fermented honey becomes soft and almost like lightly candied fruit, and it’s delicious to eat. Any herbs or spices used in the ferment are still full of flavor too — they make wonderful herbal tea. For example when I use up a jar of ginger and turmeric honey, I place the ginger and turmeric pieces in a saucepan, cover with a few cups of filtered water, and simmer covered for about 10 minutes. I then discard the spices and use the liquid as ginger turmeric tea, or add a dash of milk to make it into golden latte. I don’t usually need to sweeten that as the spices had quite a lot of honey still on them and the tea tastes sweet.
In other words, don’t discard the fruit, herbs, and spices used in honey ferments. They’re often just as useful as the honey itself.
Timing & Flexibility Options
The length of fermentation will affect the final flavor of your fermented honey.
Short Ferment (3–7 days)
Your honey will have a milder flavor. I usually transfer my honey ferments to the refrigerator around day 7, when the flavor is just right for me.
Longer Ferment (2–4 weeks)
If you leave the jar fermenting longer, the flavor will deepen as the natural yeasts and beneficial bacteria continue to work on the sugars in the honey.
Don’t Forget to Stir
Missing a day of stirring is perfectly fine. What isn’t ideal is mixing up a jar of honey and then leaving it unchecked for a week—such as when going on holiday. If the fruit or spices float to the surface and remain exposed to air for too long, mold can develop.
For best results, keep your jar of fermented honey somewhere visible on your kitchen counter so you’ll remember to give it a quick stir each day. This helps keep all the ingredients coated in honey and prevents spoilage.
Troubleshooting Fermented Honey
Honey crystallizes
This often happens after you transfer fermented honey to the refrigerator. To re-liquify it, place the jar in a saucepan of very warm water. Avoid overheating the honey, as high heat can damage the beneficial properties of raw honey.
No bubbles appear
Fermented honey is not a very bubbly ferment. I usually see only a few small bubbles in my jars. If you don’t see bubbles but the honey is thinning and becoming aromatic, fermentation is likely still happening—just a bit slowly.
Ingredients float to the top
This is completely normal. Stir the honey once a day so the fruit, herbs, or spices don’t remain exposed to air for too long. Once you move the jar to cold storage, daily stirring is no longer necessary.
Honey becomes runnier
As moisture from the fresh fruit and spices releases into the honey, it naturally becomes thinner. This happens every time and is a good sign that fermentation is progressing normally.
Strong aroma develops
As the honey ferments, it will take on a stronger aroma from the ingredients you used. This is normal and part of the fermentation process. It is not a sign of spoilage unless mold appears.
Mold on top
If mold appears on the surface, the jar should be discarded. Fortunately, this is rare if you follow basic fermentation practices: use clean jars and utensils, keep ingredients submerged by stirring daily, and monitor the jar while it ferments at room temperature.
Storage Tips
- After the initial 5–7 day fermentation, move the jar to the refrigerator. This slows the fermentation and extends its shelf life. After you move your fermented honey into cold storage, you don’t need to stir it any more. It will keep for at least 6–12 months when stored in the refrigerator.
- Fruit, ginger, herbs, etc. should always stay under the honey so they don’t go moldy.
- When removing some honey from the jar, always use clean, dry utensils.
- If you make many ferment, it is best to label your jars so you know how to rotate and use them.
- I read that for a very long term storage option, you could strain out the herbs and fruit, then store just the honey in a clean jar with lid. This can apparently store for several years. I have never personally tried this, because fermented honey never lasts more than a few months in our house!
Variations
Once you understand how to ferment honey, you can experiment with many different fruits, herbs, and spices. Here are a few delicious combinations to try.
Fresh ingredients (these provide the moisture needed for fermentation):
- Blueberries
- Elderberries
- Cubed or sliced orange
- Cranberries
- Chopped apple
- Blackberries
- Sliced lime
- Peeled garlic cloves
- Fresh pine needles
Spices and flavorings
These can be added alongside fresh ingredients for extra flavor:
- Cloves
- Cinnamon sticks
- Fresh rosemary
- Fresh thyme
- Star anise
My favorite fruit and flavor combinations:
- Strawberry + vanilla bean
- Orange + cloves +cinnamon
- Blueberry + lemon
- Elderberry + ginger
- Apple + cinnamon
Note:
Most spices and dried flavorings don’t contain enough moisture to start fermentation on their own. If used alone, they will simply create infused honey rather than fermented honey. For best results, add them together with fresh fruit or other moist ingredients.
Recipe FAQ
Your First Jar of Fermented Honey
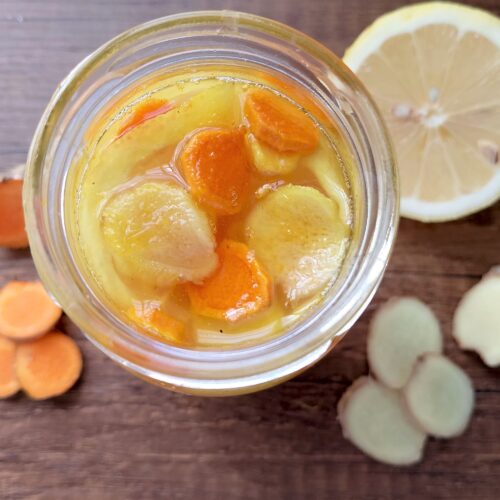
My goal with this post was to give you enough information to start fermenting honey with confidence. While the recipe I shared here is for lemon, ginger, and turmeric fermented honey—my all-time favorite, with its warm golden-orange hues and slightly tangy, gingery flavor—the same technique and ratio can be used with most other fruit, herbs, or spices you enjoy.
Honey ferments are one of the most forgiving and flexible types of fermentation, which is why they’re such a wonderful place to start. I encourage you to make a small jar this week and see just how simple and satisfying the process can be.
Traditional kitchen skills are built one recipe at a time, and my hope is that after making a few jars of fermented honey, you’ll feel confident experimenting with your own flavor combinations—and become as big a fan of honey ferments as I am.
If you enjoy learning traditional kitchen skills like fermentation, simple cheesemaking, sourdough baking, and real-food cooking, I’d love to invite you to join my newsletter. Each week I share practical recipes, simple tutorials, and encouraging guidance to help busy moms build traditional kitchen confidence step by step.
More Honey Ferments For You To Try
Fermented Turmeric and Ginger Honey
Fermented Lemon, Ginger and Turmeric Honey
Equipment
- quart jar with lid
Ingredients
- 1 organic lemon, washed and dried
- 1–2 inches fresh ginger root
- 1–2 inches fresh turmeric root,
- 1–1.5 cups raw honey
Instructions
- Prepare the fresh ingredients: Wash your lemon thoroughly and slice it into thin half-moons. Slice the fresh turmeric and ginger into rounds. Peeling is optional—unpeeled turmeric and ginger will ferment perfectly, but I usually peel them for a cleaner look in photos.
- Add honey to the jar: Spoon a small amount of raw honey into the bottom of your jar to create a base for the fresh ingredients.
- Layer the ingredients: Add the lemon, ginger, and turmeric slices to the jar, layering them evenly until you reach the neck. Arrange them so the pieces are fairly uniform for even fermentation.
- Add the remaining honey: Pour honey over the layered ingredients until they are completely covered, leaving about 1–2 inches of headspace. As the honey ferments, the fresh ingredients release moisture, causing the liquid level to rise slightly. Leaving space prevents overflow and keeps your countertop clean.
- Ferment the honey: Tighten the lid and place the jar somewhere warm and dry, out of direct sunlight, for 5–7 days. Once a day, gently stir the jar to release any air bubbles and keep all ingredients submerged. It’s normal for fruit and spices to float; daily stirring prevents mold. There’s no need to “burp” the jar—honey ferments aren’t very bubbly, and canning lids allow air to escape naturally.
- Store and enjoy: Once the honey has thinned, become aromatic, and reached your desired flavor, transfer the jar to the refrigerator or a cool pantry (this usually takes 5-7 days). Over time, lemon slices will candy, and ginger and turmeric will continue to infuse the honey. Use it in tea, drizzled over yogurt, oatmeal, pancakes, or enjoy by the spoonful!
Notes
Storage & Shelf Life
- Refrigerator: Up to 6–12 months. Honey will thicken over time but remains delicious.
- Tip: Always use clean utensils to avoid contamination. Lemon slices will candy, and ginger and turmeric will continue infusing the honey.