Rich Whole Wheat Sourdough Sandwich Bread (Easy Same-Day Recipe)
This rich whole wheat sourdough bread is simple to make, wholesome, and packed with flavor. Enriched with butter, honey, and milk, it develops a soft, tender crumb. The combination of whole wheat and white flour gives it a hearty, nutty depth, while still keeping it light and easy to slice. You can bake it in a loaf pan on the same day—no proofing baskets or Dutch ovens required—making it perfect for beginner bakers who are just learning to work with sourdough starter. Even if you’re new to whole grain flours, this recipe delivers a loaf that’s beautifully textured, flavorful, and perfect for sandwiches, toast, or simply enjoying warm with butter.

Why You’ll Love This Recipe
- Naturally fermented with sourdough starter = easier to digest and more nutritious.
- It can be mixed, risen and baked all in the same day. No need for overnight proofing.
- Soft, rich texture thanks to milk, egg yolks, and butter.
- Works beautifully for sandwiches and French toast. It’s my kids’ favorite sandwich bread!
- Great step-by-step method for beginners – I divided the process into small, easy steps to make it doable even for a novice baker.
- Turns out a perfect loaf even with the addition of whole wheat flour.
Ingredients You’ll Need

- This bread uses 60% whole wheat flour and 40% white flour. Strong flour (also sometimes called ‘bread flour’) will give you the best results.
- Your sourdough starter needs to be active and bubbly. If your house is very warm, use 70 grams of starter. If it is a bit cooler, feel free to add up to 100 grams of starter to speed up the fermentation if you want your bread ready to eat the same day.
- If you like, you can replace the water used in this recipe with whey.
Equipment
- Digital scale – for best results with my sourdough bread, I like to use gram measurements for the ingredients.
- Mixing bowl – or a large pot to mix up your bread dough.
- Loaf pan – I use a glass loaf pan, but a metal pan can also be used.

During the winter months when my house is cool, I like to place my bread dough on a heating mat to rise. This speads up the rise time and ensures that I can mix, rise, and bake the bread all in the same day. This is a heating mat I originally bought for my tomato seedlings but it is invaluable for keeping the bread or pizza dough warm in winter.
How to Make Whole Wheat Sourdough Bread (Step by Step)


Step 3

Add the whole wheat flour, white flour, and salt to the wet mixture. Using a wooden spoon, gently stir until the ingredients are mostly combined and a rough, shaggy dough forms.
Step 4

Cover the dough with a damp tea towel or a plastic bag to prevent it from drying out and let it rest for 45–60 minutes. This resting period, known as a fermentolyse, allows the flour to fully absorb the liquids.
Step 5

Once the dough has rested, gently incorporate the egg yolks, mixing until they are fully absorbed and the dough comes together again.
Step 6

Gradually add the melted and cooled butter to the dough, mixing gently to incorporate. At first, the dough may feel slippery and greasy—this is normal. After a few rounds of stretch-and-folds, it will regain its smooth, elastic texture.
Step 7

Over the next 2 hours, perform 4–5 sets of stretch-and-folds, spacing each set 20–30 minutes apart. Initially, the dough will feel slippery and sticky, but with each fold, it will gradually develop strength and elasticity.
Step 8

To keep the dough from sticking, wet your hands before each stretch-and-fold (I keep a small cup of water nearby for this purpose). Gently lift the dough and stretch it upward until you feel gentle resistance, being careful not to tear it.
Step 9

Fold the stretched flap back over the dough, as if closing an envelope. Rotate the dough ¼ turn and repeat the stretch-and-fold process. Continue this sequence until you’ve completed a full rotation—stretching, folding, and turning a total of four times.
Step 10

Allow the dough to rise (covered to prevent it from drying out) at a warm room temperature until it has increased by about 75%—just shy of doubling. I often let the dough rise directly in the loaf pan so I can easily monitor its growth. Depending on your home’s temperature, this first rise may take several hours. In cooler months I usually use a seedling heating mat, bringing the dough to readiness in about 3–4 hours. The dough should feel airy and slightly springy when gently pressed.
Step 11

Once the first rise is complete, prepare your loaf pan by greasing it with butter or oil, then dusting generously with flour to prevent sticking. Alternatively, you can line the pan with baking parchment.
Step 12
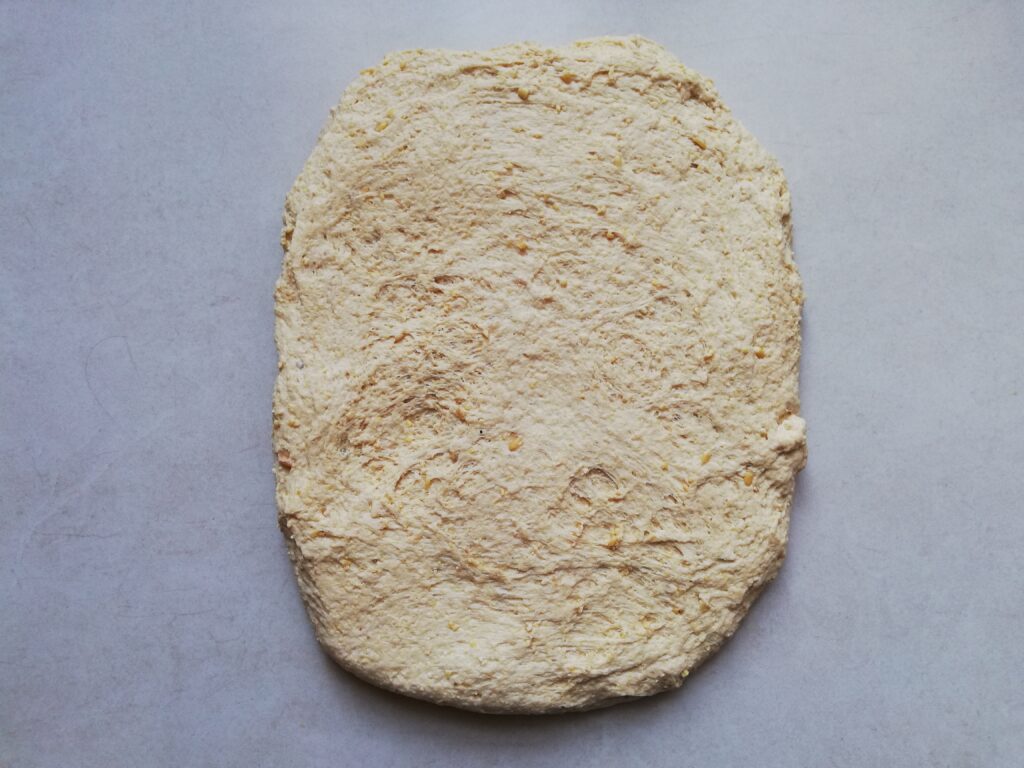
Lightly wet your work surface and hands to prevent sticking. Gently stretch the dough into a rough rectangle, being careful not to tear it.
Step 13

Beginning at the bottom edge, carefully roll the dough upward into a tight log, keeping the shape even and smooth.
Step 14

Gently tuck in the ends of the rolled dough to create a neat, compact loaf. Place the dough seam-side down in the prepared loaf pan, ensuring it sits snugly and evenly.
Step 15

Allow the dough to rise again in the pan until it is nearly doubled in size, or rises about 1–2 cm above the rim. To prevent drying, cover the pan with a large, inflated plastic bag so it doesn’t touch the dough. This second rise is shorter than the first—at a warm room temperature, it usually takes about 1½ hours, though the timing can vary depending on your home environment. The dough should feel puffy and springy to the touch when ready.
Step 16

Once the dough has nearly doubled, preheat your oven to 180 °C (350 °F). Bake the loaf for about 35 minutes, checking at the 25-minute mark—if the top is browning too quickly, tent it loosely with a large piece of aluminum foil.
As soon as the bread comes out of the oven, brush the top generously with melted butter. Allow the loaf to cool in the pan for 15 minutes, then transfer it to a wire rack. Cover lightly with a clean tea towel while it cools completely (this will keep the crust tender).
Tips for the Perfect Loaf
- Whole wheat absorbs more liquid than white flour. This dough will feel quite wet – do not be tempted to add more flour. Slightly wet whole wheat dough will rise better and have better texture.
- Don’t skip the fermentolyse step – let the mixed dough rest for the full 45-60 minutes. This step hydrates the dough, makes it more elastic and easier to stretch-and-fold.
- Give the dough enough time to proof – it should be almost doubled (75% increase is fine).
- Both butter and honey slow fermentation a little, so expect this bread to take a bit longer to rise than a standard sourdough sandwich loaf.
- Make sure you use a serrated bread knife to slice this bread. The loaf is soft but will hold its shape well if cut properly with a sharp bread knife.
Variations
- Use olive oil instead of butter.
- Replace the water with whey.
- Instead of honey, use brown sugar or maple syrup.
- Add 1/2 – 1 cup seeds to the dough, such as poppy seeds, sesame seeds, or flax seeds. It’s important to note that hard seeds such as sunflower, pumpkin, and flax seeds will need a quick soak so they don’t steal moisture from your dough.

FAQ

Serving Suggestions
- Make it into some sandwiches, such as chicken salad, tuna salad, turkey and avocado, or even peanut butter and jelly.
- Turn it into French toast, such as my French toast bake with apples and blackberries or French toast casserole with fresh strawberries.
- Make it into some cheese toasties, bread pizzas, or garlic bread to accompany soups and stews.
- Toast and top with butter for breakfast or snacks.
- Once it is one or two days old, it will also make a great bread pudding.
Storage & Freezing
- You can store this bread at room temperature for 3-4 days. Once fully cooled, wrap it in a clean, dry cotton towel and place inside a bread box.
- For long term storage, you can freeze your sourdough bread (either as a whole loaf or sliced) for up to 3 months.
Enjoy Your Perfect Loaf!
I hope you enjoy making (and eating!) this rich sourdough bread. It will fill your house with a delicious smell, similar to baking biscuits. It is currently my kids favorite sourdough bread, they even prefer it to sourdough biscuits, which until recently were their favorite.
For more old-fashioned cooking and baking recipes, as well as homemaking inspiration, subscribe to my newsletter. This newsletter is where I share my tips, offer freebie guides and ebooks, and post about any new recipes that I publish.
More Sourdough Recipes for You
Easy Whole Wheat Sourdough Sandwich Bread
Polish Apple Pancakes with Sourdough Starter
Sourdough Discard Whole Wheat Biscuits

Rich Sourdough Sandwich Bread
Equipment
- loaf pan
- mixing bowl
- digital scale
Ingredients
- 200 g warm filtered water or whey
- 150 g whole milk
- 70-100 g active sourdough starter (100% hydration)
- 200 g strong white flour
- 300 g strong whole wheat flour
- 10 g finely ground unrefined salt
- 40 g unsalted butter, melted and cooled
- 2 large egg yolks
- 1 tbsp honey
- a little melted butter, for brushing the baked bread
Instructions
- In a large bowl, dissolve honey in warm water.
- Stir in the sourdough starter and milk until smooth.
- Add whole wheat flour, white flour, and salt, then mix into a shaggy dough.
- Cover and rest 45–60 min (fermentolyse).
- Mix in egg yolks until dough comes together.
- Gradually add melted, cooled butter, mixing until incorporated.
- Over 2 hours, perform 4–5 sets of stretch-and-folds, 20–30 min apart. Keep hands wet while stretching; lift dough until you feel resistance, then fold. Turn 1/4 turn. Repeat the stretching, folding and 1/4 turn another 3 times during each set of stretch & folds.
- Let dough rise at warm room temp until ~75% larger (bulk fermentation).
- Once the dough has risen, grease and flour a loaf pan (or line with parchment).
- Wet your hands and counter, then gently stretch the dough into a rectangle.
- Roll dough from the bottom edge into a tight log.
- Tuck in ends and place seam-side down in the loaf pan.
- Let rise until nearly doubled or 1–2 cm above pan rim (second rise).
- Bake at 180 °C (350 °F) for 35 min, tenting with foil if browning too fast.
- Brush top with melted butter, cool 15 min in pan, then transfer to a rack and cover while cooling.
Notes
- Delicious warm with butter and honey.
- Makes excellent toast, especially with butter, jam, or cream cheese.
- Perfect for sandwiches, grilled cheese, or breakfast toast with eggs.
- Slice thickly and serve alongside soups, stews, or hearty winter meals.
- Use leftover slices for French toast or bread pudding.
- Store at room temperature in a bread bag or wrapped in a tea towel for 3–4 days.
- For longer storage, slice and freeze in an airtight bag for up to 3 months.
- Thaw slices at room temperature or pop them straight into the toaster.