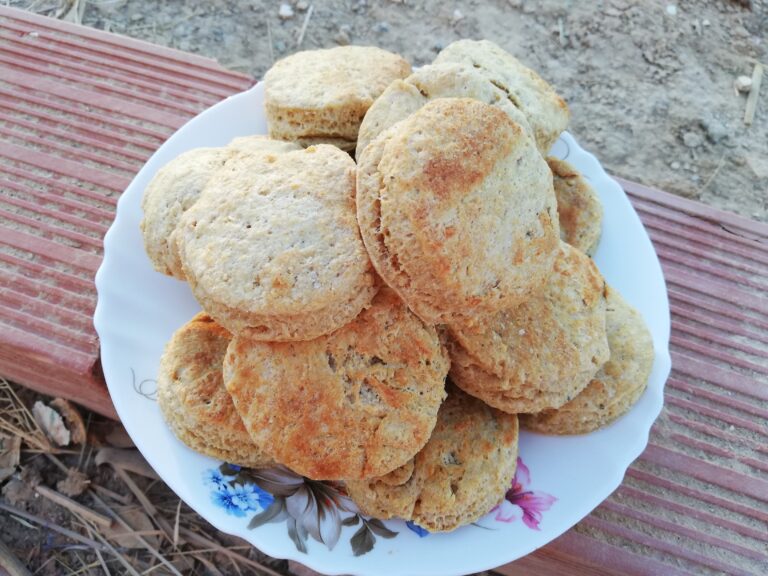
How to Render Beef Fat into Tallow (Easy Step-by-Step Guide)
Tallow is a traditional fat that’s nutrient-dense, budget-friendly, and very versatile. It’s excellent for cooking and baking, and it shines in homemade lotions, body butters, healing salves, and natural soap making. It is also a frugal and healthy alternative to butter or shortening in many recipes and has a good shelf life—even without refrigeration.
In my kitchen, tallow ranks right up there with butter and coconut oil as one of my favorite fats. In this post, I’ll show you just how easy it is to render your own tallow at home, so you can enjoy its benefits in both your cooking and your natural skincare.

What Is Tallow?
Tallow is rendered fat from hoofed ruminant animals, such as cows, sheep, goats, deer, or elk. So for example you render beef fat into beef tallow, lamb fat into lamb tallow, and so on. I have rendered fat from cows, sheep, and goats, and the method is exactly the same. You can follow my recipe whatever type of tallow you have on hand.
Fat from different parts of the animal has different names and slightly different properties. Fat from around the organs (for example kidney fat) is called suet, while the fat from under the skin and around the muscle meat is called trimmings or muscle fat. You can render either into tallow, although suet will give you the cleanest and whitest tallow.
Apart from tallow, there is another type of rendered fat called dripping. This is fat that naturally renders (melts) from meat when it is roasted or slow cooked. Dripping usually contains some impurities and so has a shorter shelf life than tallow. It also needs to be kept refrigerated.

Is Tallow Healthy?
Tallow—especially from grass-fed animals—is rich in fat-soluble vitamins A, D, and K. It also provides a nourishing source of saturated fat and cholesterol, which are important for hormone production and brain health. Dr. Weston A. Price, a pioneering dentist and nutrition researcher, found in his travels that traditional cultures around the world highly valued animal fats, often treating them as sacred superfoods. In many hunter-gatherer societies, such as North American indigenous tribes, the fat and organ meats were considered the most prized and nourishing parts of the animal.
Types of Tallow and Choosing the Right One
Tallow made from suet is the highest quality type of tallow, very hard and white. It has a smooth consistency and is great for making pastry (check out my tallow biscuits recipe), for skincare, soapmaking and candle making. Tallow rendered from muscle fat is softer and has slightly grainy consistency. Because it is softer, it is easier to scoop out of the jar for use in cooking. It also has a bit more flavor than suet tallow. It is great for sautéing vegetables, browning meat, frying sausages, or roasting potatoes. Raw muscle fat is also best for making sausages.
However, in general you can use suet and muscle fat interchangeably with good results, and I often make tallow from both.
Because tallow is high in saturated fat, it has a high smoke point of about 400-420°F (204-216°C). This makes it great for deep frying. Make sure to use it only for frying foods that you’ll eat hot. I once made chips fried in tallow and they left me with a slightly greasy feeling in my mouth. Now I only make chips in coconut oil and reserve tallow for making french fries, Indian style pakoras and fritters.
| Tallow from SUET is best for: | Tallow from MUSCLE FAT / TRIMMINGS is best for: |
| pastry making (e.g. biscuits) | sautéing |
| skincare (lotions, balms, salves etc.) | roasting |
| soapmaking | baking |
| candle making | deep frying |
| browning |
Why Render Tallow?
Turning fat into tallow makes it very easy to use and shelf stable. Raw fat does not quickly or completely melt in the pan like butter or coconut oil, so you cannot use it easily for cooking. It also needs to refrigerated for short-term storage and frozen for longer storage, while properly rendered tallow is shelf stable. I store the jar of tallow I currently use on a shelf in the kitchen, and have a few more jars on the pantry shelf.
I do not recommend storing tallow in the fridge unless you want to store it for a very long time. It gets really hard and is difficult to scoop out of the jar. My jar of tallow has been fine sitting on the kitchen shelf even at the height of summer when temperatures here hover around 40°C/104°F. I never had it spoil.
Tallow is not the only type of fat you can render. You can also render chicken fat (and other poultry fat), and it makes a soft, mild flavored cooking fat called schmaltz, great for roasting, stir frying, or sautéing. If you would like to learn how to render chicken fat, check out this post.
Wet vs Dry Rendering: Which Method Should You Use?
I have always used dry rendering and I think it is the best method. Adding any amount of water to the pot of chopped fat can lead to some moisture remaining in the rendered tallow. This in turn can have a negative impact on the shelf life of your tallow. Your fat will not burn to the bottom of the pot during dry rendering UNLESS you put the heat on too high or leave the fat unattended for a longer period of time.
When dry rendering keep the heat on very low (usually the lowest setting on your stove). Turning the heat up would not make your tallow render faster. It would just make the pieces of fat on the bottom of your pot burn. Also remember to stir the chopped fat from time to time so it can render more evenly. Always use a heavy bottomed pot to avoid the fat sticking to the bottom of your pot. I usually use my jam pot which has a wide heavy bottom, great for rendering larger amounts of fat.
If you are using a gas cooker, you may need to use a flame tamer/heat diffuser to make sure your fat renders on low heat. A flame tamer works by spreading the heat evenly and reducing its intensity. This allows the fat to gently melt without burning.
Tools You’ll Need to Render Beef Fat
- Large heavy bottomed pot
- Sieve or strainer
- Cheesecloth or old cotton tea towel (optional, for extra clean tallow)
- Jars with lids for storing the tallow
Instead of using jars, you could also pour the tallow into a baking dish lined with baking paper and once solidified, cut it into squares for use in cooking. Or you could pour it into silicone soap molds and once solidified, keep it in a large lidded container. This may be preferable if your house is really cool and the tallow (especially one made from suet) could get really hard and difficult to scoop out of a jar. I personally like to keep my tallow in mason jars.
How to Dry Fresh Beef Fat
Fat from freshly butchered meat needs to dry well before it is rendered. You can hang the strips of fat on a laundry line, out of direct sunlight. You will also have to protect them from flies. After having hung for a few hours they should be dry enough to cut up and render. Below is the photo of raw fat hanging to dry on our balcony. Not a pretty setup maybe, but functional!
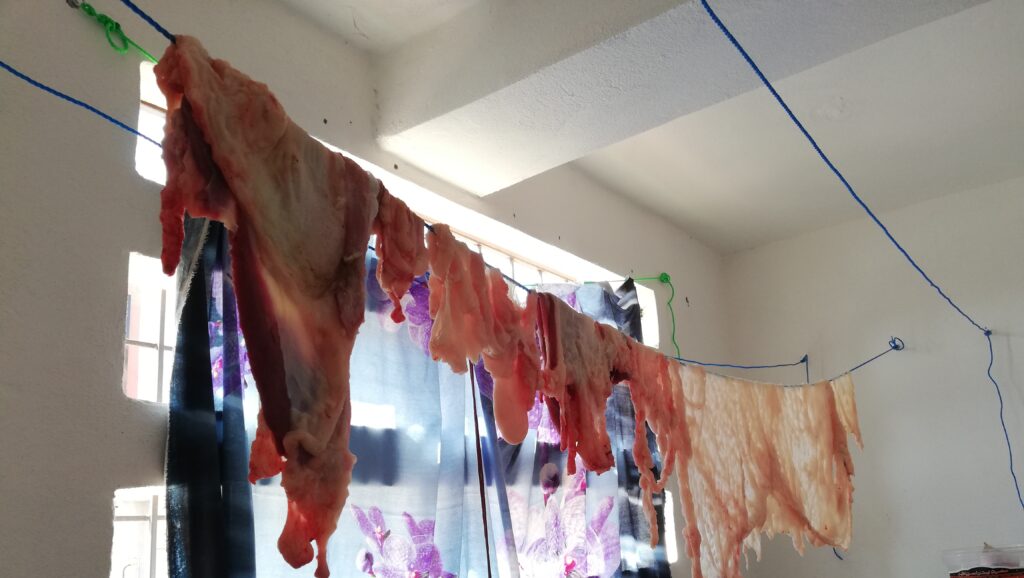
Hanging the fat to dry is important for two reasons: 1. Fresh wet fat slides around and is difficult to chop. 2. Any moisture in the fat can make the finished tallow prone to spoiling.
How to Render Beef Fat Step-By-Step
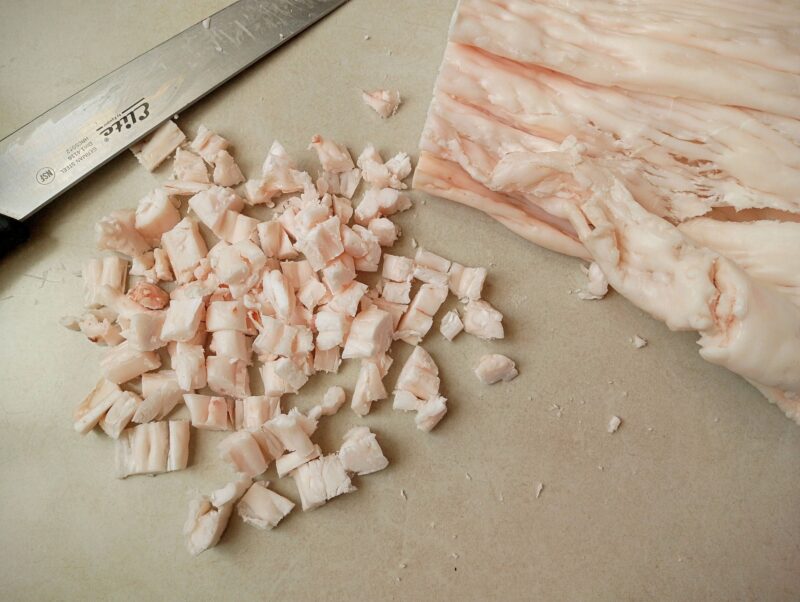
Step 1: Begin by removing any visible pieces of meat from the beef fat. You may also notice small amounts of connective tissue, which can look like a thin, plastic-like membrane attached to the fat. If you can, trim off any larger pieces of this tissue. However, you don’t need to remove the smaller bits—simply chop them up along with the fat before you begin the rendering process.
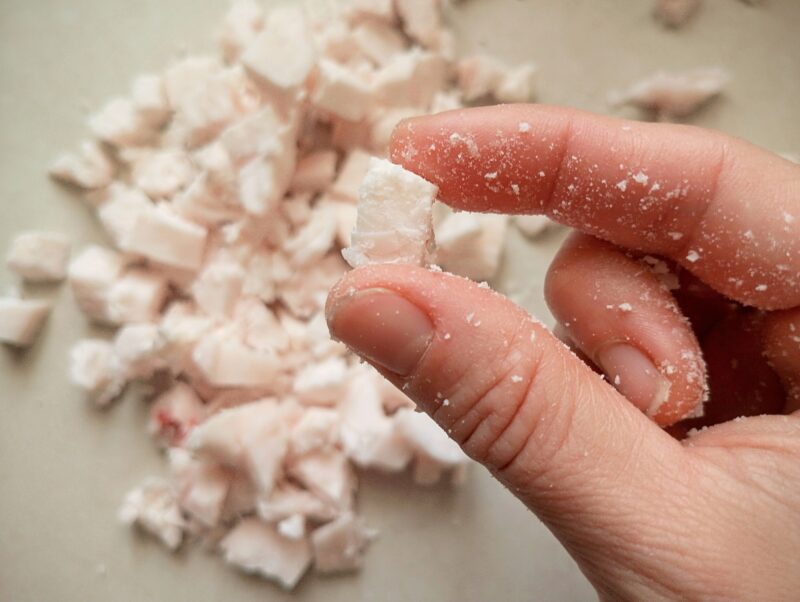
Step 2: Cut the beef fat into small pieces, ideally around ½ inch or smaller, although it doesn’t need to be perfectly uniform. Smaller pieces will render more quickly and efficiently than larger chunks. For the highest yield, you can also run the fat through an electric meat grinder, or ask your butcher to grind it for you. This helps extract more tallow and leaves very little behind in the pot after rendering. I don’t have a grinder myself, so I simply chop the fat into small pieces by hand.

Step 3: Place the chopped beef fat into a large, heavy-bottomed pot and turn the heat to the lowest setting. As it warms, the fat will slowly begin to melt into liquid. Stir occasionally to ensure all the pieces of fat are exposed to the heat and render evenly. This also helps prevent sticking and reduces the risk of anything burning on the bottom of the pot.

Step 4: Once a good amount of fat has melted into liquid, gently pour it off through a sieve into jars. This helps the remaining solid pieces in the pot make better contact with the heat, allowing them to render more efficiently. After straining, return the pot to the stove and continue the process until all the fat has fully rendered. The total rendering time will vary depending on the amount of fat you’re using and how finely you’ve chopped it.

Step 5: Once everything has fully melted and no more liquid fat is rendering out of the cracklings, the process is complete. Carefully pour the hot fat through a fine mesh sieve into clean, dry jars. For an even cleaner final product, you can strain it again through cheesecloth or a coffee filter, although this extra step is optional. My own mesh sieve is very fine, so it catches any impurities, and I usually don’t need to do the additional straining.

Step 6: Allow the rendered fat to cool in the jars at room temperature. As it cools, it will gradually change from a golden liquid to a firm, white solid. Once the tallow has completely cooled and solidified, screw the lids on tightly and store the jars in a cool, dry pantry or cupboard. Properly rendered and stored tallow will keep for a long time without refrigeration.
Do You Have to Whip Tallow?
Your rendered tallow will set into a hard, white solid, perfectly usable as it is for frying, roasting, and baking. It is also the most shelf stable in this form. For the most part, you don’t need to whip your tallow and I never do it if I plan to use it for cooking and baking.
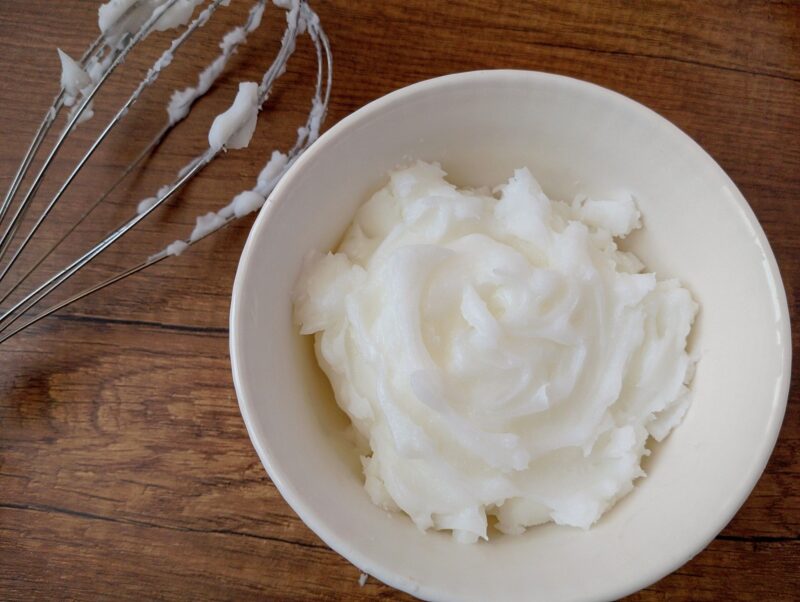
That said, I do like to whip it if I want to use it as a rich body butter or in my skincare recipes. When you whip tallow as it cools, you incorporate air into it making it fluffier, lighter, and much easier to scoop. I currently have a jar of whipped tallow in my bathroom which I use as a body butter after showering.
So for kitchen uses, there is no need to whip tallow at all, but for body balms, butters, and other skincare uses, whipping does improve the texture and usability a lot. The only time I would consider whipping tallow for cooking would be if my kitchen was cold and I wanted it easier to scoop out with a spoon.
Tips For The Best Home Rendered Tallow
- Keep the heat on the lowest setting throughout the process. If the fat is heated too quickly or too high, it can brown too much and develop a stronger, more “cooked” flavor.
- Be careful not to burn the fat, as this will negatively affect both the flavor and the shelf life of your finished tallow.
- Also, avoid any water contamination. Moisture can significantly shorten the shelf life of tallow, so make sure all utensils, tools, and storage containers are completely clean and dry before you begin.
How to Use Cracklings
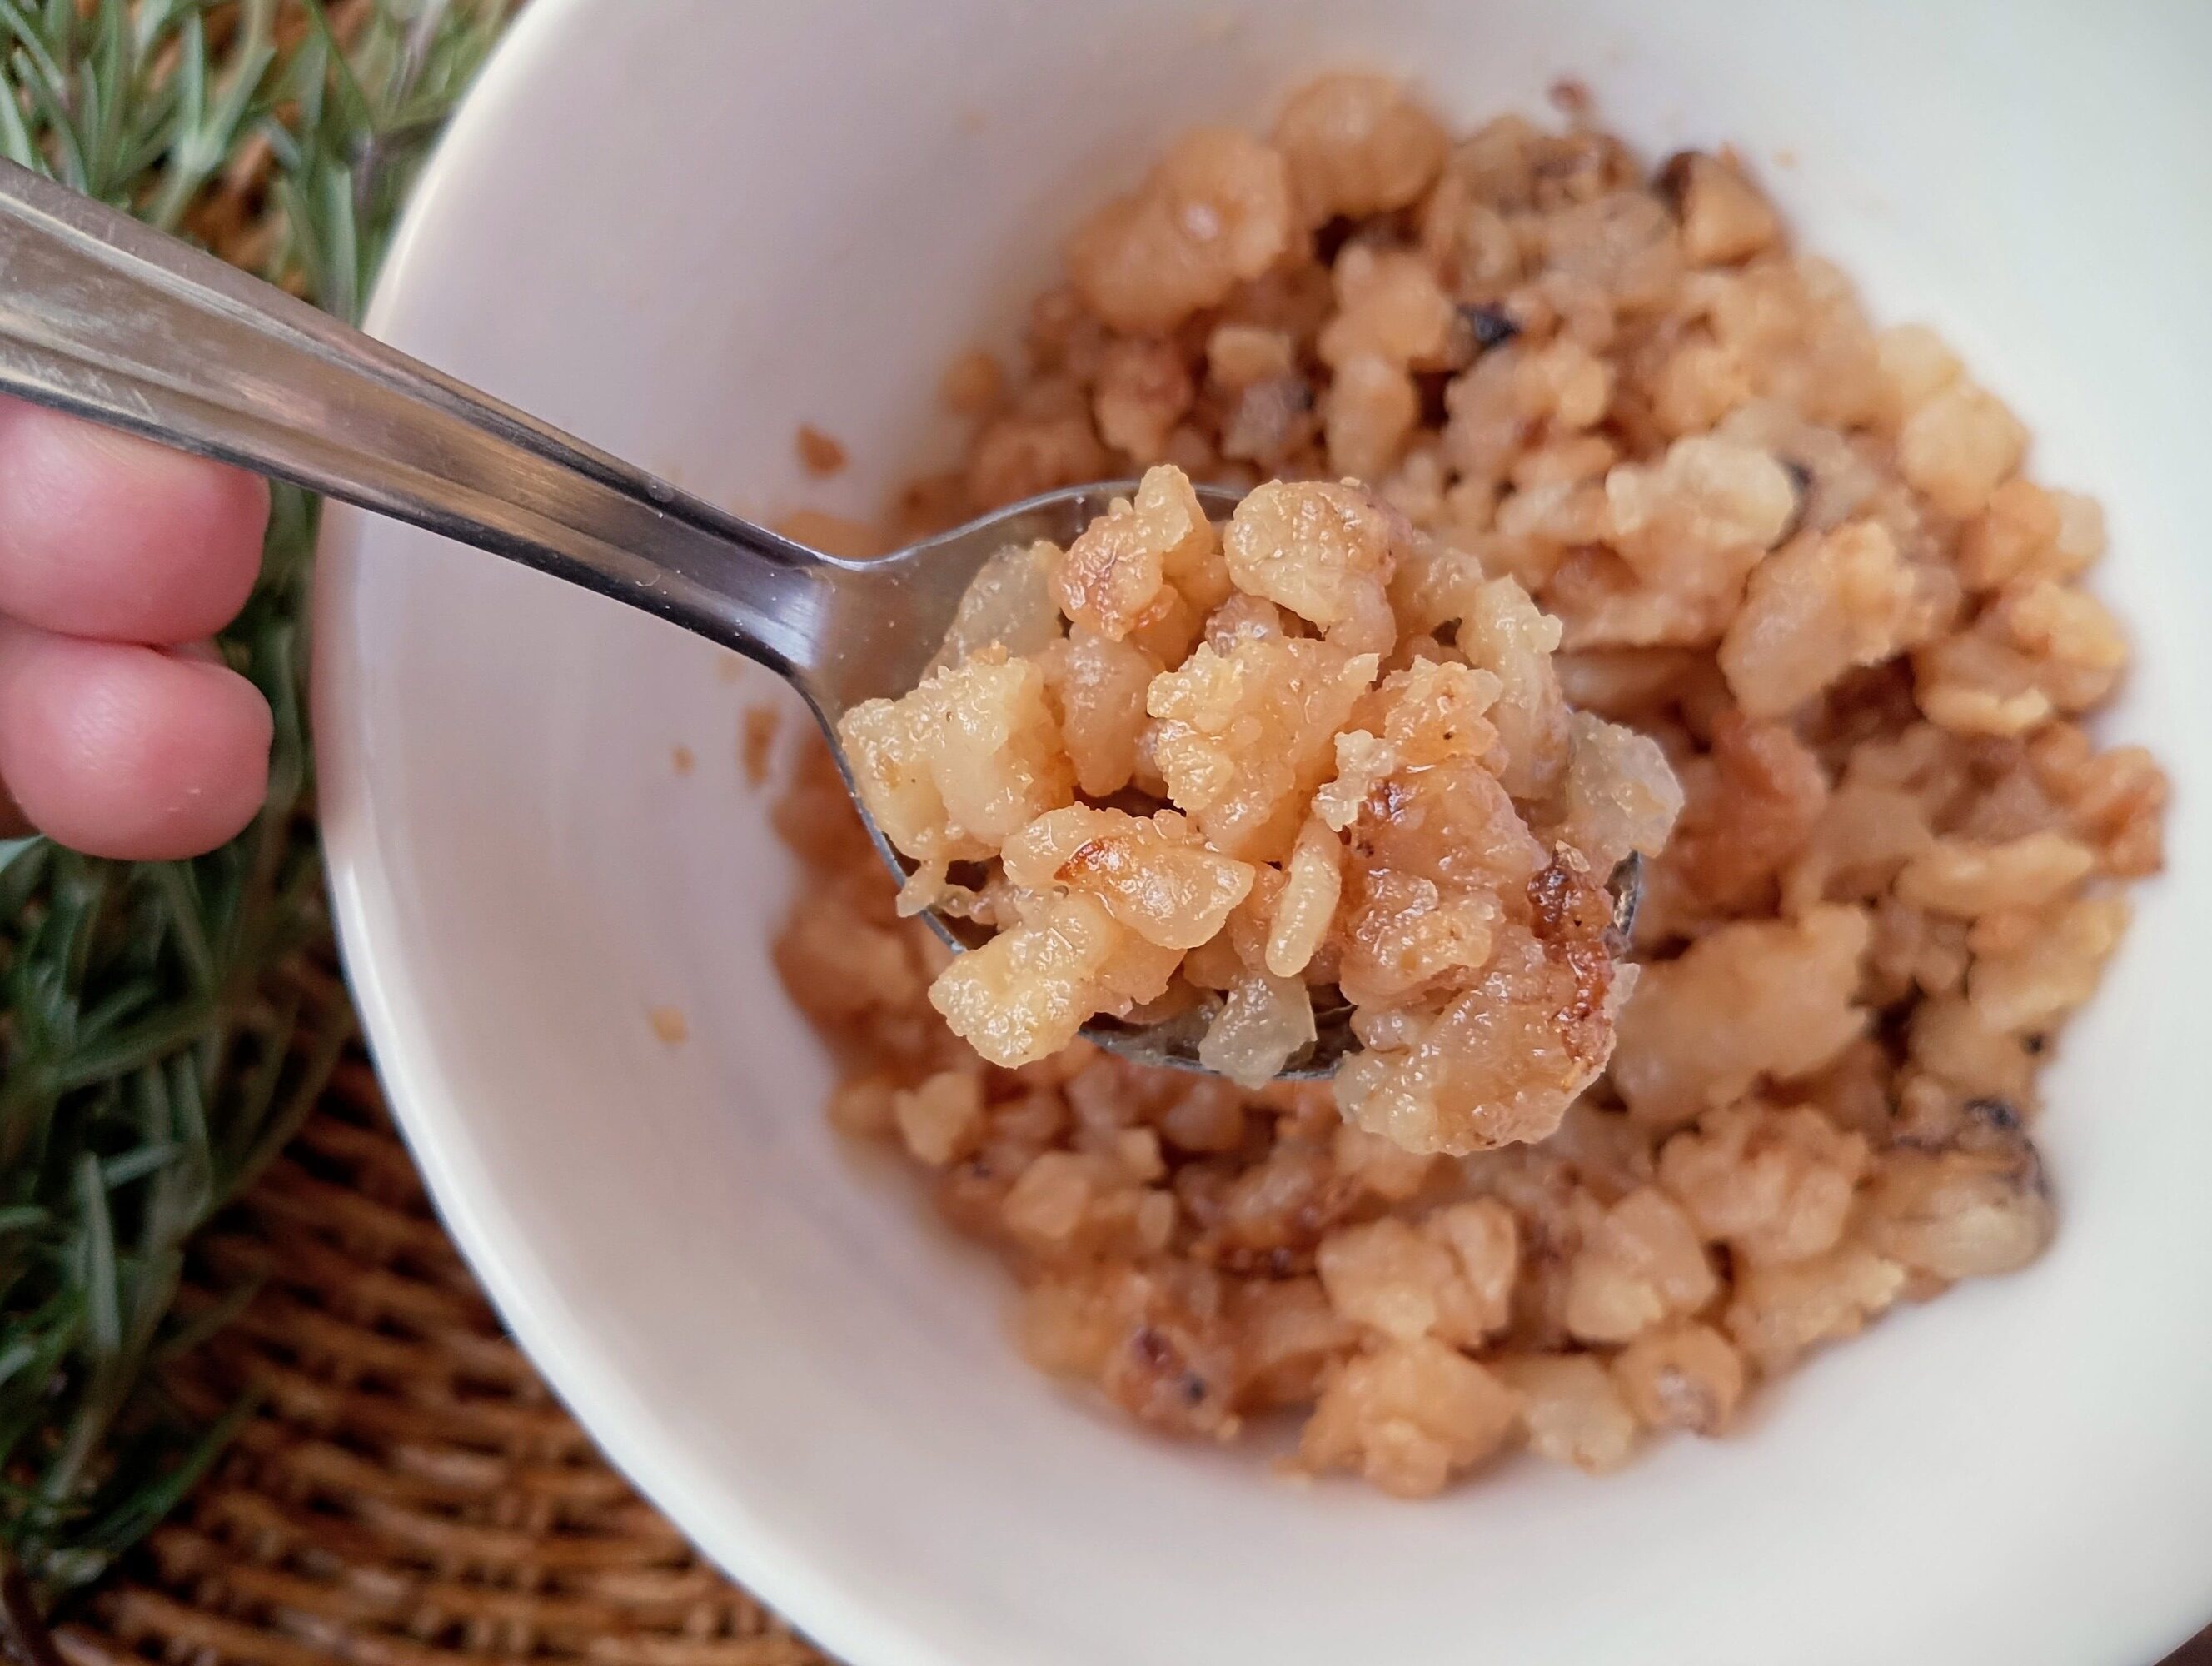
The crispy brown bits you get after pouring off the rendered fat are called cracklings. You don’t have to throw them away. You can salt them and eat them as a crunchy snack, sprinkle them over soups, or mix them into dough for rolls to add extra richness and flavor.
If you’d rather not eat them yourself, your dog will usually be very happy to have them. Chickens also enjoy cracklings, although they’re more likely to eat them if you mix them into their feed or combine them with soaked, shredded stale bread.
How to Store Tallow
When rendered and stored properly, tallow will keep for a very long time. Here are my tips for storing tallow for maximum freshness:
- Store tallow in tightly sealed jars in a cool, dry cupboard, away from direct sunlight. I like to keep mine in a kitchen cupboard for easy everyday use, with extra jars stored on a pantry shelf.
- Properly rendered tallow is very shelf-stable. I’ve kept jars for well over a year without any issues. In most cases, tallow only goes bad if moisture gets in—either from improper rendering or from storage in a humid environment with a loosely sealed lid.
- Refrigeration isn’t necessary, but you can store tallow in the fridge if you prefer. It will become very firm at low temperatures but will keep for many months. You can also freeze tallow for long-term storage.
What Is Beef Tallow Good For?
Tallow is a very versatile fat, great for use in cooking, baking, and frying. Below are some of my favorite ways to use home rendered tallow in the kitchen:
| Sautéing | Roasting | Frying | Browning | Baking | Other |
| onions and garlic for soup or stew base | roast potatoes | french fries | browning meat for stews | biscuits, rolls, and buns | melted tallow added to meat marinades |
| stir-frying vegetables | roast carrots | chicken nuggets | browning meat bones for bone broth | greasing loaf pans for baking bread | warm tallow and cracklings spread on a slice of bread |
| cooking savory pancakes | oven baked fries | pakoras, fritters | cooking steak | making tortillas or pita breads |

Beef Tallow For Skincare
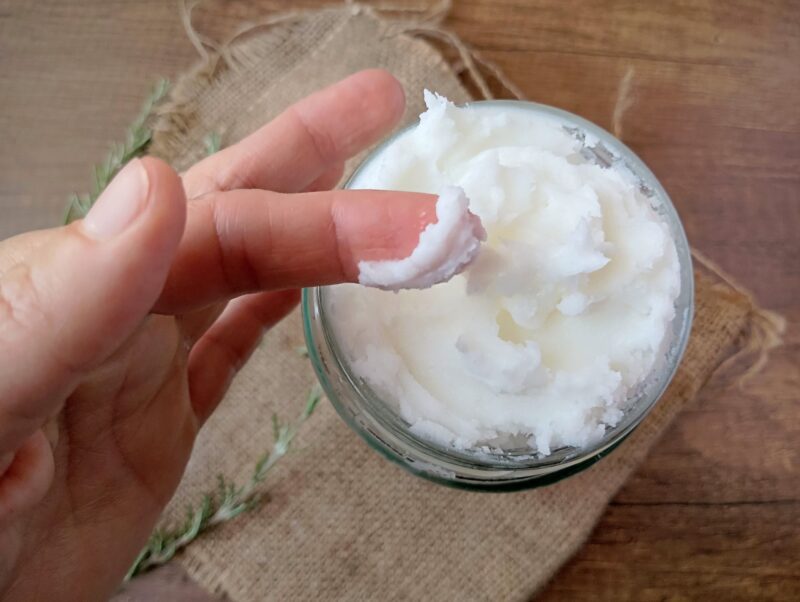
Tallow is a wonderfully versatile ingredient for natural skincare. You can use it on its own or blend it into salves, lotions, balms, and soaps. Thanks to its rich content of vitamins A, D, E, and K, tallow is deeply nourishing. The saturated fats in tallow closely resemble the natural oils of our skin, making it especially effective at moisturizing, protecting, and restoring the skin barrier.
With its light, neutral scent, tallow works well even without added fragrance. However, if desired, you can blend in essential oils for scent or therapeutic benefits. It’s especially beneficial for dry or normal skin as a hot oil treatment. It is also excellent for healing cracked heels, rough patches, or hands chapped by cold weather.
You can also infuse tallow with herbs such as calendula, chamomile, plantain, or lavender to create healing salves for first aid or daily care. Because it’s so gentle, it’s often suitable for babies or those with sensitive skin—but as with any new product, it’s good to do a patch test first to check for any reaction.
To improve spreadability and create a silky texture, you can whip tallow while it’s semi-solid using a hand or stand mixer. Just be sure to store whipped tallow in a cool place, or you’ll need to re-whip it if it melts in warm weather.
Below are some of the ways I use tallow in natural skincare recipes I make, along with simple ideas to help you get started.
| massage oils – sore muscles massage oil, hot oil treatment |
| balms – baby balm for diaper rash, lip balm for dry chapped lips |
| herbal salves – calendula salve for rashes and skin irritations, soothing plantain salve |
| lotions – hand lotion for dry skin, foot lotion for cracked feet |
| soap – hard laundry soap, simple hand soap |
Tallow FAQ
Conclusion
Rendering tallow is a wonderfully old-fashioned skill that opens up so many possibilities—in cooking, baking, natural skincare, and soapmaking. I hope you’ll give it a try and explore the many ways tallow can enrich your home and health.
Have questions? Curious about specific recipes or looking for tutorials on using tallow in cooking, skincare, or soapmaking? Drop a comment below — I’d love to hear from you! And if you’d like more nourishing recipes, DIY tutorials, and homemaking inspiration, subscribe to my newsletter to get new posts straight to your inbox.

How to Render Beef Fat
Equipment
- large heavy bottomed pot
- fine mesh sieve
- Cheesecloth or cotton tea towel (optional)
- jars with lids for storage
Ingredients
- 1 kg or 2.2 lb raw fat from beef, lamb, goat, or deer
Instructions
- Remove any visible meat and larger pieces of connective tissue from the beef fat. Small bits don’t need to be removed.
- Cut the fat into small pieces (about ½ inch or smaller). Smaller pieces render faster and more efficiently. You can also grind it for a higher yield.
- Place the fat in a heavy-bottomed pot over the lowest heat. Let it slowly melt, stirring occasionally to prevent sticking and ensure even rendering.
- Once enough fat has liquefied, gently pour it through a fine mesh sieve into jars. Return remaining solids to the pot and continue rendering until finished.
- When no more liquid fat comes out of the cracklings, strain everything into clean jars. You can also strain again through cheesecloth or a coffee filter for extra purity.
- Let the tallow cool at room temperature until fully solid and white. Seal tightly and store in a cool, dry pantry.
Notes
- To make tallow you can use fat from lamb, goat, beef, deer, or any other hoofed ruminant animal.
- 1kg/2.2 lb raw chopped fat will yield approximately 2 to 2 1/2 cups of rendered tallow. However, you can use this recipe no matter the amount of fat you have on hand.
- Store tallow in tightly sealed jars in a cool, dry cupboard away from direct sunlight. Properly rendered tallow is shelf-stable and keeps well for many months. It can also be refrigerated (for extra firmness) or frozen for long-term storage.