Easy Sourdough Discard Burger Buns (Soft & Beginner-Friendly)
These sourdough discard burger buns are perfect when you need something simple, wholesome, and family-friendly. Because they use sourdough discard along with a little yeast, they rise quickly—so if you mix the dough at lunchtime, you can have fresh, homemade buns ready by dinnertime.
They also freeze beautifully. Simply slice them in half before freezing, then pop them straight into the toaster when you need them for an easy, from-scratch option in a jiffy.
Made with 40% whole wheat flour, these sourdough discard burger buns are more nutrient-dense while still staying soft and light inside—just what you want in a good burger bun.
In this post, I’ll walk you through exactly how to make them step by step, share tips to help you avoid common mistakes, and answer frequently asked questions so you can bake them with confidence for your family.

Why You’ll Love This Recipe
- A simple, practical way to use up sourdough discard—no waste
- Soft, family-friendly buns perfect for burgers, sandwiches, or dipping into hearty stews
- Easy to fit into your daily rhythm (I share flexible timing options below)
- Made with simple, from-scratch ingredients you likely already have
- More nutritious thanks to 40% whole wheat flour, without sacrificing a soft texture
- Helps you build confidence as a sourdough baker with a reliable, beginner-friendly method
Ingredients Overview

- Sourdough discard – You can use unfed discard straight from the fridge.
- Whole wheat + white flour – A balanced blend gives you the best of both worlds: added nutrition with a soft, light texture.
- Milk – Creates a well-hydrated dough and keeps the buns tender.
- Tallow (or butter) – Adds rich flavor and softness. Tallow works beautifully in baking, but butter is an excellent substitute.
- Eggs – One egg enriches the dough, and another is used for brushing the tops for a golden finish.
- Sugar or honey – Helps the buns brown nicely and adds a touch of sweetness.
- Instant yeast – Just a small amount gives a gentle rise without rushing the process, so you still get some benefits of longer fermentation. You can also use active dry yeast, bloomed in a little warm milk.
- Salt – Essential for flavor and dough structure. Finely ground, unrefined salt works best.
- Sesame seeds – for sprinkling on top before baking.
You can find the full list of ingredients with exact amounts in the recipe card below.
Tools You’ll Need
- Kitchen scale – For the most accurate and consistent results. If you’re new to sourdough, this one tool will make a big difference in how your sourdough discard burger buns turn out.
- Mixing bowl or large pot – Any medium to large bowl will work for mixing your dough comfortably.
- Spoon or dough whisk – Use whatever you have on hand to bring the dough together—no special equipment needed.
- Baking tray lined with parchment paper – Keeps the buns from sticking and makes cleanup easy.
Step-By-Step Method
Step 1
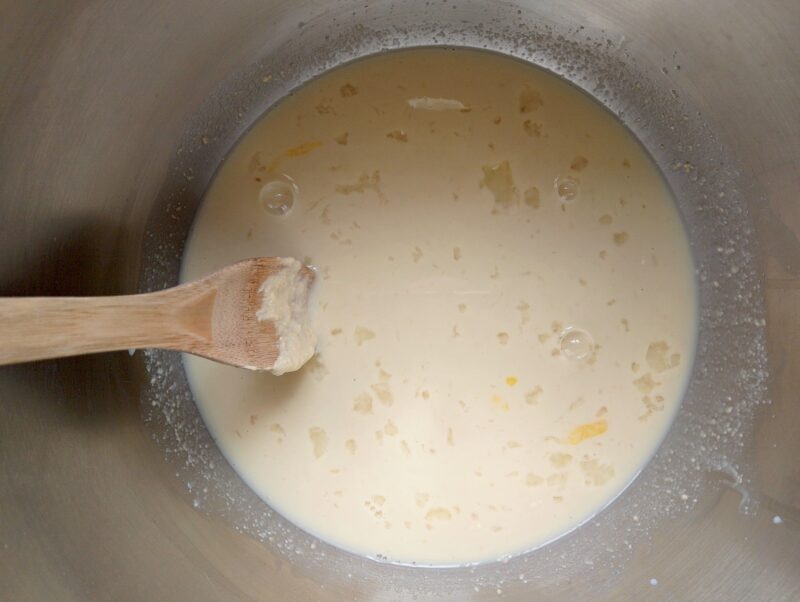
In a large mixing bowl, whisk together your sourdough discard, warm milk, one egg, and sugar until smooth and well combined. The milk should be warm but not hot (around 30–35°C / 85–95°F) to help the yeast activate.
Step 2
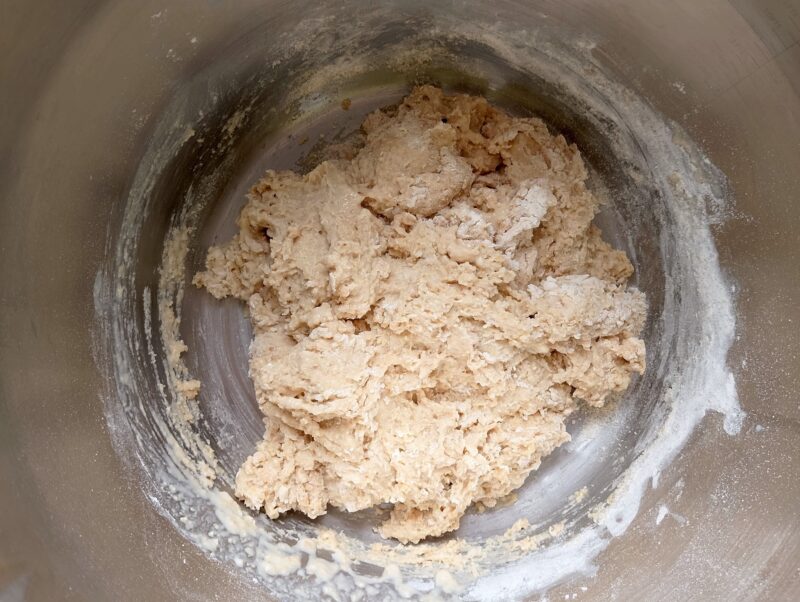
Add the bread flour, whole wheat flour, instant yeast, and salt to the wet mixture. Stir or mix until a shaggy dough forms—slightly sticky and uneven is perfect. Let the dough rest for 10 minutes. This short rest, called an autolyse, allows the whole wheat flour to fully absorb the milk.
Step 3
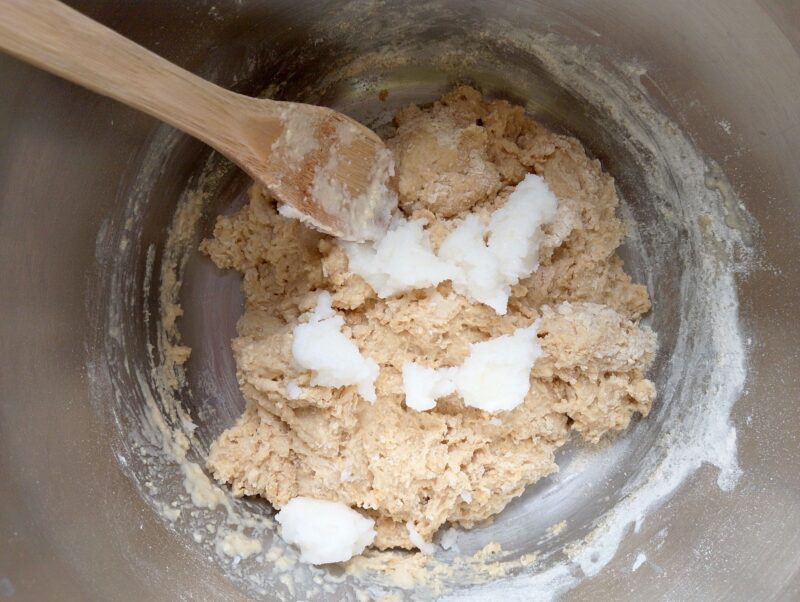
Add the softened tallow (or butter) to the dough and mix it in using a spoon until fully incorporated. The dough will feel a little sticky at first—that’s normal.
Step 4
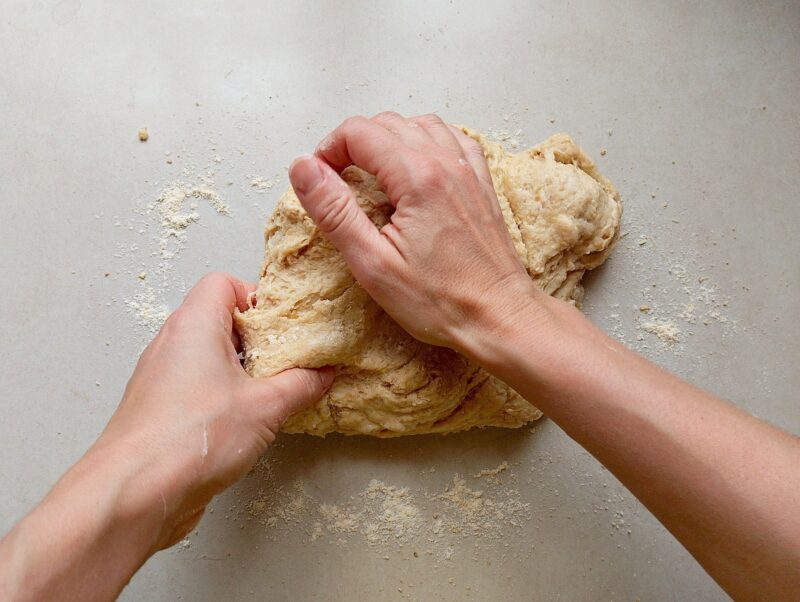
Turn the dough out onto a lightly floured surface. Knead by hand for 8–10 minutes, or use a stand mixer with a dough hook for 5–6 minutes. The dough should end up soft, slightly tacky, and stretchy—just enough to hold its shape without being sticky. This kneading develops the gluten, giving your sourdough discard burger buns a light, airy texture.
Step 5
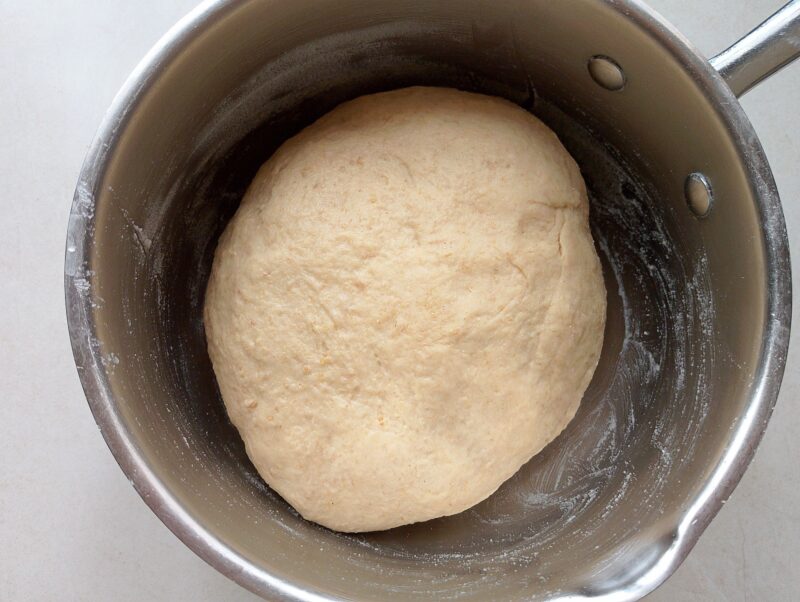
Place the kneaded dough in a greased bowl (I like to use tallow) and cover it with plastic wrap or a damp tea towel to prevent drying. Let the dough rise until it has roughly doubled in size, which usually takes 60–90 minutes in a warm kitchen.
Step 6
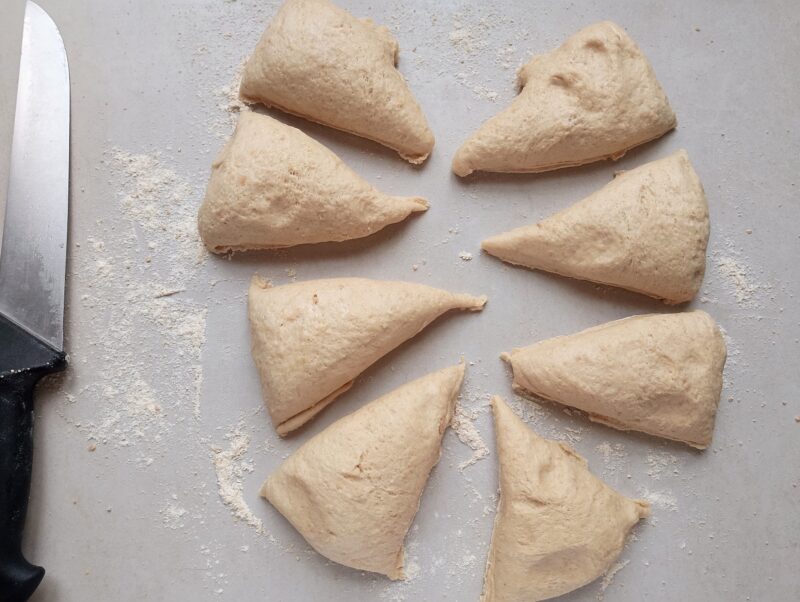
Once the dough has risen, divide it into portions—8 pieces for large buns or 10 pieces for medium-sized buns. For even portions, gently pat the dough into a rough circle, then cut it in half, then quarters, and finally divide each quarter in half. A large, sharp knife works best, but a pizza cutter is fine too.
Step 7
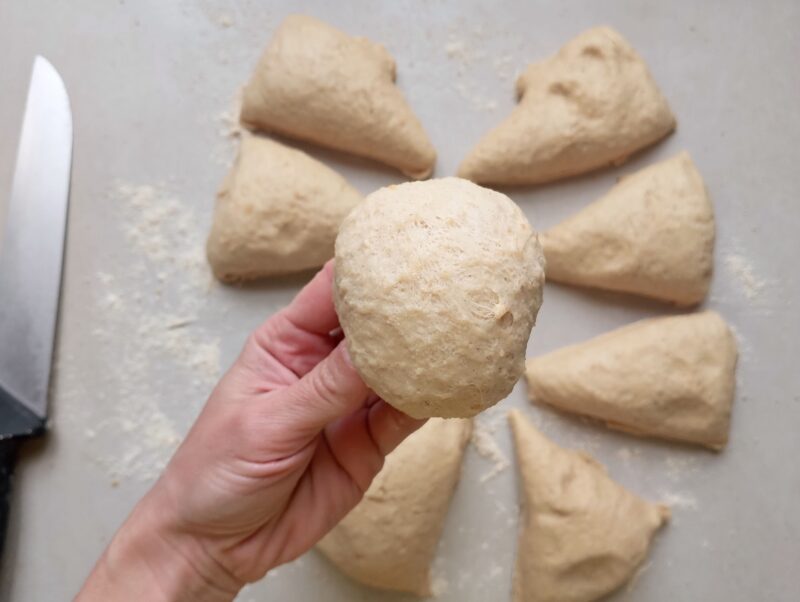
Shape each portion of dough into a tight ball by gently tucking the edges underneath. This creates surface tension, which helps the buns hold their shape and rise evenly.
Step 8
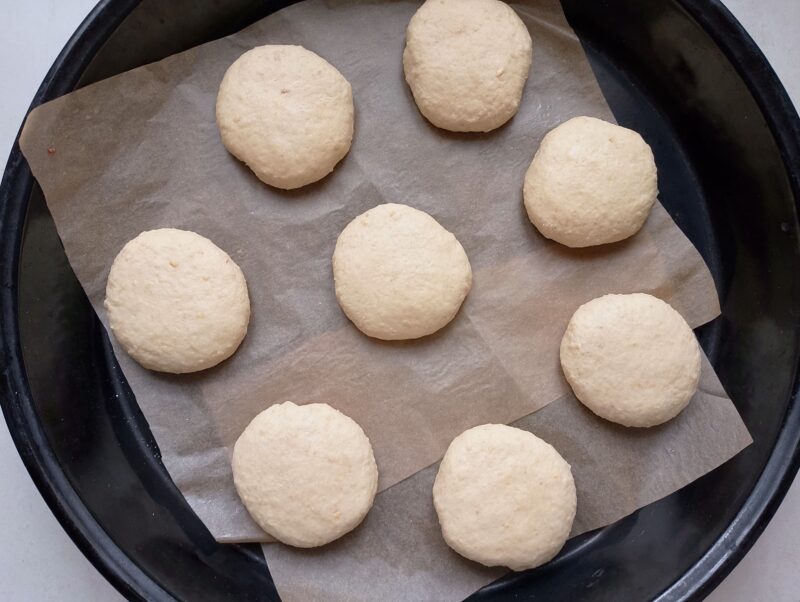
Place the shaped rolls on a parchment-lined baking sheet and gently flatten each one slightly to form a classic burger bun shape. Cover the buns with a clean, damp tea towel or lightly greased plastic wrap, and let them rise until puffy and about 1½ times their original size.
Step 9
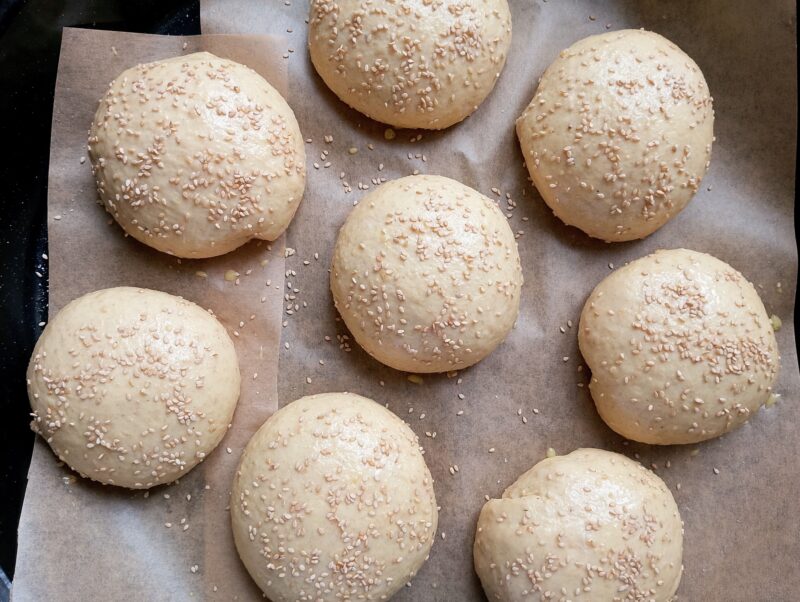
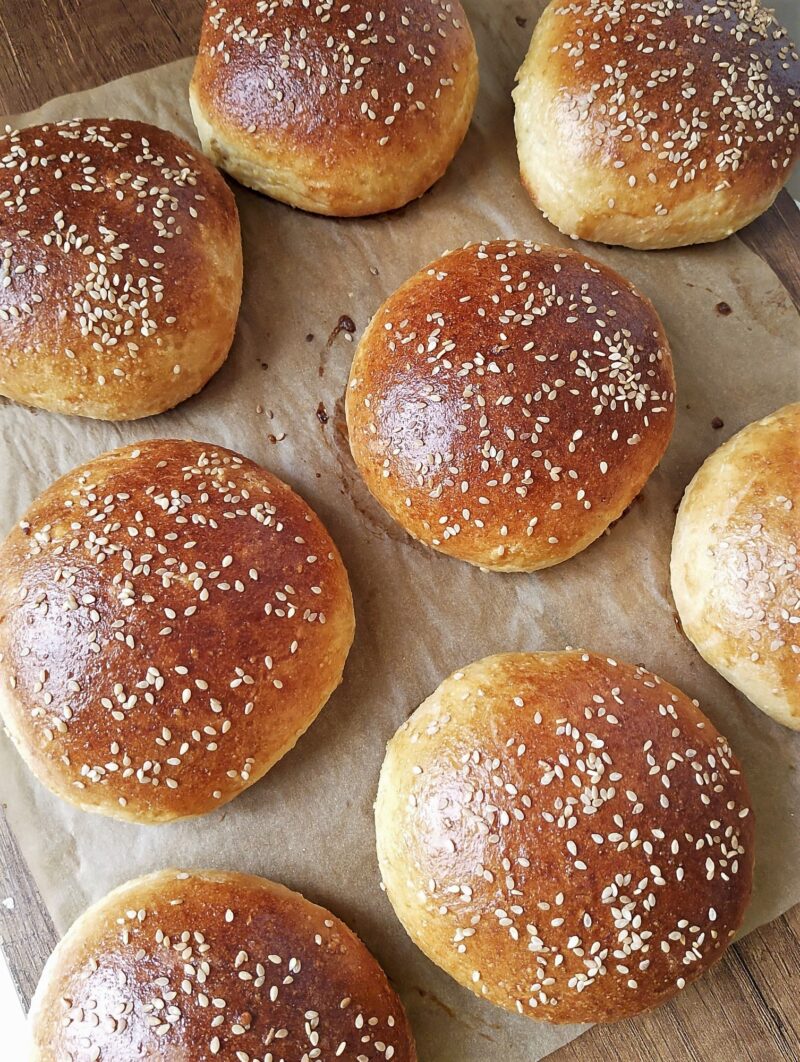
Preheat your oven to 190°C (375°F). Lightly brush the tops of the buns with egg wash and sprinkle with sesame seeds (or your favorite seeds). Bake for 15–18 minutes, until golden brown on top.
Step 10
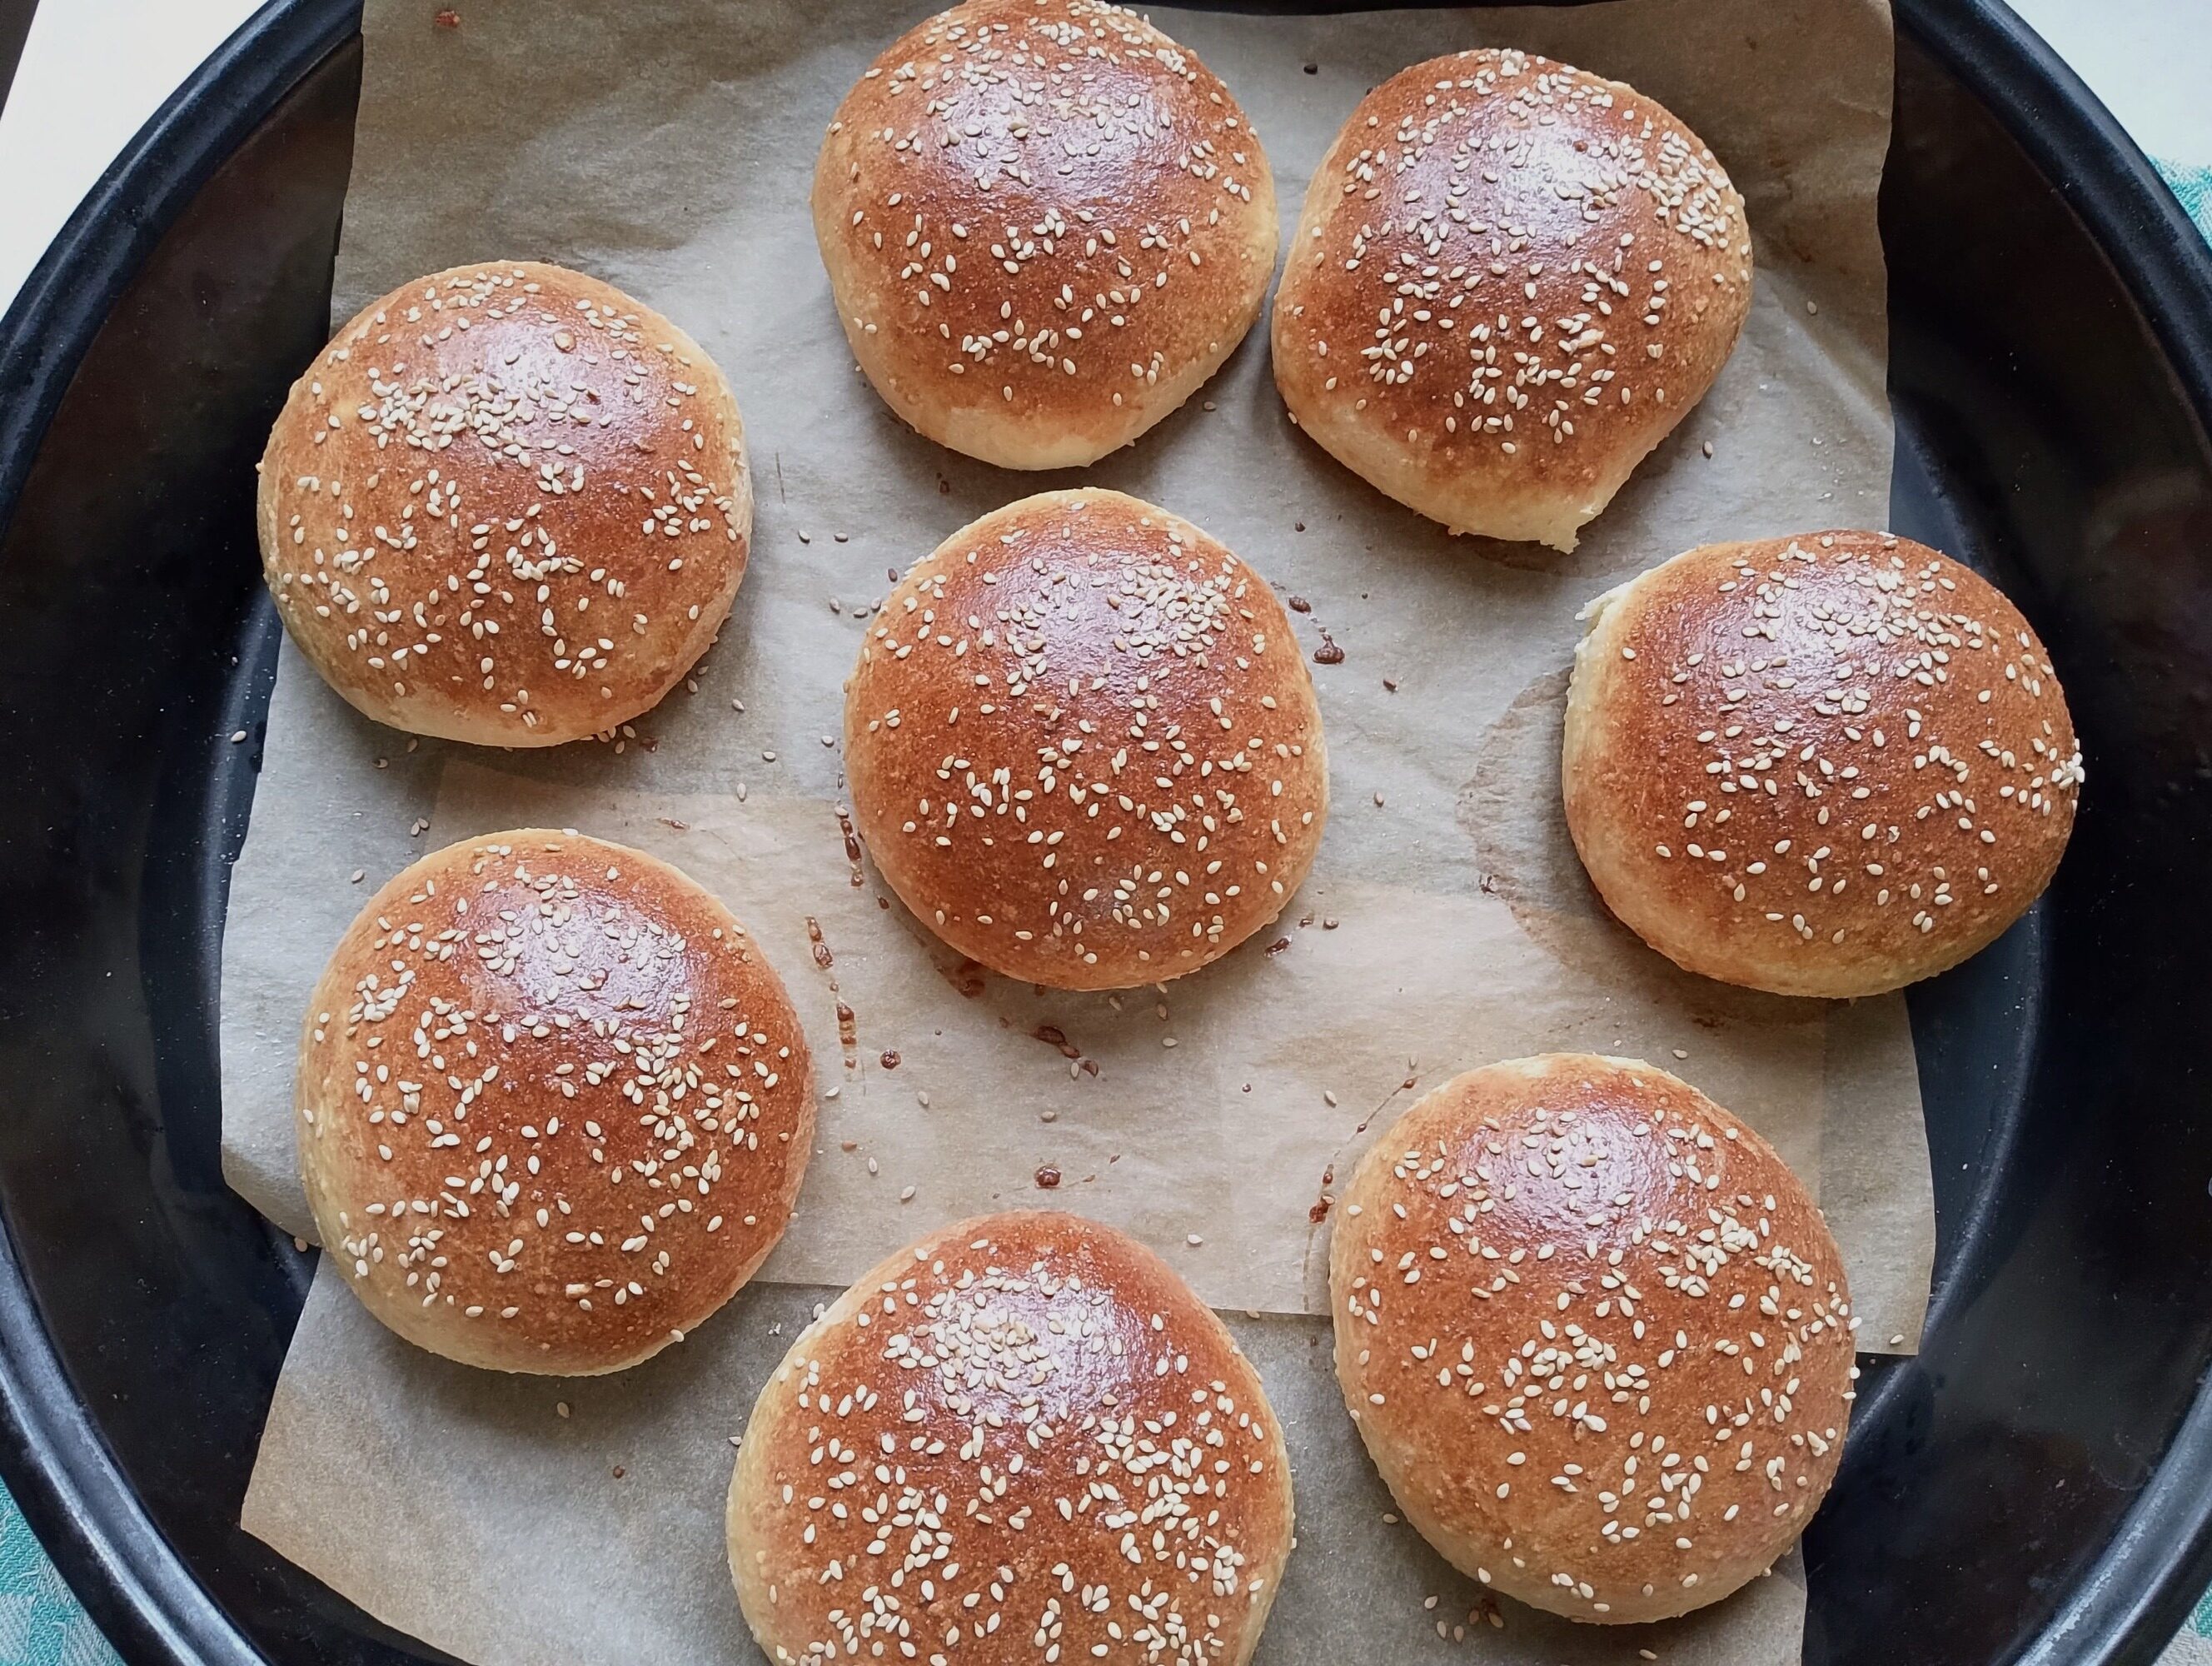
Once baked, let the buns cool for at least 30 minutes before slicing. This resting time allows the crumb to set, giving you soft, tender buns that hold up beautifully for sandwiches or burgers.
Timing Options
| Timing Option | Steps | Notes / Tips |
| Same-Day | Mix → Rise → Shape → Rest → Bake | Quickest; dough needs a warm kitchen; buns ready in a few hours |
| Overnight | Mix in evening → Refrigerate → Shape + Bake next day | Slow fridge fermentation = more flavor; bring dough to room temp before shaping |
| Pause After Mixing | Mix → Refrigerate → Stretch & Fold → Shape → Bake | Great for busy schedules; flavor develops slowly. Continue when convenient |
| Pause After Shaping | Mix → Rise → Shape → Refrigerate → Bake | Short rest in the fridge keeps buns fresh until baking |
Common Mistakes to Avoid When Making Burger Buns
- Dough too sticky – When you first mix the dough, it will feel tacky—that’s completely normal. Let it rest (autolyse) before adding the fat. When kneading, lightly flour your hands and work surface to prevent sticking. During stretch and folds, switch to wet hands and a damp counter instead of adding more flour, which can make your sourdough discard burger buns too dense.
- Dense buns – Make sure your yeast is fresh and within date (even though instant yeast has a long shelf life, it does expire). Don’t rush the bulk fermentation—let the dough rise until doubled, and allow about a 50% rise after shaping. Also, avoid adding too much flour when shaping, as this can lead to heavy, dense buns.
- Dry buns – Use only a light dusting of flour when kneading and shaping. For stretch and folds, use wet hands instead of flour. Be careful not to overbake—remove the buns when they are lightly golden. As soon as they come out of the oven, cover them with a clean, dry tea towel to keep the crumb soft.
- Didn’t rise much – If your yeast is active, the most common causes are a cool kitchen or not enough time. Place your dough in a warm spot (near the stove or in the oven with the light on works well). You can also use a seedling heat mat in colder months. Focus on the dough, not the clock—your burger buns should look puffy and well-risen.
- Uneven buns – This usually happens when the dough isn’t divided evenly or shaped properly. For even portions without a scale, gently pat the dough into a circle, cut it in half, then into quarters, and then each piece in half again. When shaping, create surface tension by pulling and tucking the edges underneath, then place on the tray and gently flatten into a burger bun shape.
Storage Tips for Sourdough Discard Burger Buns
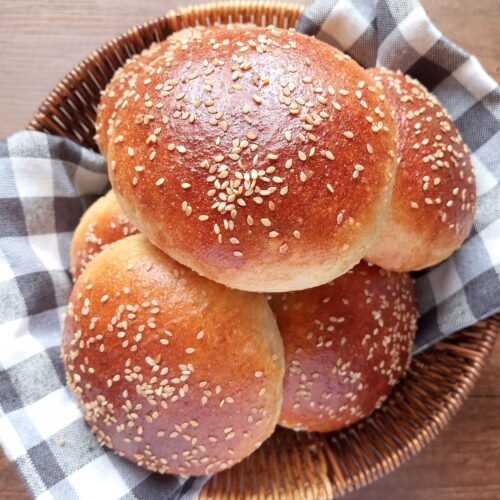
- Cool completely before storing – Once fully cooled, store your sourdough discard burger buns in a linen bread bag, or place them in a paper bag inside a loosely closed plastic bag. They will keep well at cool room temperature for 1–2 days.
- Avoid airtight plastic bags – Storing buns in a tightly sealed plastic bag can trap moisture and make them soggy.
- Skip the fridge (if possible) – Refrigeration tends to dry out bread more quickly. Only refrigerate if your kitchen is very hot or humid.
- To freeze – Let the buns cool completely, then slice them in half. Place in a single layer on a tray and freeze for about 2 hours, until firm. Transfer to freezer bags, removing as much air as possible before sealing.
- Freezer storage time – Buns can be frozen for up to 3 months, though they’re best if used within 4–6 weeks for optimal texture and flavor.
- To reheat – For the best texture, toast the buns straight from frozen. To reheat several at once, warm them in the oven at 160–170°C (320–340°F) for 5–10 minutes.
Variations
- More whole wheat (increase gradually) – This recipe uses a 40% whole wheat blend for a balance of nutrition and softness. If you’d like to increase the whole wheat, add a little more milk (since whole wheat absorbs more liquid) and allow a longer rest time so the flour can fully hydrate.
- Add more seeds – Sesame seeds are a classic topping, but you can also use poppy seeds or other small seeds. Sprinkle them on top before baking, or mix 1–2 tablespoons directly into the dough for added texture and nutrition.
- Herb buns – Add 1–2 teaspoons of dried herbs to the dough along with the flour. Oregano, basil, or thyme all work beautifully in these sourdough discard burger buns.
- Smaller rolls (sliders) – For slider buns, divide the dough into 12–16 pieces instead of 8. They will bake more quickly, so keep an eye on them to avoid overbaking.
- Sandwich rolls – Shape the dough into short logs instead of balls and flatten slightly. After baking, brush with a little melted butter for a softer crust—perfect for sandwiches.
Recipe FAQ

Serving Ideas
- Simple burgers with homemade patties: Make beef, chicken, or veggie patties from scratch—seasoned simply with salt, pepper, and herbs. Toast the buns lightly for a golden crust, then add the patties, lettuce, tomato, pickles, or a smear of homemade mayo.
- Egg sandwiches for quick breakfasts: Fry, scramble, or make omelets and sandwich them between buns. Add cheese, avocado, or sliced tomato for extra flavor. These can even be made ahead and wrapped for a portable breakfast.
- Leftover meat + cheese sandwiches: Use roast chicken, beef, or turkey leftovers from dinner. Add sliced cheese and a little mustard or aioli, then toast slightly if you like a melty sandwich. This is a great lunch option with minimal prep required.
- Serve alongside soups for easy dinners: Soft sourdough discard burger buns are perfect for dipping. Toast them with butter, make cheese toasties by grating cheese over halved buns and grilling until golden, or use them as a quick garlic bread alternative—simply mix minced garlic with softened butter, spread on the buns, and grill until lightly golden.
Bringing This Into Your Weekly Rhythm
While I love baking with sourdough and make most of my bread recipes entirely from starter, discard recipes are a fantastic option when you’re short on time, forgot to feed your starter, or simply have some discard to use up. Because these recipes include a bit of commercial yeast, the dough rises quickly, while the sourdough discard still adds that subtle, tangy flavor.
If you love sourdough, fermentation, and other traditional kitchen skills, join my newsletter to get fresh recipes, practical tips, and inspiration for creating a peaceful, nourished home—delivered straight to your inbox. Perfect for busy moms who want to feed their families real, wholesome food without stress.
More Delicious Discard Recipes
Sourdough Discard Applesauce Blackberry Muffins
Sourdough Discard Banana Coconut Cake
Whole Wheat Biscuits with Sourdough Discard
Sourdough Discard Burger Buns
Equipment
- Kitchen scale
- baking tray
- Parchment paper
Ingredients
For the dough
- 120 g sourdough discard (unfed, room temp)
- 240 g warm milk
- 40 g honey or sugar
- 1 large egg
- 300 g bread flour
- 200 g whole wheat flour
- 5 g instant yeast
- 8 g salt (1½ tsp)
- 60 g tallow or butter (softened)
For the topping
- 1 egg
- 1 Tbsp milk
- ¼ cup sesame seeds
Instructions
- Combine wet ingredients: In a large bowl, whisk together sourdough discard, warm milk, one egg, and sugar until smooth.
- Add dry ingredients: Stir in bread flour, whole wheat flour, instant yeast, and salt until a shaggy dough forms. Let rest 10 minutes to hydrate the whole wheat flour.
- Incorporate fat: Mix softened tallow (or butter) into the dough until fully incorporated.
- Knead the dough: Knead by hand for 8–10 minutes or in a stand mixer for 5–6 minutes, until the dough is soft, slightly tacky, and stretchy.
- Bulk ferment: Place dough in a greased bowl, cover, and let rise until doubled in size (about 60–90 minutes).
- Divide and shape: Turn dough onto a lightly floured surface. Divide into 8–10 pieces (depending on desired bun size). Shape each portion into a tight ball by tucking the edges underneath.
- Final proof: Place buns on a parchment-lined baking sheet, flatten slightly, cover, and let rise until puffy and about 1½ times their original size.
- Bake: Preheat oven to 190°C / 375°F. Brush buns with egg wash and sprinkle with sesame seeds. Bake 15–18 minutes until golden brown.
- Cool: Let buns cool at least 30 minutes before slicing to set the crumb.
Notes
- Room temp: Store cooled buns in a linen bread bag up to 2 days.
- Freezer: Slice, flash freeze, then keep in an airtight bag up to 3 months.
- Reheat: Toast or warm in oven straight from frozen for best texture.