Old-Fashioned Raw Milk Farmer’s Cheese Recipe (Simple & Traditional)
With this raw milk farmer’s cheese recipe, we’re turning naturally soured raw milk into a fresh, simple cheese that’s perfect for spreading on sourdough bread, stirring into dips, or using as a filling for crepes and cheesecake. There’s no exact timing, no perfect conditions, and no advanced skills required. I’ll show you how to make it using tools you already have in your kitchen—so even if you don’t own a thermometer or cheesecloth, you can still make this cheese. Let’s get you started on your cheesemaking journey with confidence.
Why You’ll Love This Recipe
- A simple way to use up soured raw milk with almost no extra effort
- Beginner-friendly introduction to homemade cheesemaking
- No special equipment needed—you likely already have everything in your kitchen
- A mild, versatile cheese that works beautifully in pancake fillings, on crackers, or mixed with sour cream and spread over sourdough bread
What Is Farmer’s Cheese?
Farmer’s cheese is a simple, fresh cheese made by gently curdling milk (or using naturally soured milk) and then draining off the whey, leaving behind a soft, slightly tangy curd. It’s mild, high in protein, and incredibly versatile—used as a spread, filling, or crumbled topping in both sweet and savory dishes. When made at home from raw milk like this one, it’s not only rich in protein but also contains naturally occurring vitamins and beneficial bacteria found in raw milk.
Farmer’s cheese is similar to other fresh cheeses like ricotta or cottage cheese, but there are a few key differences. It’s usually drier and crumblier than cottage cheese. It also differs from ricotta, which is a secondary cheese made from whey left over after another cheese is produced, while farmer’s cheese is a primary cheese made directly from clabbered or soured milk.
Ingredients
- 2 quarts/liters whole raw milk
- 1-2 teaspoons fine salt
Tools You’ll Need

- Glass jar or bowl – for souring the milk
- Stainless steel pot – to gently heat the milk
- Food thermometer (optional) – for measuring temperature, or you can simply use a clean finger to check warmth
- Ladle or large spoon – to transfer curds into the colander. You can even use a teacup as a ladle substitute!
- Cheesecloth, muslin, or a clean cotton tea towel – for draining the curds
- Colander – to hold the curds while they drain
- Large bowl – to catch the whey
How to Know When Milk Has Soured
Soured milk has a distinctly tangy, acidic smell and may taste sharp or slightly fizzy compared to fresh milk. It often begins to thicken and may show small curdled bits, especially once natural fermentation has started.
So, is “soured” the same as “clabbered”? Not exactly. “Soured” simply means the milk has started to turn acidic, while “clabbered” means it has fully thickened into a gel-like curd through natural fermentation. All clabbered milk is soured, but not all soured milk has fully clabbered yet.
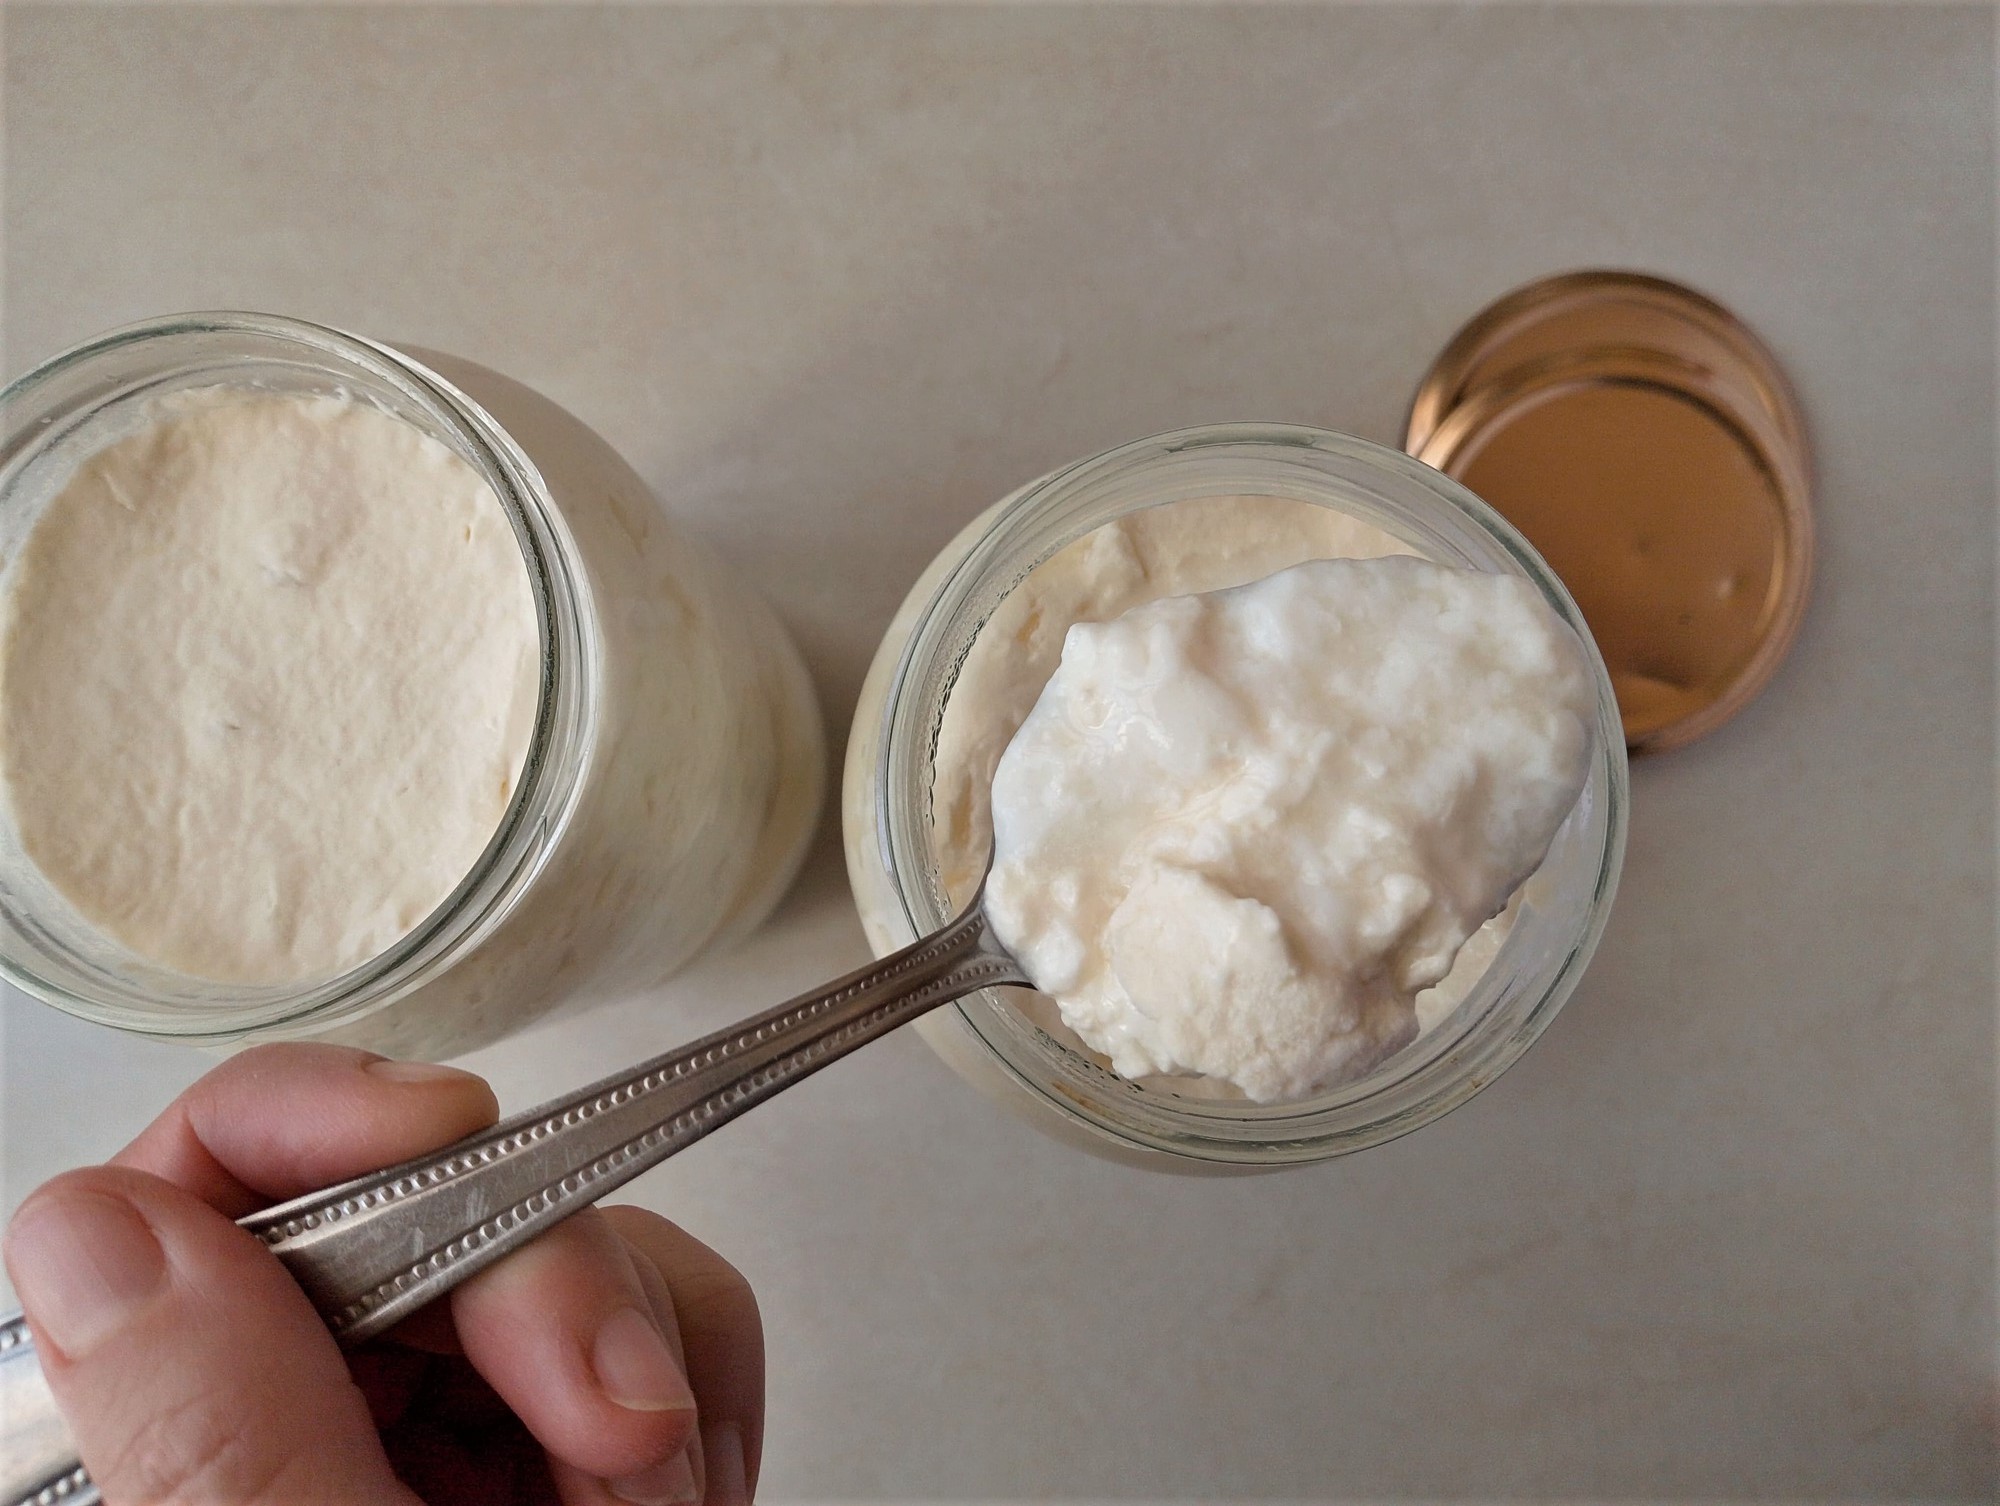
For this recipe, you want milk that has fully clabbered—thick like yogurt, with visible separation between curds and whey when you tilt or look at the jar from the side. This will give you the best yield of cheese.
How to Make Raw Milk Farmer’s Cheese Step-By-Step
Step 1
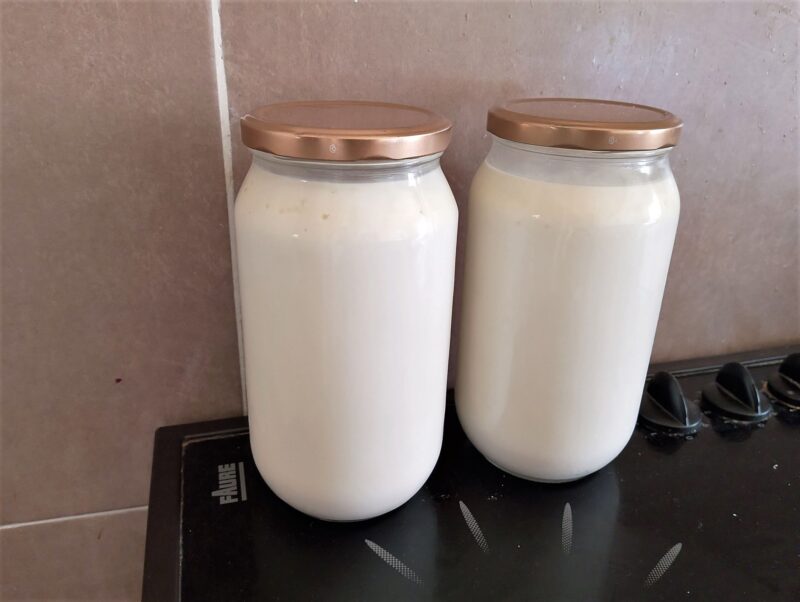
Pour the milk into a clean jar (or jars) and cover loosely with lids. Leave at room temperature (around 20–24°C) for 1 to 3 days to clabber. After a couple of hours, you’ll notice the cream rising to the top—this is completely normal.
Step 2
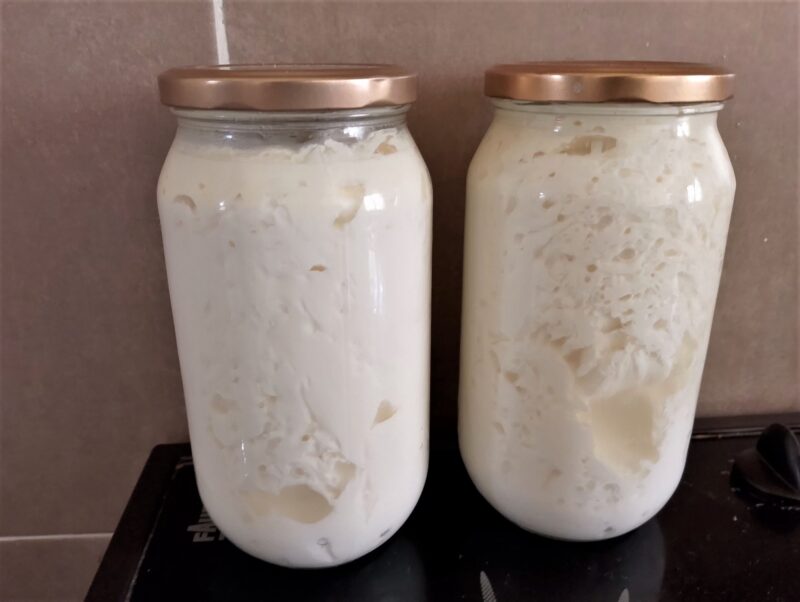
When the milk has thickened to a yogurt-like consistency and you can clearly see the separation between curds and the watery whey, it’s ready to be made into cheese. It should also have a pleasant sour aroma, similar to yogurt or kefir.
Step 3
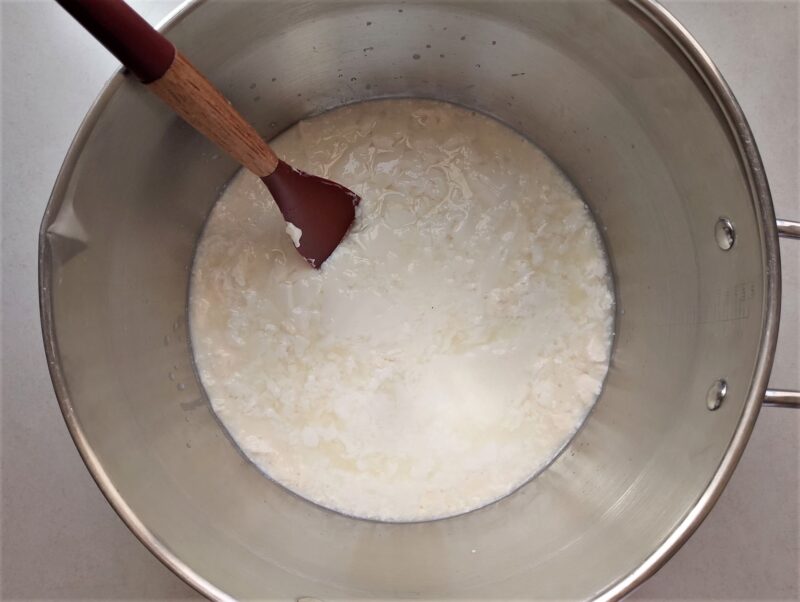
Gently and slowly pour the clabbered milk into a stainless steel pot, ideally a heavy-bottomed one. Place it on the stove and turn the heat to low.
Step 4
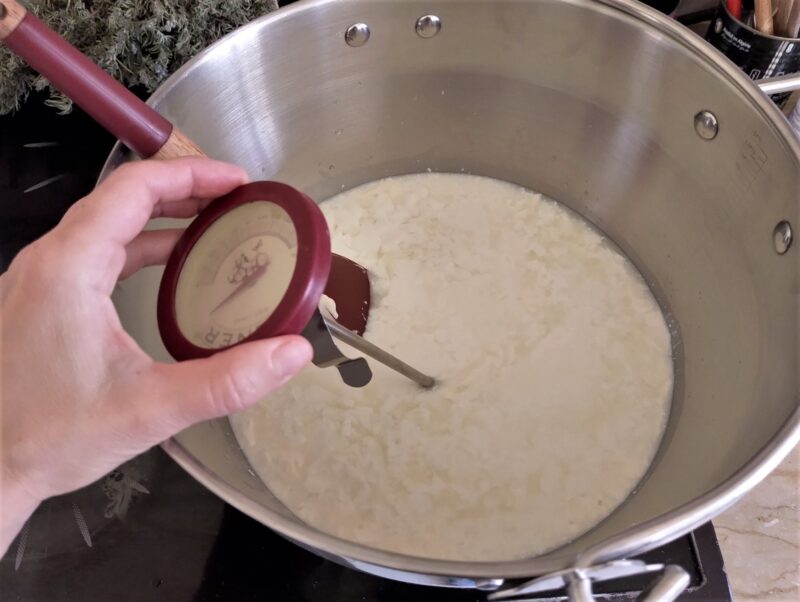
Warm the clabbered milk very gently to about 38–43°C (100–110°F). Stir the pot slowly from time to time so the milk heats evenly, but avoid vigorous stirring—it will break up the curds.
If you don’t have a food thermometer, don’t worry—it’s helpful but not essential. Dip in a clean finger and hold it in the milk. If it feels warm but comfortable, and you can keep your finger in without needing to pull it out, the temperature is about right.
Step 5
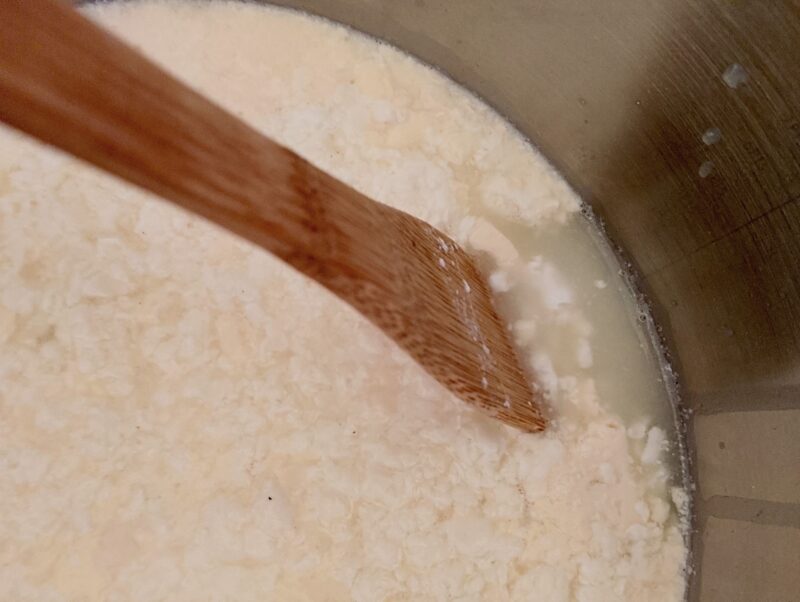
When the milk reaches the right temperature, you’ll also notice the curds beginning to separate more clearly and the whey turning transparent and slightly yellow. Once this happens, remove the pot from the heat—overheating can cause the curds to become hard and rubbery.
Step 6
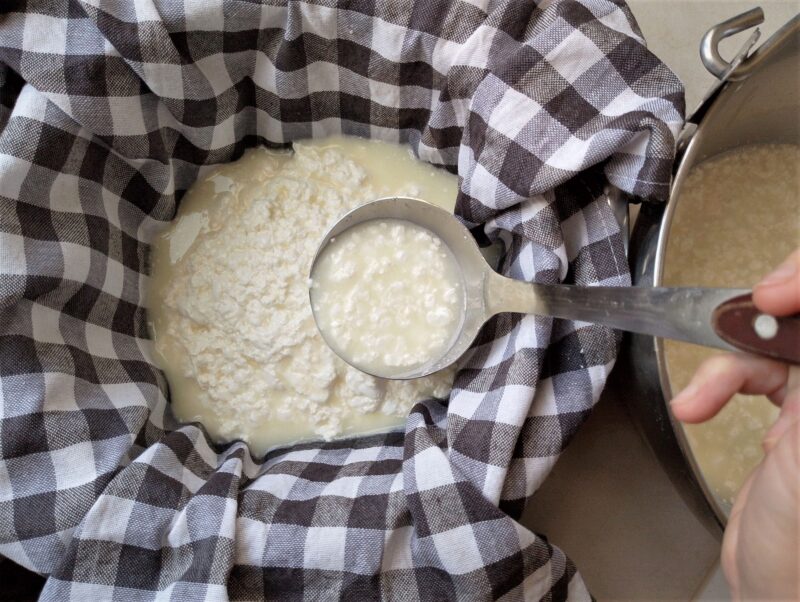
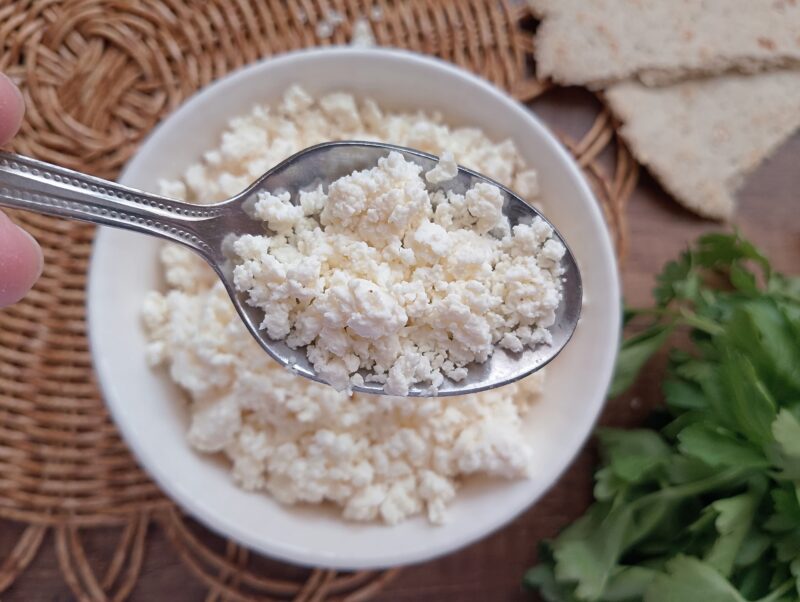
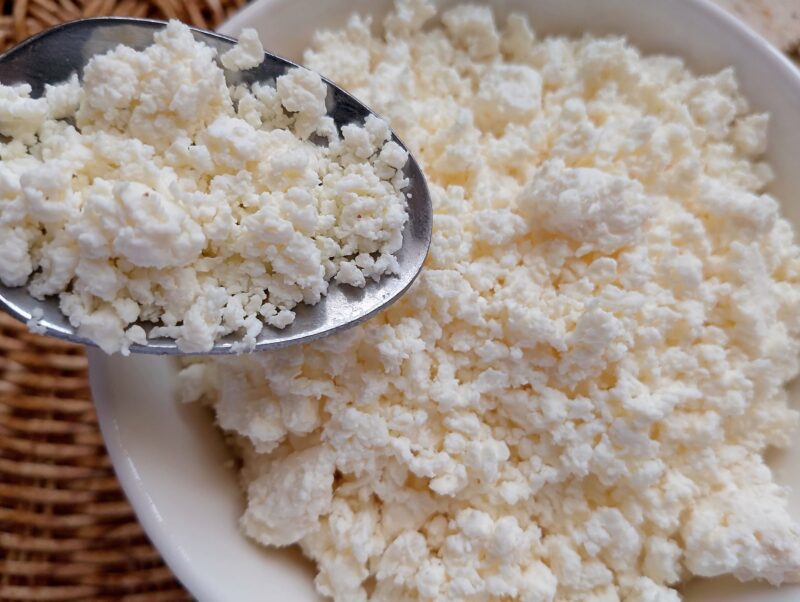
Set a colander over a large bowl to catch the whey and line it with cheesecloth or a clean cotton tea towel, like I’m using here. Gently transfer the curds and whey into the colander using a ladle or large spoon—don’t pour it straight in, as this can break up the curds.
Let the cheese drain for several hours. The longer you leave it, the firmer your finished cheese will be, so adjust the draining time to suit your preference.
Step 7
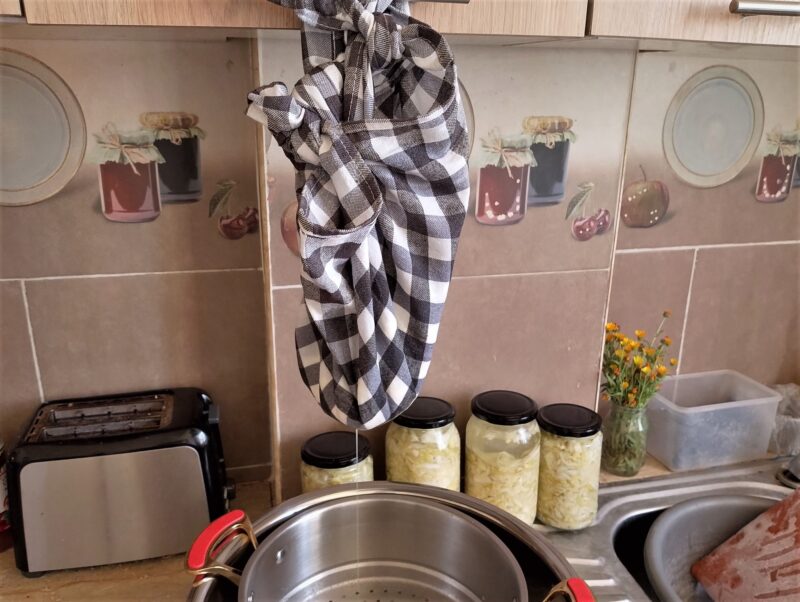
For a firmer texture and faster draining, you can also hang your cheese. I simply tie the cloth bundle to a kitchen cupboard handle and let it drip into a bowl for about an hour.
Step 8
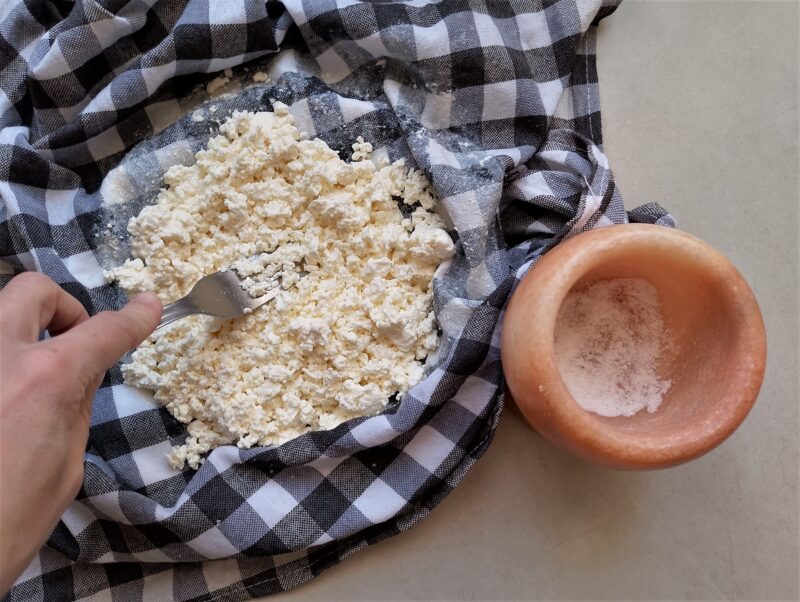
Once your cheese has drained to your preferred softness or firmness, it’s time to salt it. Salting is optional, but it improves the flavor and helps the cheese keep longer in the refrigerator.
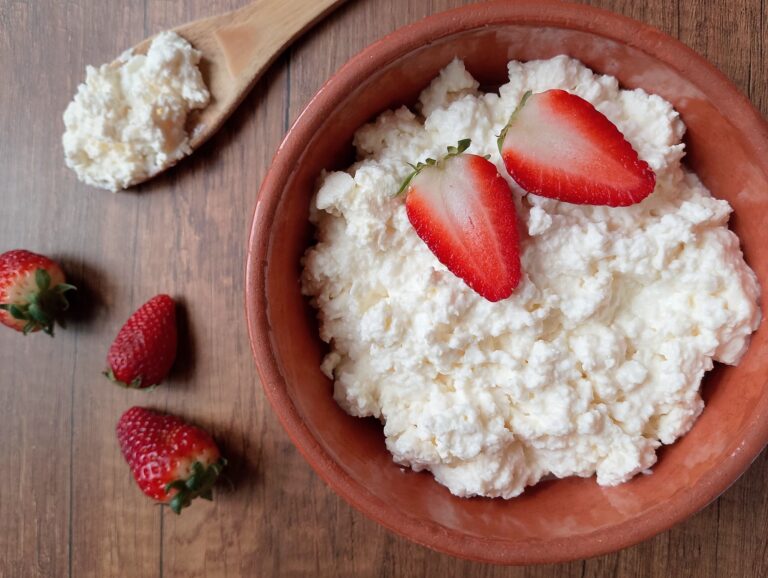
Sprinkle about a teaspoon of salt over the cheese and mix it in well with a fork. Taste and adjust, adding a little more if needed, until it tastes just right to you. Your farmer’s cheese is now ready to serve or chill.
How to Press Farmer’s Cheese
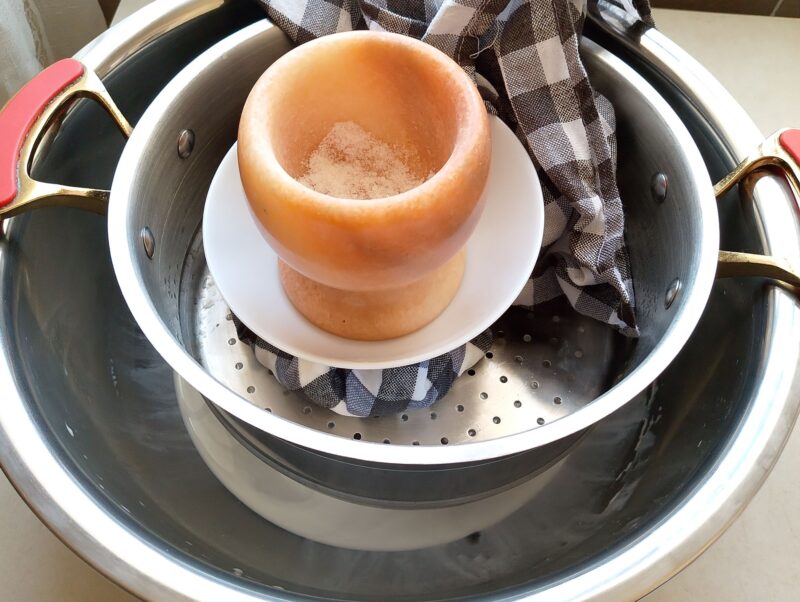
If you want a sliceable farmer’s cheese, tie the drained curds in the cheesecloth into a bundle, then place it on a plate and weigh it down with something heavy. I used my mortar, but a heavy can or a sealed jar filled with water works just as well.
If you’re mainly making fresh cheeses, a cheese press is honestly an unnecessary expense in my opinion. This simple setup might look a bit improvised, but it works really well—as long as you start with at least 2 liters of milk. Any less, and the cheese may be too small to press into a proper shape. The cheese you press in a homemade setup won’t have a perfectly uniform shape like one made in a “proper” press—it may be slightly uneven or thicker on one side than the other—but it will still be perfectly lovely and sliceable just the same.
Serving Ideas
If you’re wondering what to do with farmer’s cheese once you’ve made it, here are some of the best traditional-style ways to serve raw milk farmer’s cheese—simple, versatile, and most don’t require any extra cooking on your part:
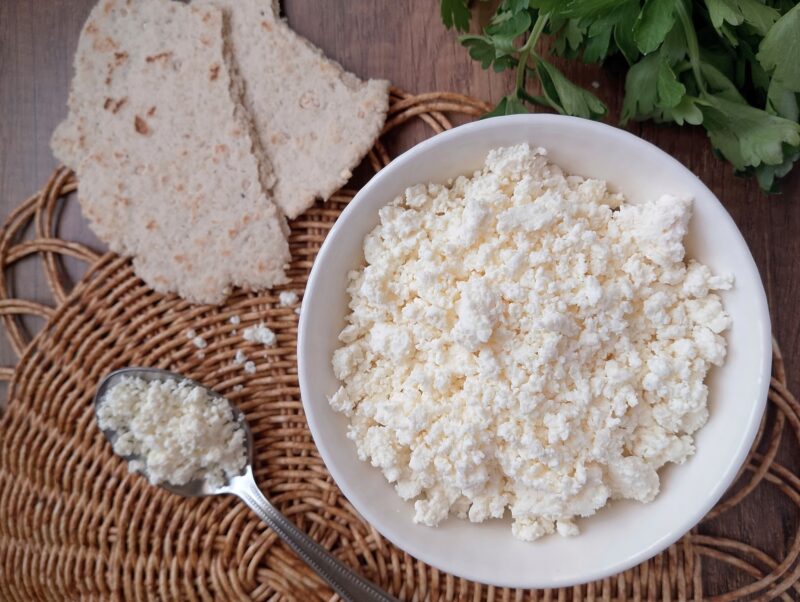
- Spread on sourdough or toast: You can eat farmer’s cheese much like cottage cheese. Simply spread it over a slice of sourdough or toast and top with a pinch of salt, a drizzle of raw honey, or a spoonful of fruit preserves for a simple sweet-savoury breakfast.
- Savoury herb cheese spread: Mix the farmer’s cheese with fresh herbs like chives, dill, or parsley, along with salt and a little raw cream or butter to create a soft spread or dip. You can also use my cottage cheese dip recipe and simply swap the cottage cheese for farmer’s cheese, adding in a little extra cream if your farmer’s cheese is quite dry.
- Breakfast bowl: Serve with honey, berries, stewed apples, or grated apple + cinnamon for a high-protein breakfast.
- Stuffed into pastries or pancakes: Use farmer’s cheese as a filling for crepes, blintzes, or savoury hand pies in the classic Eastern European style. My grandmother often used it in crepes—it works especially well because it’s drier than cottage cheese, so the filling holds together beautifully without making them soggy.
- Mixed into eggs: Fold into scrambled eggs or omelettes for a soft, creamy texture and extra protein.
- Sweet dessert cheese: Blend farmer’s cheese with vanilla, honey, and a little lemon zest, then serve it with fresh fruit or use it in baked goods. It’s also excellent for cheesecake—and in my opinion more traditional than the cream cheese used in many modern recipes. If your farmer’s cheese is crumbly, simply blend it with a splash of cream until smooth before using it in a cheesecake.
Tips For The Best Raw Milk Farmer’s Cheese
This cheese is fairly straightforward to make if you follow a few key principles. Here are some common mistakes you may run into, how to fix them, and how to avoid them in the future.
- Don’t rush the clabber. When your milk sours (or clabbers) slowly, it develops a better, deeper flavor in the finished cheese. In warm summer temperatures, milk will clabber quickly and the resulting cheese will tend to be tangier. In cooler winter months, it can take up to 3 days for raw milk to fully clabber—I usually place mine at the back of the stove where it stays gently warm. The cheese made from slower-clabbered milk is often milder and more balanced in flavor. Don’t let the milk sour in the refrigerator! It needs a warm room temperature environment to clabber properly.
- Handle the curds gently: Once the milk has clabbered, don’t stir it. From this point on, the curds are delicate and should be handled with care. Be gentle when transferring the milk from the jar to the pot, and again when moving it into the cheesecloth. Pouring too quickly or roughly can break the curds and result in a lower cheese yield.
- Let the milk reach the right temp (~38–43°C (100–110°F). If your milk is too cool, it won’t separate properly and you’ll end up with less cheese. If you overheat it, you’ll end up with rubbery curds and your farmer’s cheese won’t be a true raw milk cheese (heat destroys the probiotic benefits of raw milk).
Timing Options
If making the cheese in one day feels like too much, you don’t have to do it all at once. You can clabber your milk, store it in the fridge for a few days, then heat it when you have time. After that, let it drain overnight in the refrigerator and mix in the salt the next day.
This slower, flexible approach takes a bit more time overall, but it can feel much easier. Here are a few timing options you can choose from:
- Same-day option: warm the milk and let it drain, then salt and serve the same day.
- Overnight option: leave draining in the refrigerator for firmer texture. The next morning salt your cheese and serve, or use it in recipes.
- It’s safe to pause your cheesemaking process once the milk has clabbered, after the curds have formed, or even during the draining stage. Simply transfer it to the refrigerator and finish making the cheese the next day when you have time. I often clabber the milk first, then move the jars into the fridge where they’ll keep for a few days until I’m ready to finish the cheese.
Troubleshooting Your Farmer’s Cheese
Here are some common issues you might run into when making farmer’s cheese, along with simple fixes to help you get the best results every time.
Milk not separating
It likely hasn’t soured enough yet. Let it sit longer, or move it to a warmer spot. In winter, I always set my milk to clabber near the stove—the warmest part of my kitchen. If your kitchen is very cool and you don’t want to wait up to 3 days for the milk to clabber, you can use a seedling heat mat. These are usually used for germinating tomato and pepper seeds, but they work beautifully here too. Simply plug it in and place your jars of raw milk on top to gently keep them warm, which helps the milk sour more quickly. They’re also quite affordable and have an added bonus —they can help your sourdough rise more reliably in winter too.
Curds too small or soft
This usually means the heat was too high. Next time, use gentler, more gradual warming so the curds have time to form properly. Also be very gentle when handling the milk at every stage. Always use a ladle or large spoon when transferring it—from jars to the pot, and then from the pot into the colander. Rough pouring or stirring can easily break the curds into smaller pieces, which affects both texture and final yield.
Cheese too dry or crumbly
This usually happens when the curds have been drained for too long. Next time, shorten the draining time slightly to keep a softer, more spreadable texture. To fix this batch, simply mix in a little yogurt or cream. This will bring back moisture, reduce the crumbliness, and make it perfect again for spreading on toast or sourdough.
Strong sour taste
This is completely normal when working with raw, naturally soured milk—especially if you’re new to raw milk cheeses. It may just take a little time for your palate to adjust to the tangy flavor. You can balance the sourness by adding a bit of salt, or by using the cheese in recipes where the tang will be less noticeable. And with time, you’ll likely come to enjoy that characteristic sour milk tang—I know I did. Raw milk cheeses are now one of my favourite sandwich toppings.
Uneven texture
This is common when using gentle, home-style cheesemaking methods. Your cheese is still perfectly usable, and any unevenness is simply part of its rustic charm.
Storage Tips
- Store your finished farmer’s cheese in a sealed jar or airtight container in the coldest part of your refrigerator for 3–5 days. If you’ve drained it until it’s quite dry, it may even keep for up to a week.
- Farmer’s cheese can also be frozen for 2–3 months, although the texture will become more crumbly after thawing. For this reason, it’s best used in cooked dishes like baked goods or pancake fillings after freezing.
- If your cheese smells off (not just tangy, but truly rotten), or develops slime or mold, discard it.
- If it starts to dry out, you can crumble it into recipes or refresh it by mixing in a little cream or yogurt to bring back moisture and creaminess. I often mix my farmer’s cheese with cream before using it as a sandwich topping.
- The whey left behind after making farmer’s cheese will keep in the refrigerator for up to 7 days. Don’t throw it away—it’s very versatile and can be used in both your kitchen and your garden. To learn more, check out this post.
Variations
There are endless ways to make farmer’s cheese your own. Here are some delicious variations to inspire you:
- Herb version: Mix in chopped dill, chives, or parsley.
- Savory farmer’s cheese: Add garlic powder or freshly ground black pepper.
- Creamier version: Stir in a spoonful (or more) of cream after draining. You can also mix in plain yogurt to make it softer and more moist, similar to cottage cheese—perfect for eating by the spoonful or spreading on toast.
- Seasonal version: Add finely chopped spring onions, or use dried herbs in winter. If using dried herbs, let the cheese chill for a couple of hours so the flavors can infuse, then give it a good mix before serving.
- Lighter, soft version: Drain for less time to keep a very soft, spreadable texture. This is lovely as a sandwich spread or a quick dip for veggie sticks or homemade crackers.
Recipe FAQ
Cheesemaking Made Simple
Cheesemaking is one of those kitchen skills that looks sophisticated and difficult, but is actually quite simple once you learn the basics. Every batch you make teaches you a little more about how milk behaves in a traditional kitchen.
Fresh cheeses are the best starting point if you’re curious about cheesemaking. Once farmer’s cheese, paneer, or ricotta become easy, you can begin exploring aged cheeses without feeling overwhelmed. There’s no perfect outcome here, only useful, nourishing food made at home.
If you love old-fashioned food and homemaking, I’d love for you to subscribe to my newsletter. I share weekly recipes, tips, and homemaking inspiration from my kitchen to yours.
Simple Raw Milk Cheese Recipes
Queso Fresco (Mexican Fresh Cheese)

Raw Milk Farmer’s Cheese
Equipment
- Glass jar or bowl
- stainless steel pot
- Large spoon or ladle
- Cheesecloth or cotton tea towel
- colander
- Large bowl or pot
- Food thermometer (optional)
Ingredients
- 2 quarts (liters) whole raw milk
- 1-2 tsp fine salt (optional)
Instructions
- Pour raw milk into a clean jar, cover loosely, and leave at room temperature (20–24°C) for 1–3 days until fully clabbered and thick like yogurt, with visible separation of curds and whey.
- When ready, gently transfer the clabbered milk into a heavy-bottomed pot and warm slowly over low heat to about 38–43°C (100–110°F), stirring very gently. Do not over-stir, as this can break the curds.
- Once the curds fully separate and the whey turns clear and yellowish, remove from heat.
- Line a colander with cheesecloth or a clean cotton towel and set over a bowl. Carefully ladle the curds into it and let drain for several hours, or hang for about 1 hour for a firmer cheese.
- When drained to your liking, transfer to a bowl, add about 1-2 tsp salt (optional), and mix well. Taste and adjust seasoning.
- The cheese is now ready to eat or store in the refrigerator.
Notes
- Let milk clabber fully—don’t rush this step for best flavor.
- Handle curds gently to avoid breaking them and losing yield.
- Use low, gentle heat—no boiling or fast heating.
- Drain longer for firmer cheese, shorter for soft and spreadable.
- A little salt goes a long way for flavor and preservation.
- If too dry, mix in a spoon of cream or yogurt to soften.
- Store farmer’s cheese in an airtight container or sealed jar in the coldest part of the refrigerator for 3–5 days (up to 1 week if well-drained).
- It can be frozen for 2–3 months, but will become more crumbly after thawing—best used in cooking or baking.
- If it smells off (not just tangy), or shows mold or slime, discard.
- To refresh dried-out cheese, mix in a little cream or yogurt to restore moisture.