Easy Raw Milk Queso Fresco Recipe – Fresh Cheese in One Hour
This raw milk queso fresco is one of the easiest cheeses you can make at home. It’s quick to prepare, gives a generous yield per quart of milk, and works beautifully in a wide variety of dishes—from tacos and enchiladas to salads, soups, and simple bean dishes. You don’t need any special equipment to make it—though a food thermometer is helpful—and in about an hour (or two, if you choose to press it for a more sliceable texture), you’ll have a mild, fresh, and versatile cheese ready for your kitchen. In this step-by-step tutorial, I’ll show you exactly how to make raw milk queso fresco from scratch, how to store it, how to use it in everyday cooking, and I’ll answer common questions so you can confidently troubleshoot if needed.
What Is Queso Fresco?
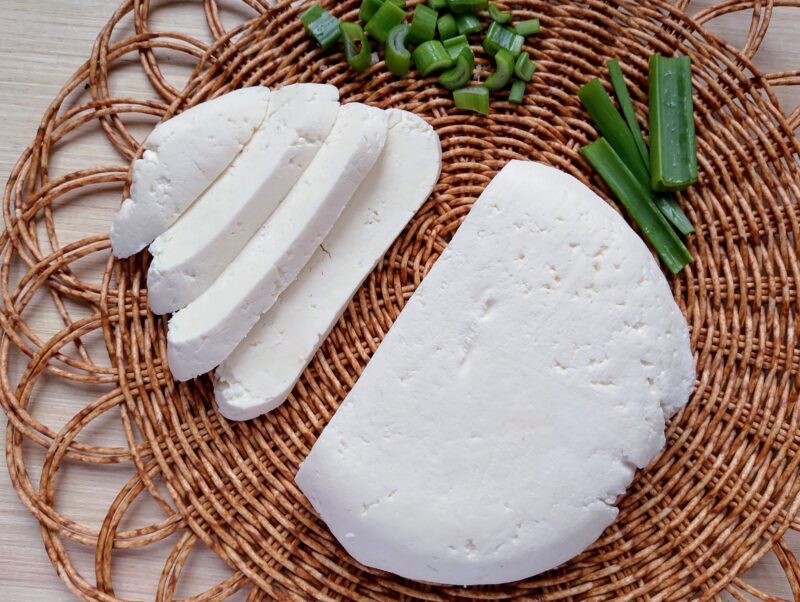
Queso fresco is a mild, fresh Mexican cheese with a flavor similar to farmer’s cheese. It can be made with either raw or pasteurized milk by gently heating the milk and then adding vinegar or lemon juice to separate it into curds and whey. In traditional Mexican cuisine, queso fresco is most often used as a topping or stuffing for dishes like tacos, enchiladas, and salads. In our kitchen, we also like to lightly press queso fresco in a homemade cheese press so it can be sliced for sandwiches or enjoyed simply on its own. Thanks to its gentle, creamy flavor, this has recently become my kids’ favorite homemade cheese.
Can You Make Cheese With Raw Milk?
This queso fresco recipe uses raw milk primarily for its nutrient density. Raw milk works especially well for fresh cheeses because it contains natural enzymes, intact proteins, and beneficial bacteria that help the curds form more easily. As a result you get a creamier, more flavorful cheese. When using raw milk for cheesemaking, it’s important to start with milk from a clean, trusted source and to use it while it is very fresh. Raw milk will generally keep in the refrigerator for up to a week before beginning to sour. However, for the best results use it as soon as possible after purchase. You can also freeze it until you’re ready to make cheese.
This is even more important when working with milk from your own cow or goat, which often sours more quickly than farm-chilled milk because most home setups can’t cool it as rapidly after milking. Raw milk that isn’t perfectly fresh can curdle prematurely when heated. Aim to use the freshest raw milk you have for consistent results. Taste your milk – if you detect even a very faint note of sourness, don’t use it in this recipe. Instead, set it on your counter to sour naturally. Once the raw milk is properly soured and thickened, you will be able to use it as a probiotic drink, a replacement for yogurt, or to make raw milk cottage cheese.
Tips for Making This Recipe
- I use 10 cups (3 liters) of milk in this recipe which gives me almost 18 ounces (500 grams) of cheese. This is just an estimate – your yield will depend on the type of milk you use and whether you press it, and for how long.
- This recipe is easy to scale up if you’d like to make a larger batch of cheese. I recommend using a minimum of 2 quarts (1.9 liters) of milk—anything less won’t yield enough cheese to be worth the effort, in my opinion.
- Make sure you use very fresh raw milk. Raw milk that has been sitting in your fridge for a few days may curdle when you try to heat it. Taste your milk – if it has even a very subtle note of sourness, don’t use it for queso fresco. Set it in jars on your counter and let it sour and thicken naturally, so you can use it for drinking, using as a substitute for yogurt, or for making raw milk cottage cheese.
- I would recommend you use a food thermometer if you are a beginner cheesemaker. However, if you don’t have it, you can still make this cheese. Simply heat the milk slowly until you see steam rising and tiny bubbles forming around the edges, but never a boil. When the milk looks slightly shimmery and feels very hot but not painful to the touch, turn off the heat.
Ingredients
How to Make Homemade Raw Milk Queso Fresco (Step by Step)
Step 1
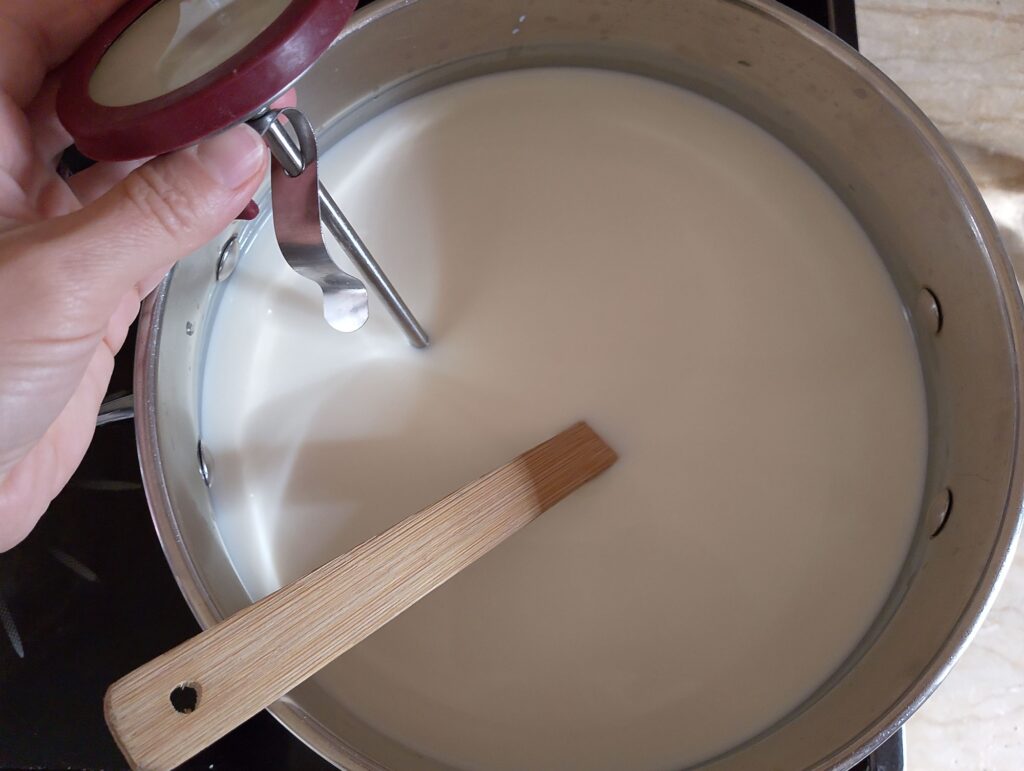
Pour the raw milk into a heavy-bottomed pot and place it over medium-high heat. Warm the milk slowly, stirring occasionally to prevent scorching, until it reaches 185°F (85°C). Use a candy or instant-read thermometer for accuracy—raw milk can scorch quickly if left unattended, so gentle, consistent stirring makes all the difference.
Step 2
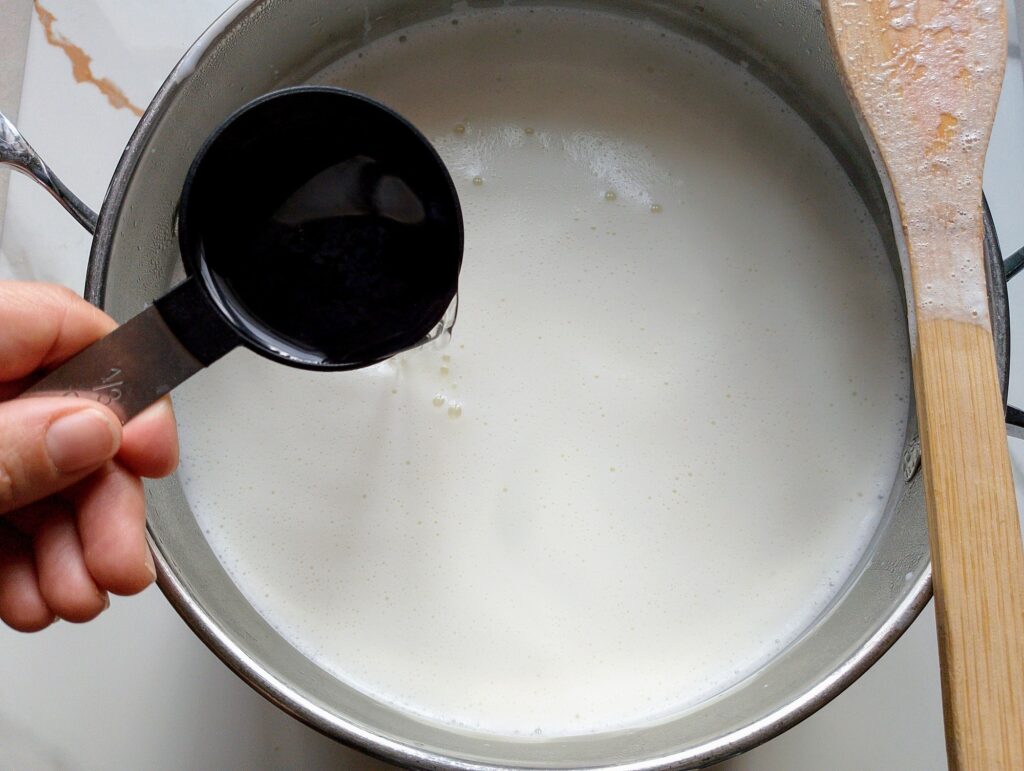
Once the milk reaches 185°F (85°C), remove the pot from the heat. Gradually add the vinegar, a little at a time, stirring gently. You should see the curds begin to separate from the whey almost immediately. If the whey still looks milky after adding all the vinegar, add a bit more—about a tablespoon at a time—until the curds fully form.
Step 3
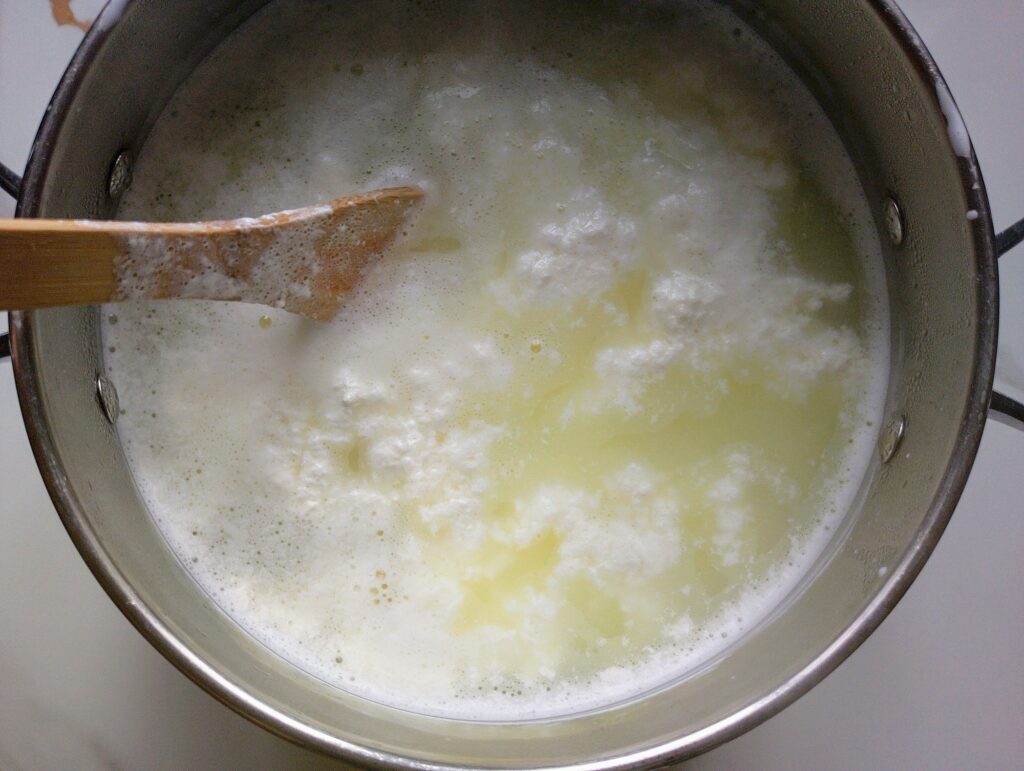
Allow the milk to sit undisturbed for 10 minutes. This rest time lets the curds fully separate from the whey, giving you firmer curds and clearer whey.
Step 4
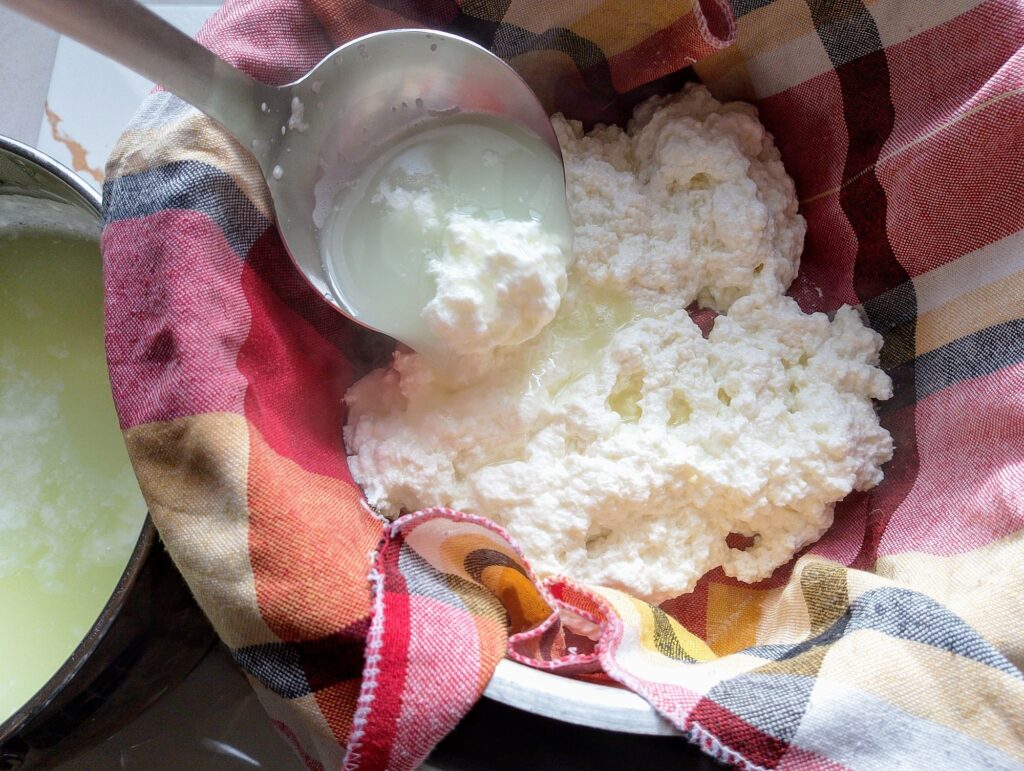
Using a ladle or slotted spoon, carefully transfer the curds to a colander lined with cheesecloth or a clean tea towel, set over a pot or bowl to catch the whey. Slowly pour some of the warm whey over the curds to rinse them gently. Let the curds drain for about 15 minutes, or until most of the liquid has been removed.
Step 5
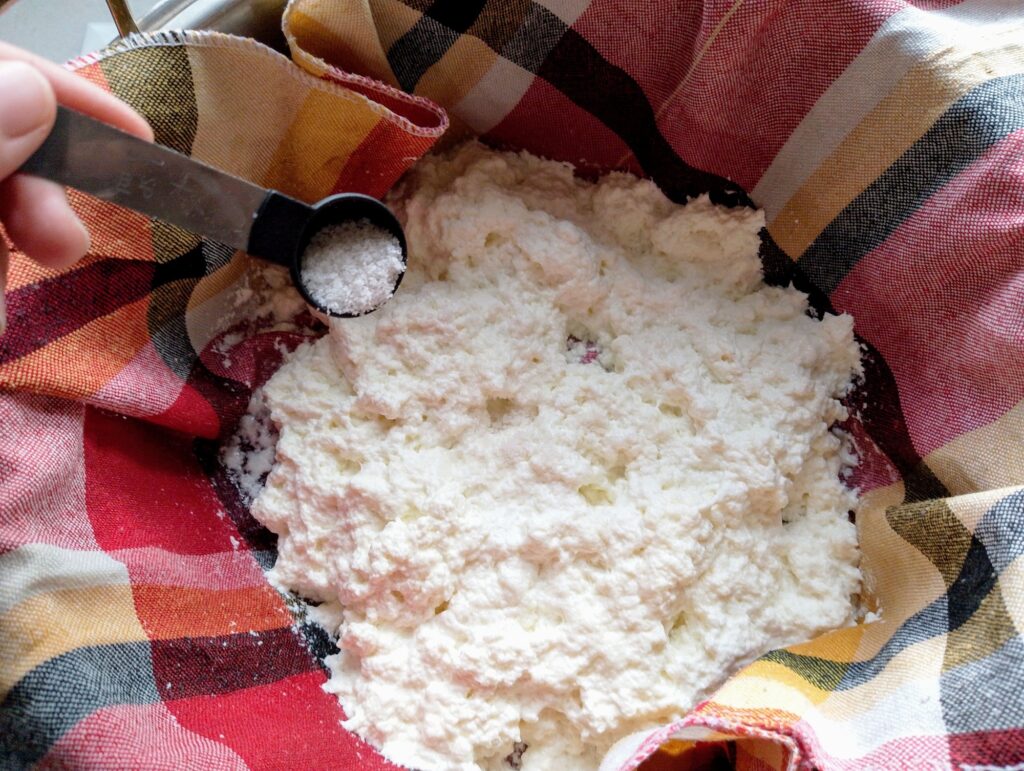
Sprinkle the salt evenly over the drained curds and gently fold it in. This not only seasons the cheese but also helps draw out any remaining moisture.
Step 6
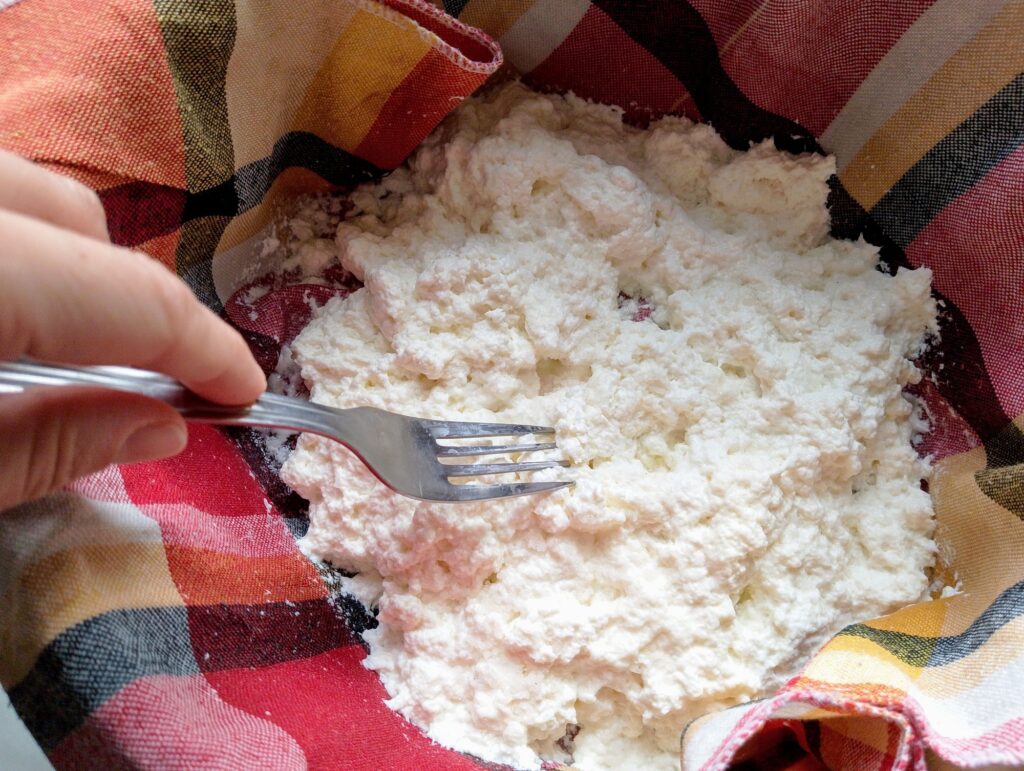
Use a fork to gently mix the salt into the curds, tasting as you go, until the flavor is just right for you. Mixing gently keeps the curds soft and creamy—overmixing can make them break down too much.
Step 7
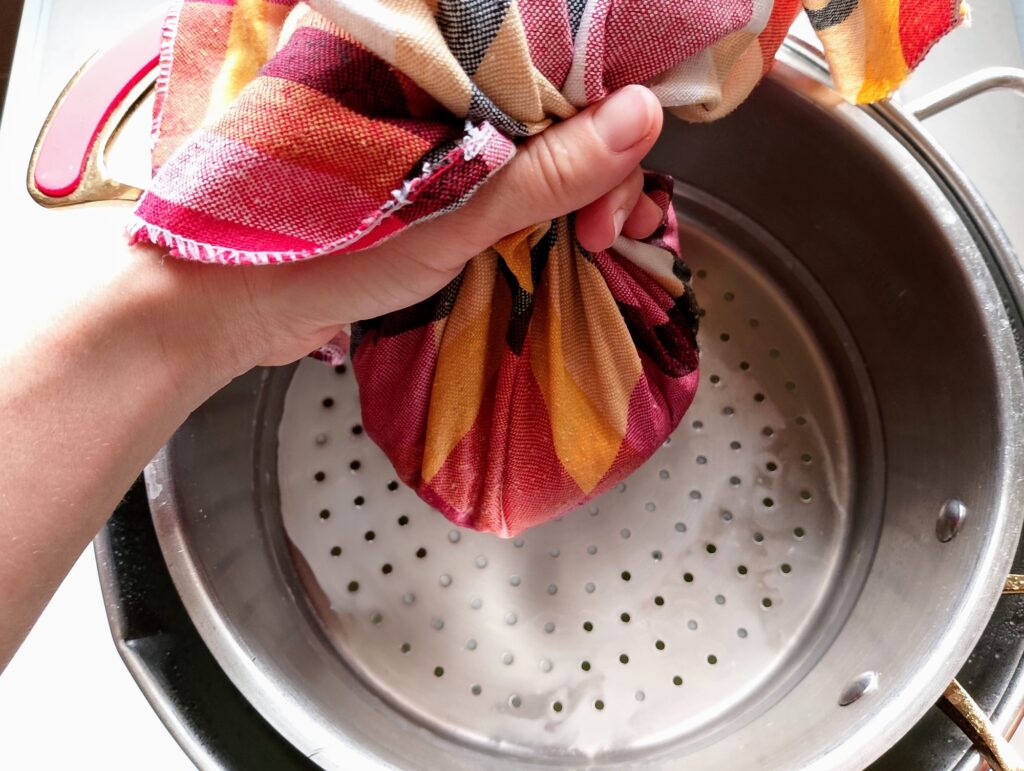
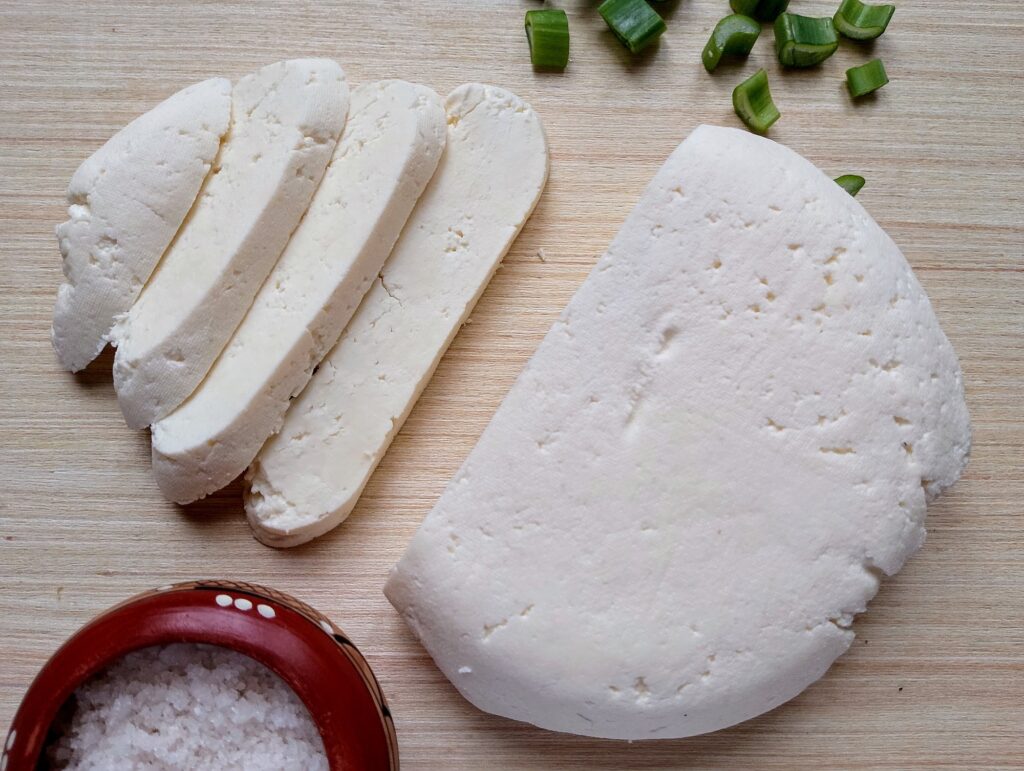
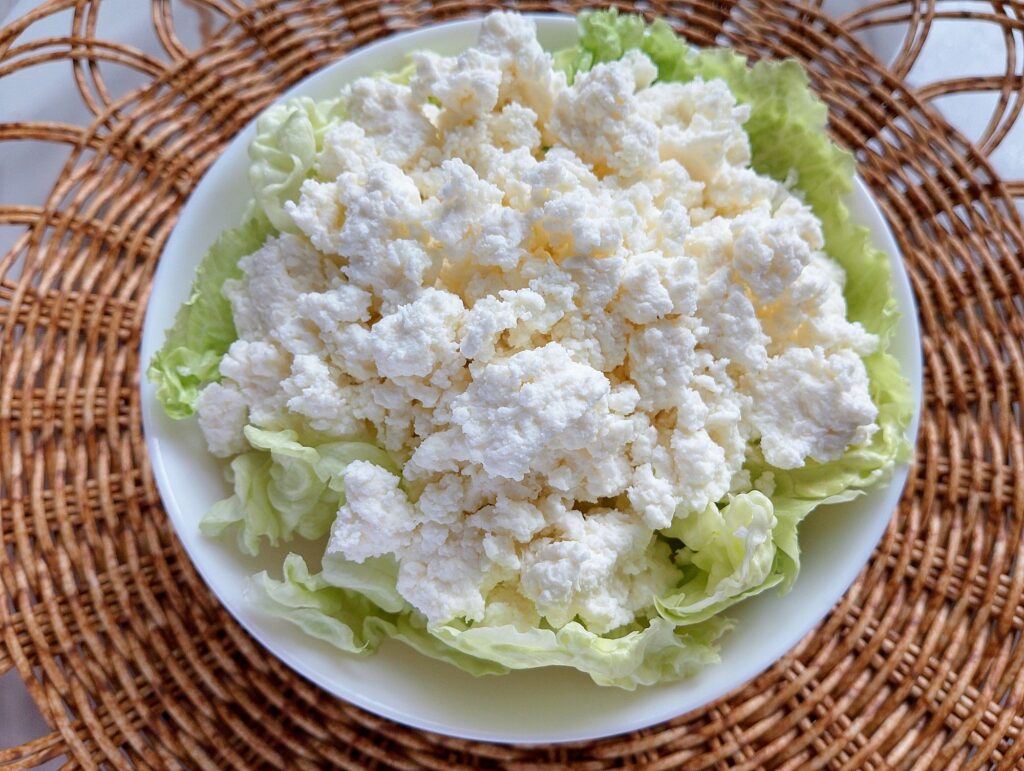
For a crumbly queso fresco, gather the curds in the cheesecloth and hang them for about 30 minutes to drain. For a firmer, sliceable cheese, twist the cheesecloth to keep the curds compact, return it to the colander, cover with a plate, and weigh it down with 1–2 pounds. A heavy can, a jar filled with water, or the base of a mortar works perfectly.
Step 8
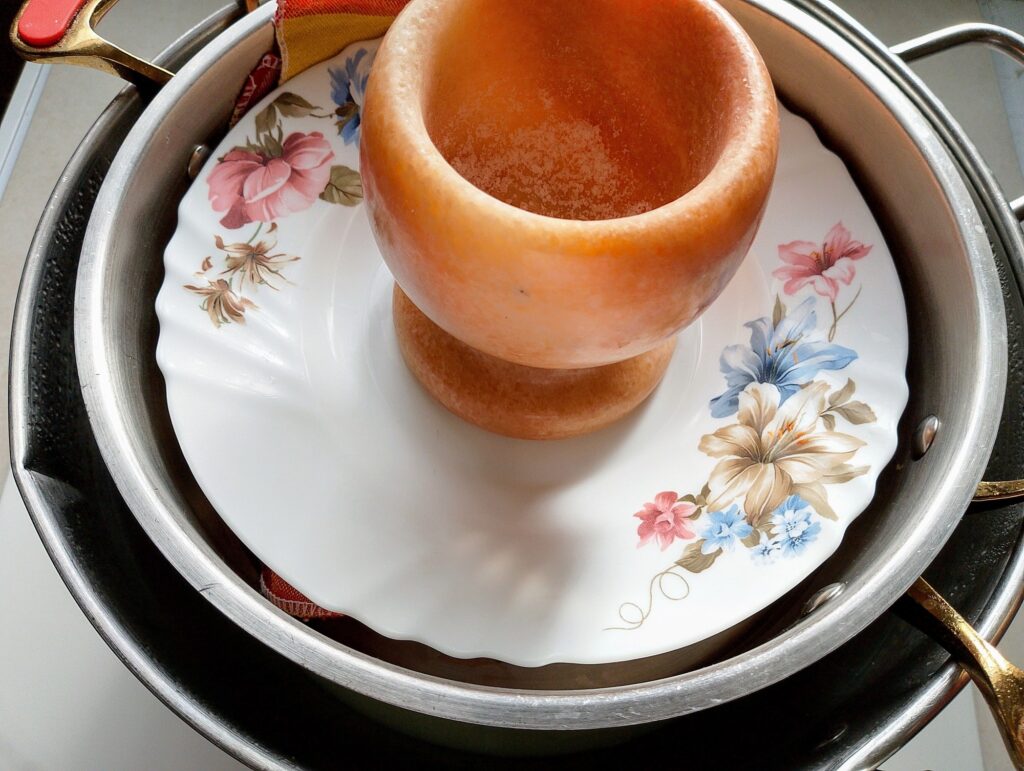
Press the cheese for 1 hour. Once it has reached your desired firmness, remove it from the press and refrigerate until well chilled before slicing. Chilling helps the cheese firm up even more and makes it easier to slice cleanly.
Step 9
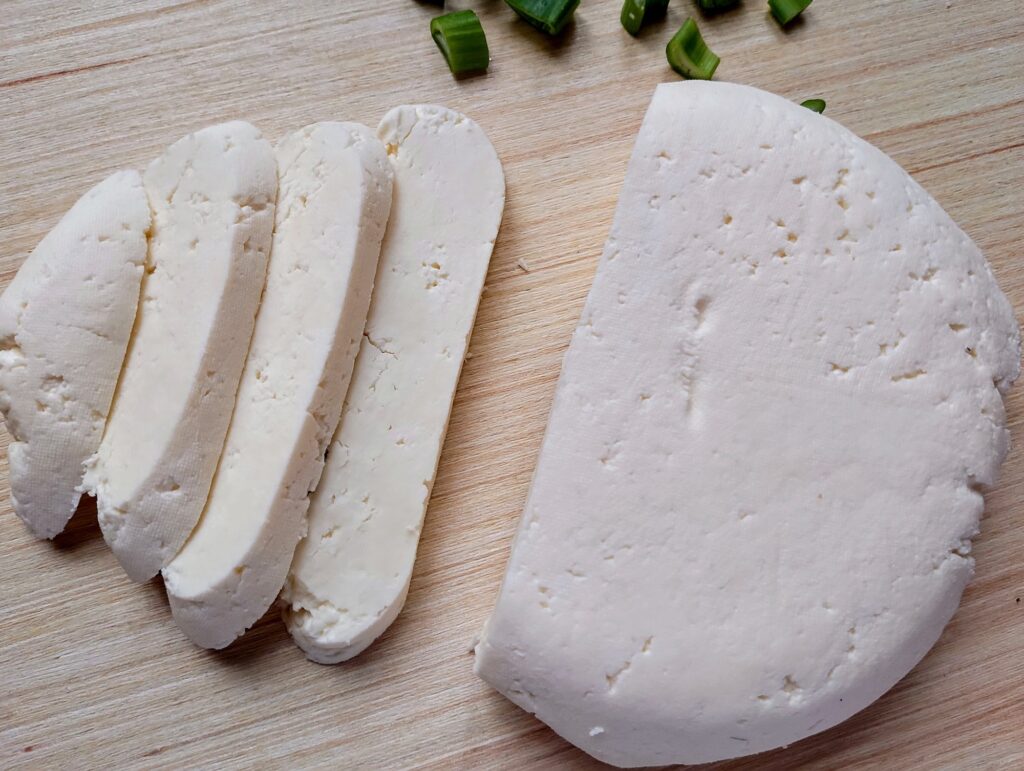
Once your queso fresco is thoroughly chilled, slice it or cut it into cubes using a large, sharp knife. For clean cuts, wipe your knife between slices—this keeps the edges neat and prevents the cheese from sticking.
Tips for the Best Queso Fresco
- Best milk temperature for clean curds. The best milk temperature for clean curds is around 185°F (85°C). Heating milk to this temperature denatures the proteins just enough to allow them to coagulate properly when you add acid, producing firm, tender curds that separate cleanly from the whey.
- How much vinegar to use (and what happens if you use too much). For 1 gallon (3.8 L) of milk, use about ½ cup of vinegar (or lemon juice).If you use too much vinegar, the curds can become too sour or crumbly, and the cheese may taste bitter.
- Why gentle handling matters. Queso fresco curds are fragile. Stirring, lifting, or pressing too roughly can break them into tiny pieces, making the cheese overly crumbly or uneven in texture. Handling gently helps the curds stay intact, drain properly, and develop soft, tender texture.
Common Mistakes to Avoid
- Overheating the milk. If the milk gets too hot (above about 185°F / 85°C), the proteins can denature too much. This makes the curds tough, rubbery, or dry instead of soft and crumbly.
- Stirring too aggressively. Stirring too aggressively can break up the curds before they have a chance to form properly. This can lead to small, fragmented curds that are harder to drain and press, resulting in a crumbly or uneven texture.
- Over-pressing (why queso fresco should stay crumbly). Over-pressing is a mistake because queso fresco should be soft and crumbly, not firm like paneer or cheddar. Pressing too long or with too much weight squeezes out too much whey, making the cheese dense, dry, and less flavorful.
- Using ultra-pasteurized milk. Using ultra-pasteurized milk is a common mistake because the high heat treatment denatures the proteins too much. This prevents the milk from forming proper curds, so your queso fresco may turn out soft, grainy, or fail to set at all. I am using raw milk in this recipe, but feel free to use full fat pasteurised milk if you don’t have access to raw milk – your cheese will still turn out great!
How to Store Queso Fresco
- Store in an airtight container in the fridge for up to 5 days.
- Keep wrapped in cheesecloth or parchment to maintain moisture, or place it in an airtight container.
- You can also freeze queso fresco for up to 2 months, but texture may change slightly. It can get a little more crumbly after defrosting. If you plan to crumble it over tacos or salads, then this of course won’t be an issue.
What Do I Do With Queso Fresco?
- Sprinkle it over tacos, enchiladas, fajitas, and quesadillas.
- Crumble it onto soups, chili, and bean dishes just before serving.
- Mix it into scrambled eggs, breakfast casseroles, and omelets.
- Scatter it over roasted vegetables.
- Pressed queso fresco is great in sandwiches.
- Pressed and cubed, it can be added to salads in place of feta.
- Because it doesn’t melt smoothly, it is best to use queso fresco as a finishing cheese rather than a cooking cheese.
Substitutions & Comparisons
- Can I use queso fresco in place of feta? Yes you can, in many cases, for example in salads, as a topping for roasted veggies, or in tacos. It is however less salty and tangy than feta, so you may need to adjust the seasoning of your dish when using it.
- Can I replace mozzarella with queso fresco? I would use it to replace mozzarella in salads, but not in cooked dishes. It doesn’t melt like mozarella when heated (it softens but stays crumbly), so it won’t give you a good texture in pizza or baked pasta.
- When substitutions work — and when they don’t. Queso fresco works great as a crumbly topping, in cold dishes, salads, or fresh Mexican-style dishes. It however doesn’t work well when you need a melting cheese, like for grilled cheese, pizza, or baked casseroles that require gooey texture.
Recipe FAQ
Enjoy Your Homemade Cheese!
I hope you enjoy making—and tasting—this simple, versatile Mexican cheese! Home cheesemaking is a fun and delicious hobby, and starting with fresh cheeses like this one means you don’t need large amounts of milk or any special equipment to get started. If you try this recipe, I’d love to hear how it turns out in the comments. For more from-scratch, old-fashioned recipes, subscribe to my newsletter to get new recipes and subscriber-only resources delivered straight to your inbox.
More Raw Milk Cheese Recipes
Raw Milk Queso Fresco
Equipment
- medium or large heavy bottomed pot
- food thermometer
- colander
- cheesecloth OR a clean tea towel
Ingredients
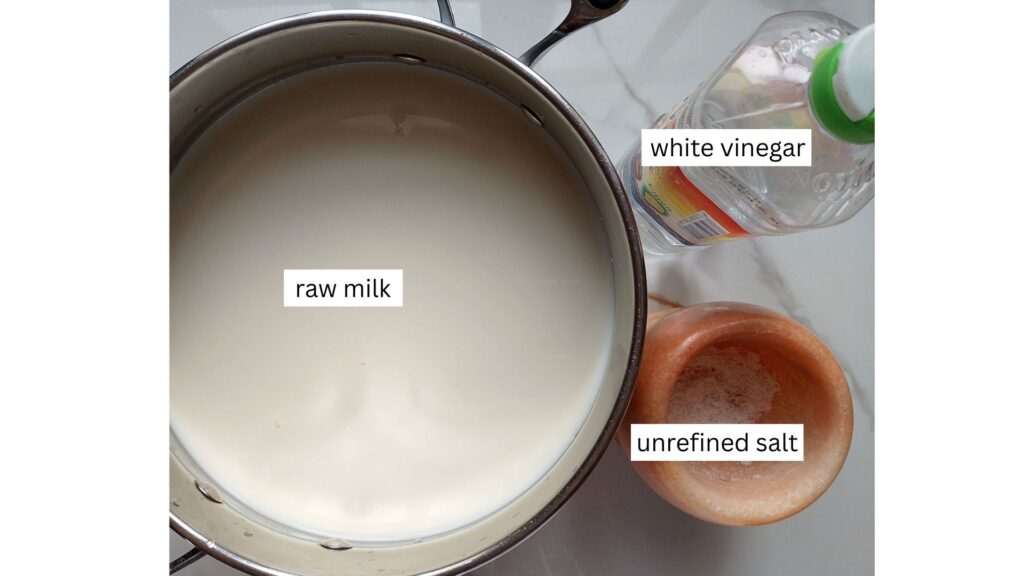
- 3 liters (10 cups) whole raw milk
- ⅓ cup white vinegar
- 1 tsp fine salt, or to taste
Instructions
- Heat the Milk: Pour raw milk into a heavy-bottomed pot and place over medium-high heat. Warm slowly to 185°F (85°C), stirring occasionally to prevent scorching.
- Curdle the Milk: Remove the pot from heat. Gradually add vinegar, stirring gently. Curds should form quickly. If whey still looks milky, add a little more vinegar, one tablespoon at a time.
- Rest the Curds: Let the milk sit undisturbed for 10 minutes to allow the curds to fully separate.
- Drain the Curds: Using a ladle or slotted spoon, transfer curds to a colander lined with cheesecloth or a tea towel, set over a bowl. Pour the warm whey over the curds to rinse gently. Let drain for 15 minutes.
- Salt the Curds: Sprinkle salt over the drained curds and mix gently with a fork, tasting as you go, until seasoned to your liking.
- For a crumbly queso fresco, gather curds in the cheesecloth and hang for 30 minutes.
- For firmer, sliceable cheese: Twist cheesecloth to keep curds compact, return to colander, cover with a plate, and weigh down with 1–2 pounds (a jar, can, or mortar works).
- Press & Chill: Press cheese for 1 hour. Remove from press and refrigerate until fully chilled.
- Serve: Slice or cube the pressed queso fresco with a sharp knife. Wipe your knife between cuts for neat edges.
Notes
- Serve fresh as a topping for salads, tacos, or roasted vegetables.
- Cube for snacking or add to sandwiches and breakfast dishes.
- Store in an airtight container in the fridge for up to 5 days.
- Keep wrapped in cheesecloth or parchment to maintain moisture.
- Freeze for up to 2 months, but texture may change slightly.