Beginner-Friendly Sourdough Focaccia: Overnight, Simple, Delicious
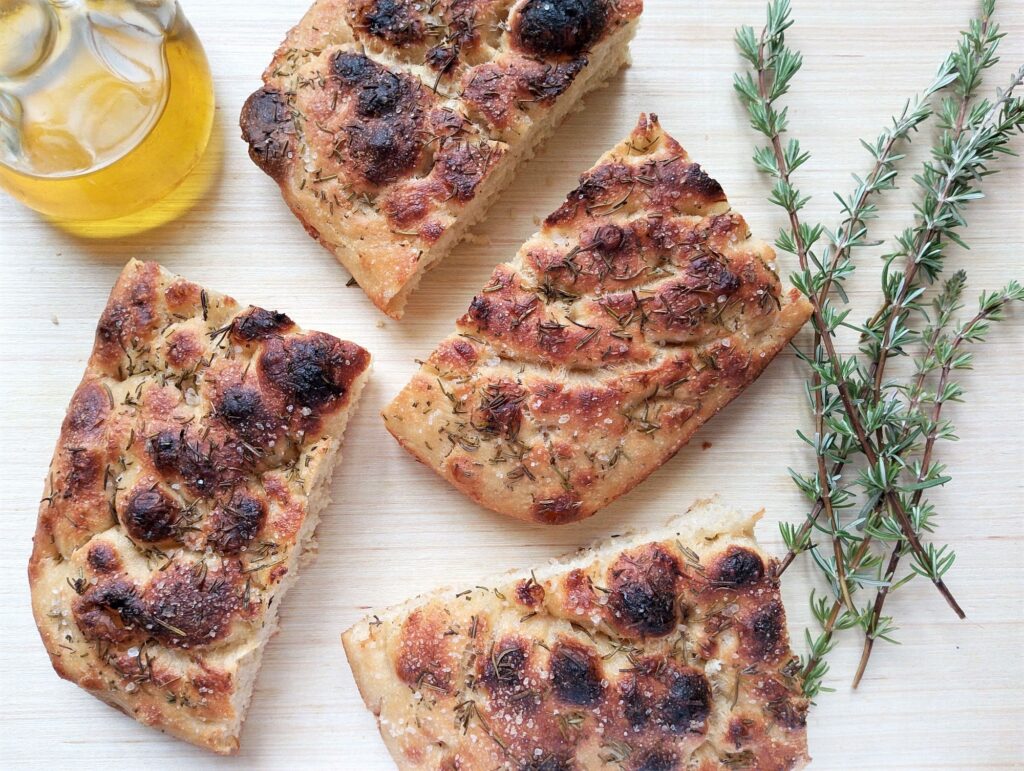
This easy overnight sourdough focaccia is perfect when you’re short a busy mom with very little time to spare but still want a delicious sourdough flatbread to serve alongside dinner. With just a few minutes of active prep, this recipe fits naturally into a busy day—you can mix the dough, do a few gentle stretches and folds while tending to other tasks, and let time do the rest. As the dough slowly ferments overnight in the refrigerator, it develops deep flavor and an airy texture. The next afternoon, you’ll simply bring it out, top it with fresh rosemary from your garden or local market, and bake it into a fragrant, golden, and beautifully puffy dinner side.
In this step-by-step tutorial, I’ll walk you through the entire process and share helpful troubleshooting tips, along with storage and freezing instructions, so you can make your first sourdough focaccia with confidence.
Why You’ll Love This Recipe
- Effortless but impressive: With just a few minutes of hands-on work, you get a bakery-worthy focaccia that smells amazing and tastes even better.
- Deep, tangy flavor: Thanks to the sourdough starter and the cold ferment, this bread develops a rich, nutty flavor that makes plain olive oil taste like magic.
- Fluffy, airy crumb with golden, crisp edges: High hydration and careful fermentation create that soft, pillowy inside and crisp outside that makes this focaccia so satisfying.
- Part of a wholesome, real-food lifestyle: Using a touch of whole wheat (25% to be exact) and sourdough starter, this recipe is more nourishing than your average store-bought focaccia—perfect for feeding your family well.
- Versatile: great served alongside soups, stews, and main dish salads.
- Confidence-building: Once you make this, you’ll see just how forgiving sourdough can be. This recipe is a great intro into sourdough baking because the technique is simple and gives lovely results.
Ingredients
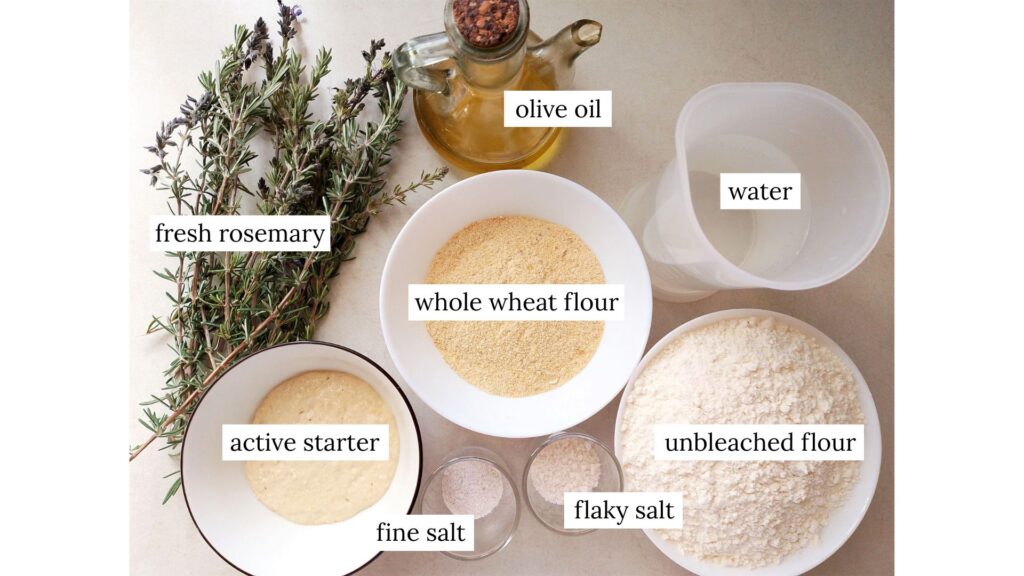
- Active sourdough starter: the heart of flavor and rise. Use bubbly starter at its peak (or just past the peak) for best results.
- Flour: bread flour is best because it gives the bread its light, airy crumb. I also use some whole wheat in this recipe for more nutrient density.
- Olive oil: encourages soft crumb and crisp top. I like to use extra virgin olive oil for best flavor.
- Salt: fine sea salt in the dough and flaky salt for sprinkling on top just before baking. You can also use coarse sea salt if you don’t have flaky sea salt (that’s what I did!).
- Fresh rosemary: I recommend fresh because it is more aromatic than dried. Fresh thyme can also be used for a different flavor.
- I use gram measurements in this recipe because they are more accurate than cup measurements. In my opinion they give better results if you are a beginner baker.
- Full list of ingredients with exact amounts can be found in the recipe card below.
Tools & Equipment
- digital scale
- mixing bowl
- wooden spoon
- 9×13 inch metal baking pan or similar
How to Make Overnight Sourdough Focaccia (Step-by-Step)
Step 1
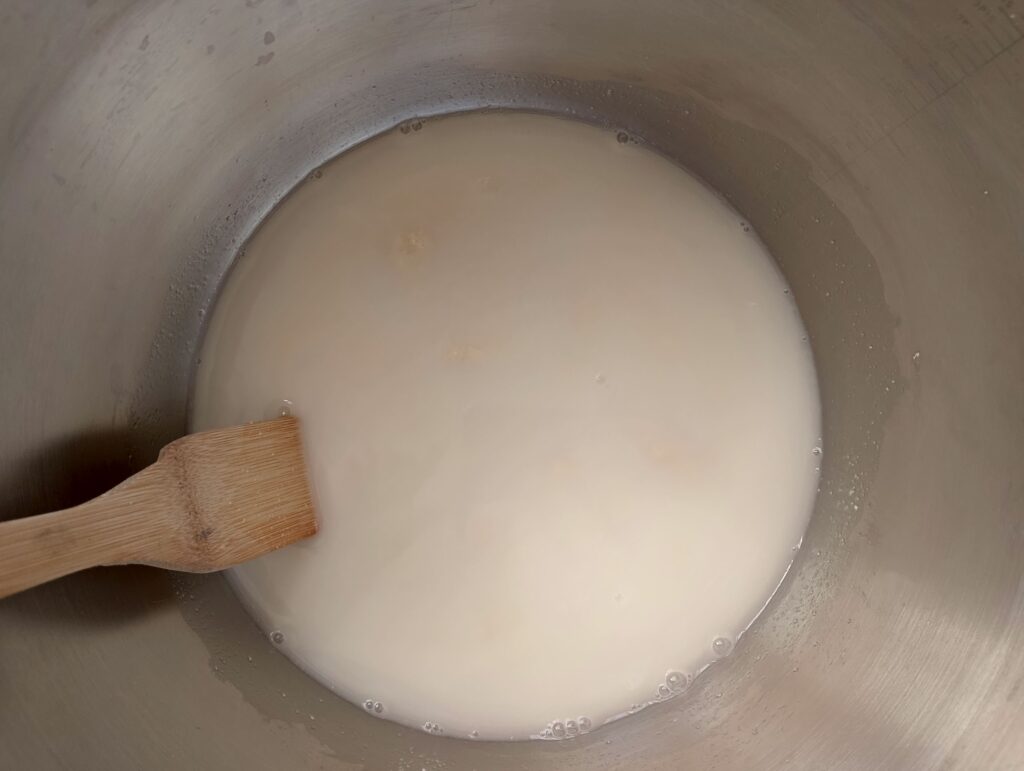
In a large mixing bowl, combine the water and active sourdough starter. Stir gently until the starter is fully dissolved and the mixture is smooth.
Step 2
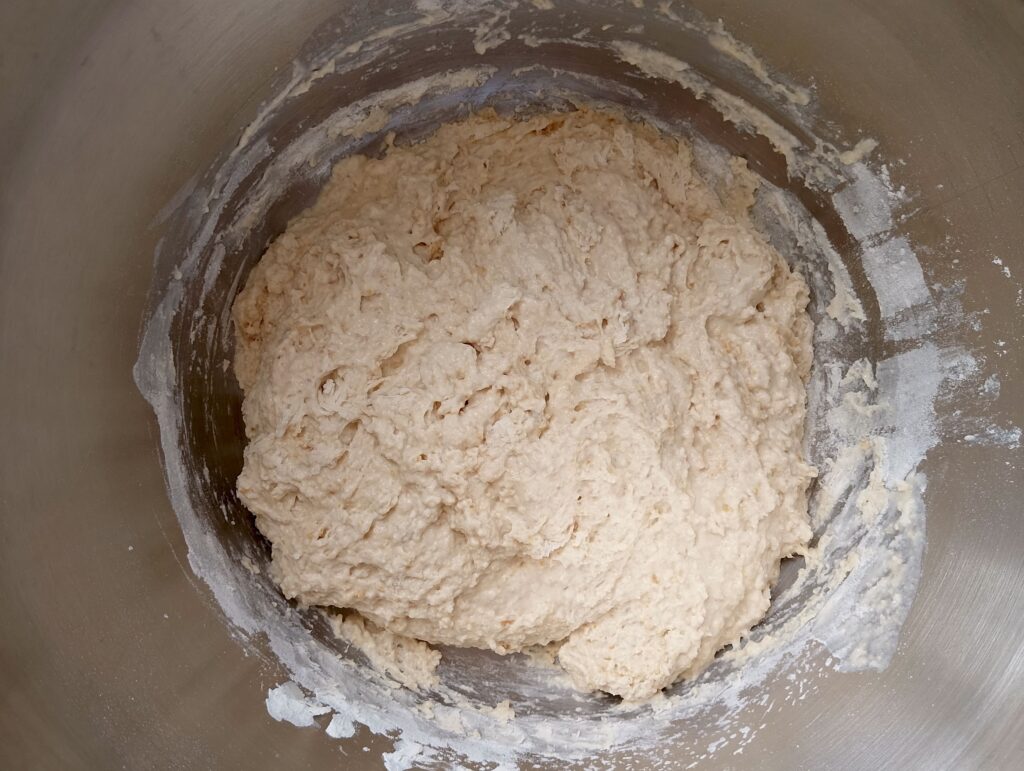
Add all the flour to the bowl and mix until a shaggy dough forms, making sure there are no dry patches remaining. Let the dough rest for about 30 minutes. This short rest, called an autolyse, helps the flour fully absorb the water and makes the dough easier to stretch and fold later.
Step 3
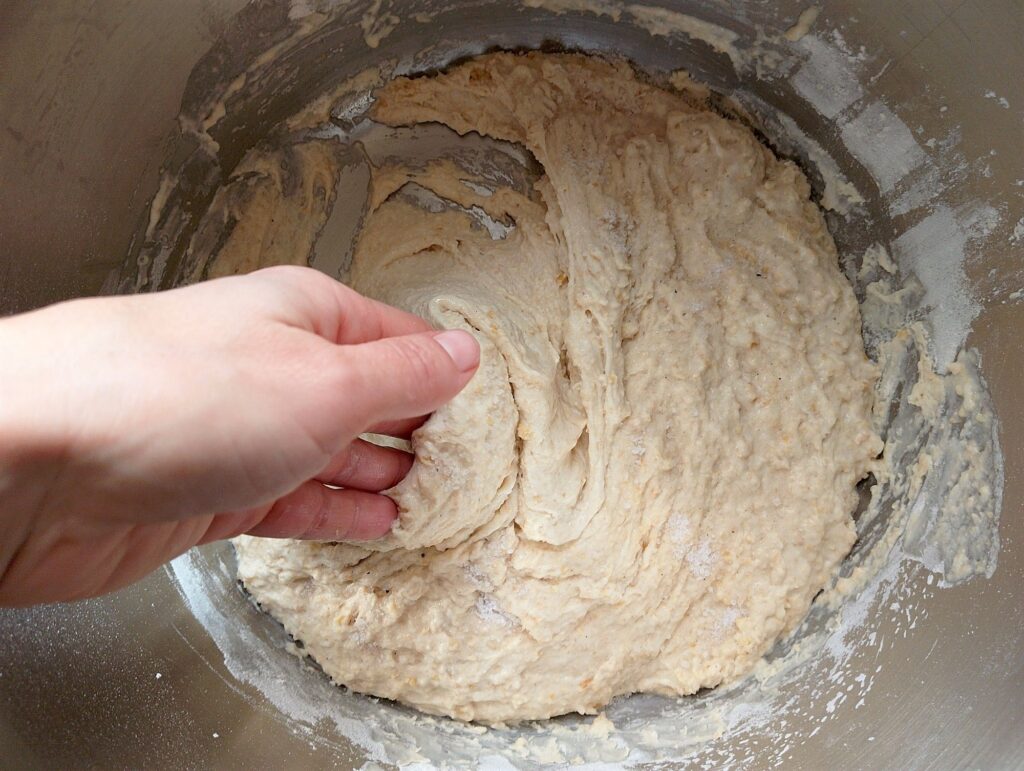
Sprinkle the fine salt evenly over the dough. Using well-wetted hands, incorporate it by gently pinching and folding the dough until the salt is fully mixed in. Wetting your hands generously prevents the sticky dough from sticking and makes this step much easier.
Step 4
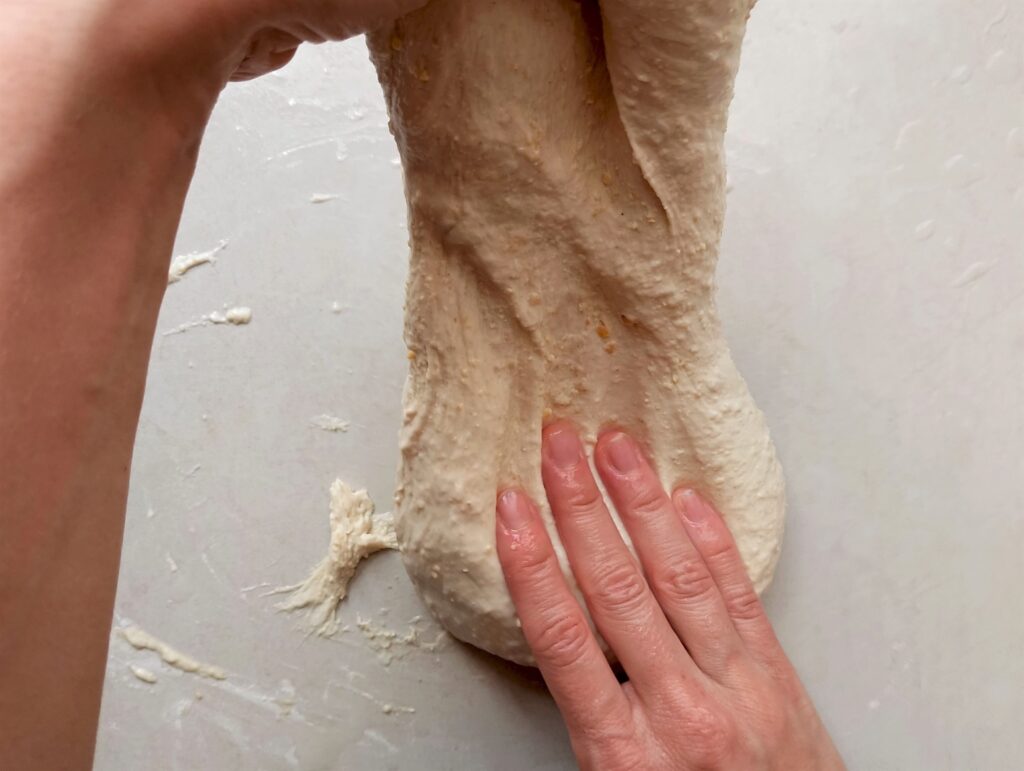
Over the next 2 hours, perform 3–4 sets of stretches and folds, spacing each about 30 minutes apart. Wet your hands and the work surface generously to prevent sticking. Gently lift the top of the dough upwards and away from you, while supporting the rest of the dough with your other hand, then fold it back over itself.
Step 5
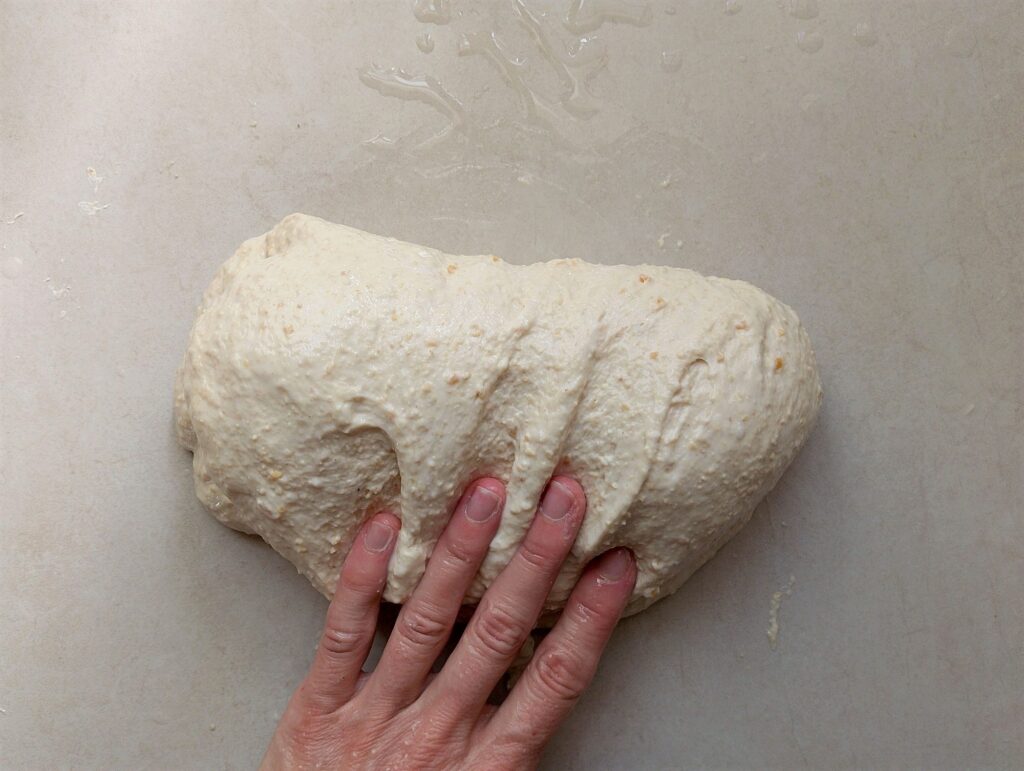
Repeat around the dough until all sides have been stretched and folded.There is no need to cover the dough between stretches and folds like you would with bread – it’s so wet it won’t dry out.
Step 6
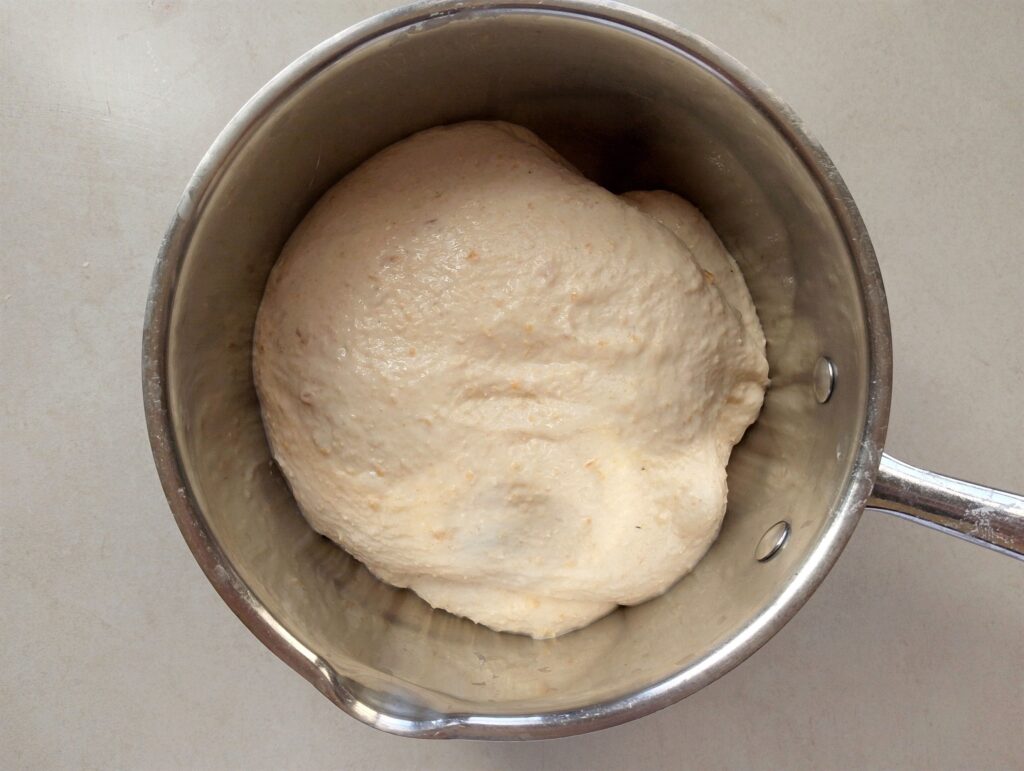
Once you’ve completed the stretches and folds, transfer the dough to a clean bowl and cover it with plastic wrap or a damp tea towel. Let it rise until it has increased by about 50–70%—don’t let it double. This usually takes around 3 hours, but may take longer in a cooler kitchen. Once it has risen, move the dough to the refrigerator for a slow overnight ferment of 12–48 hours. This long, cold fermentation develops deep flavor and gives the focaccia its airy texture.
Step 7
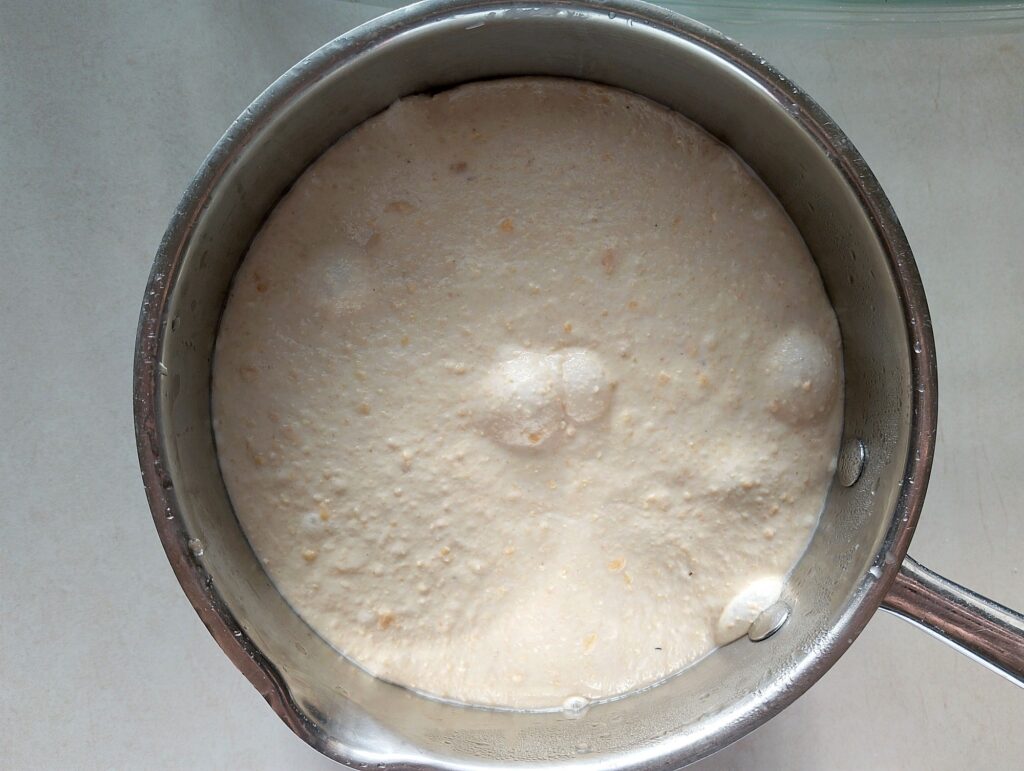
After the dough has cold-proofed in the refrigerator for 12–48 hours (24 hours is usually the sweet spot for flavor and ease of handling), remove it from the fridge for the final proof before baking.
Step 8
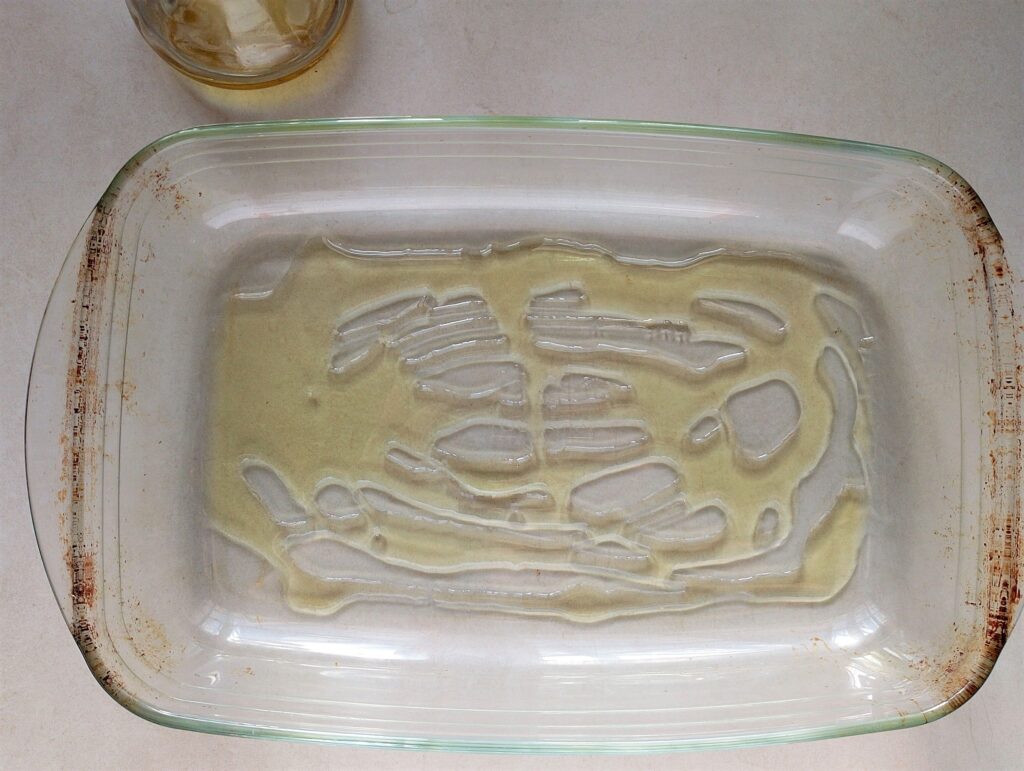
Generously oil your pan with olive oil. A metal pan works best, since focaccia can stick to glass even when well-oiled—but if a glass pan is what you have, that works too! I am using a glass pan here because I don’t have a metal pan in the right size.
Step 9
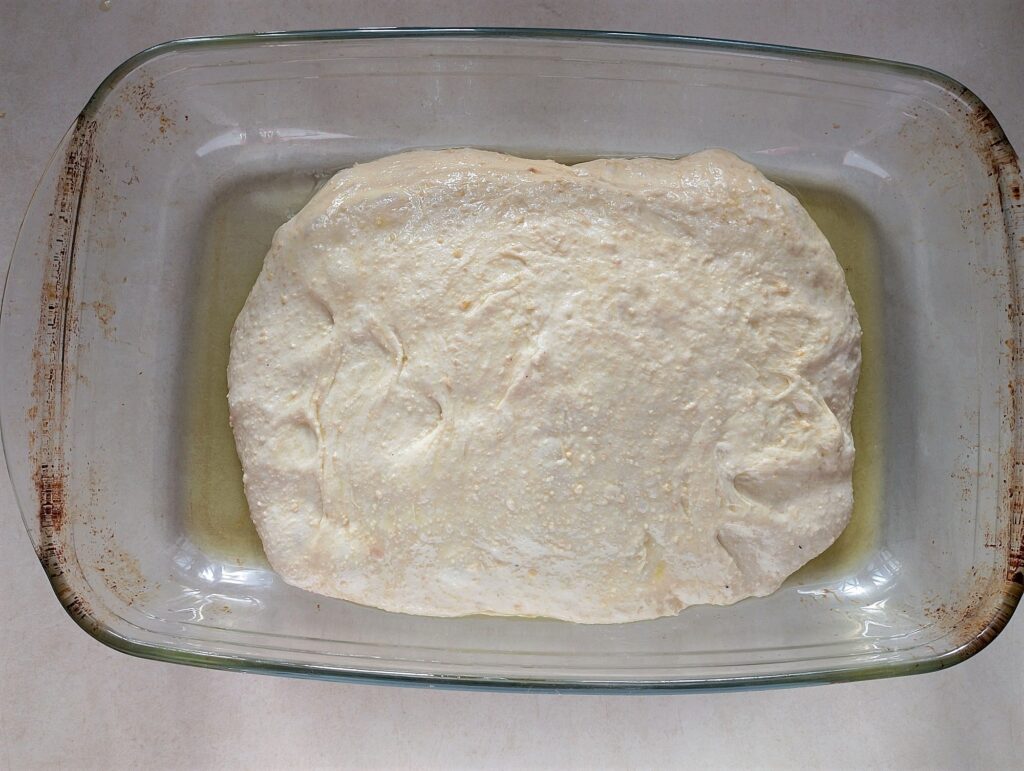
Gently tip the dough into the prepared pan. Then carefully flip it over so that both sides are coated with oil—this helps prevent sticking and gives the focaccia a golden, crispy bottom.
Step 10
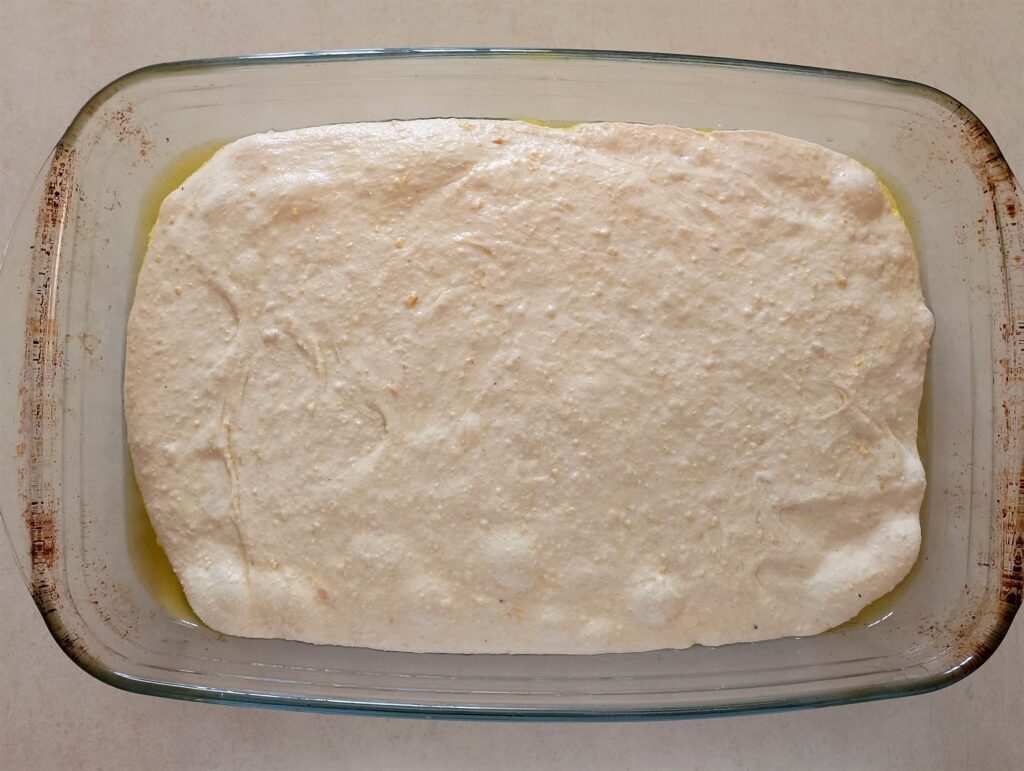
Let the dough rest in the pan for 2–4 hours at room temperature, either uncovered or lightly covered. I usually cover mine with a large domed plastic bag—avoid anything that touches the dough, as it will stick. You want the dough to become puffy and jiggly, with some visible bubbles forming on the surface, just like in the photo above.
Step 11
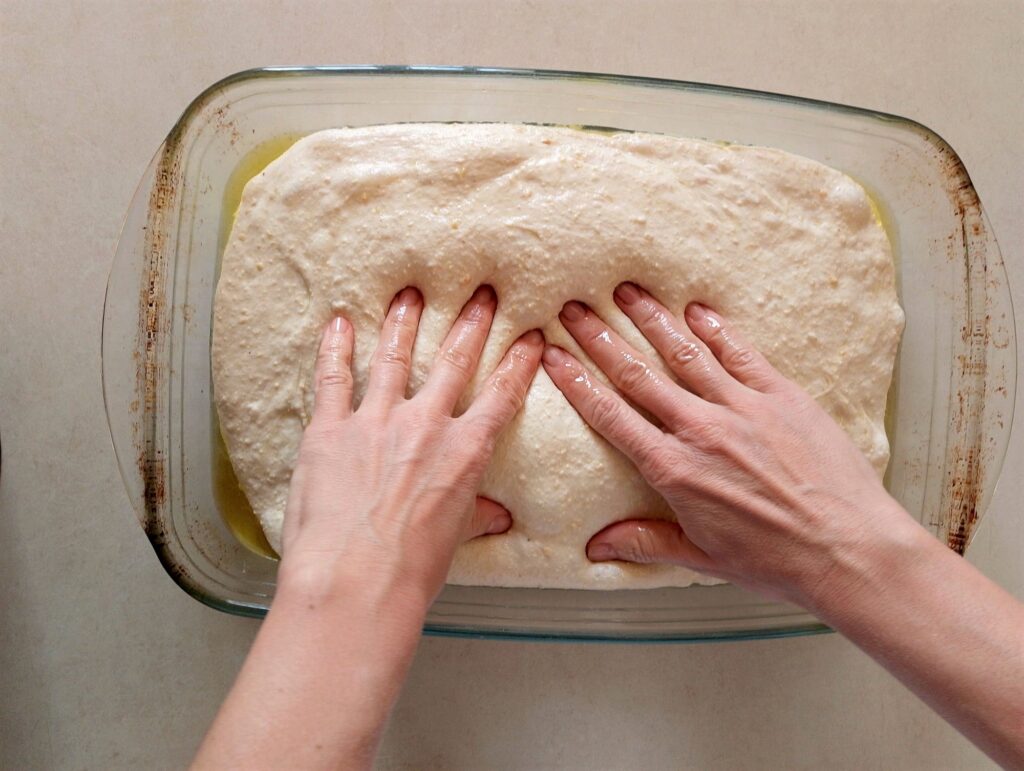
Once your focaccia has finished resting, preheat your oven to 230°C (450°F). Generously oil your hands and dimple the dough deeply, pressing all the way down—this is, for me, the most fun part of making focaccia! The dimples help hold olive oil and toppings while giving the bread its fun texture.
Step 12
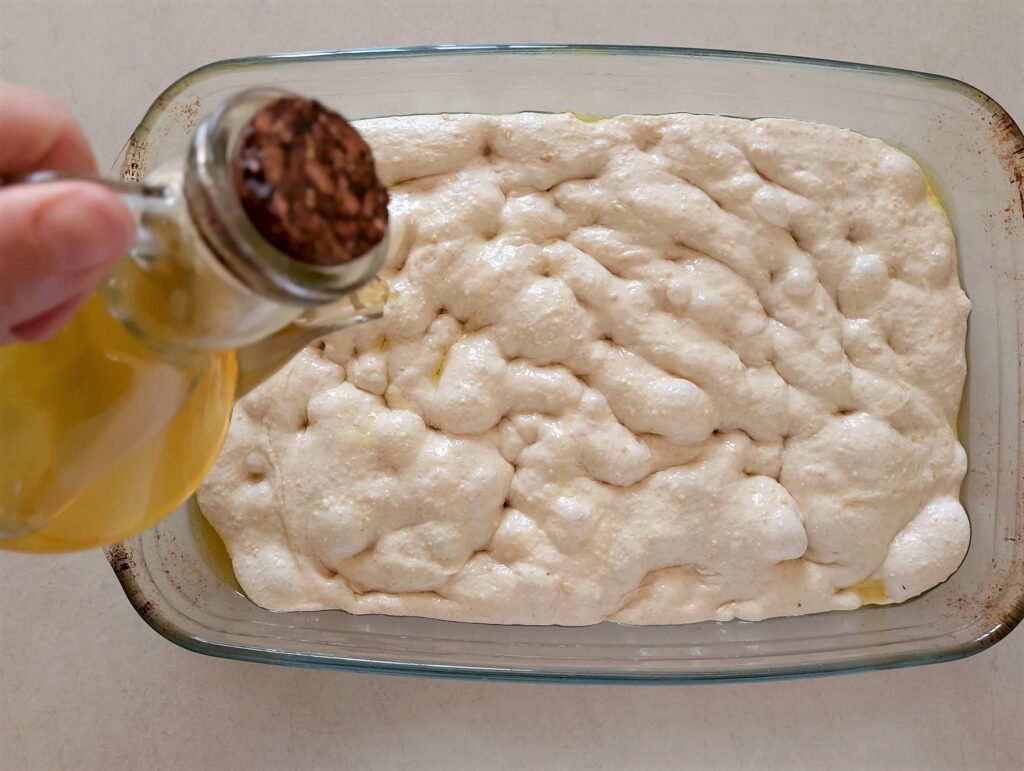
Drizzle a generous amount of olive oil into the dimples you just created. This helps keep the focaccia moist, adds flavor, and gives it that beautiful golden finish when baked.
Step 13
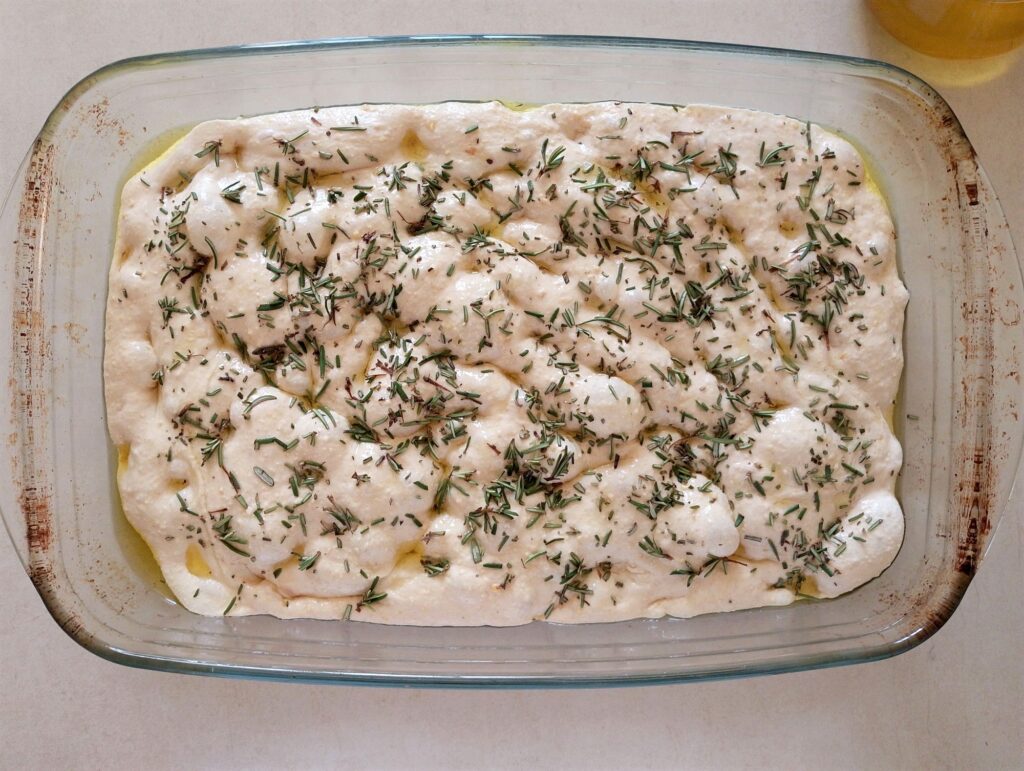
Sprinkle chopped fresh rosemary evenly over the focaccia. The aroma is incredible—there’s nothing quite like the fresh, herbal scent of rosemary!
Step 14
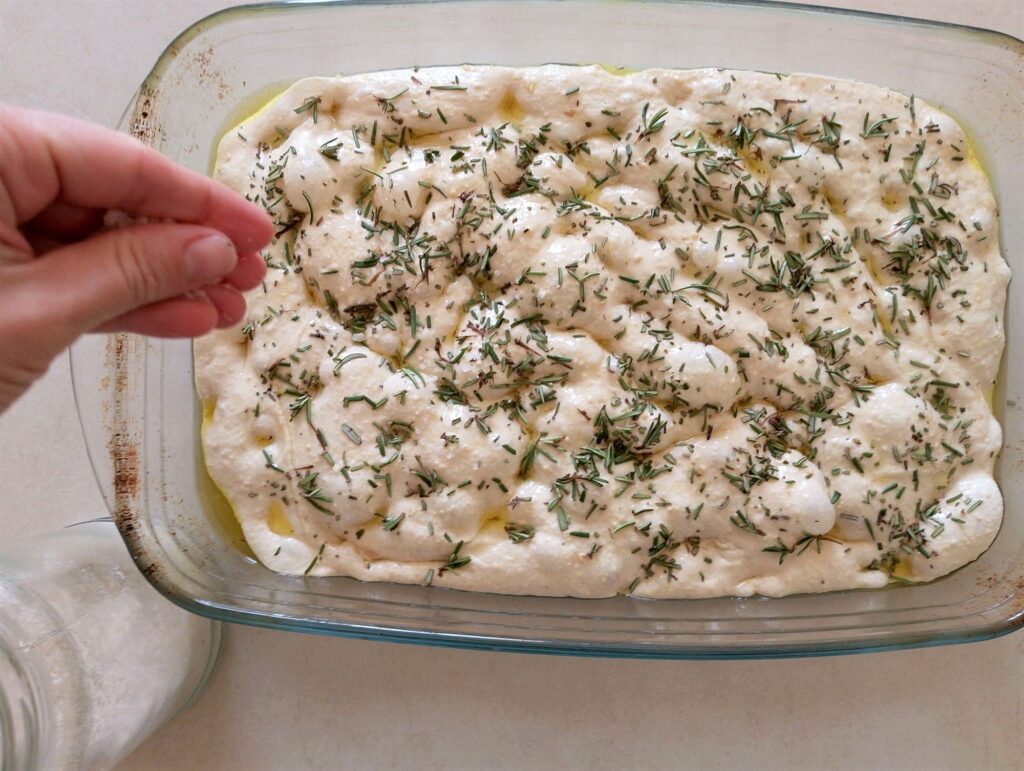
Finish by sprinkling a generous pinch of flaky sea salt over the surface. If you don’t have flaky salt, coarse sea salt works just fine—either will add that perfect burst of flavor and texture.
Step 15
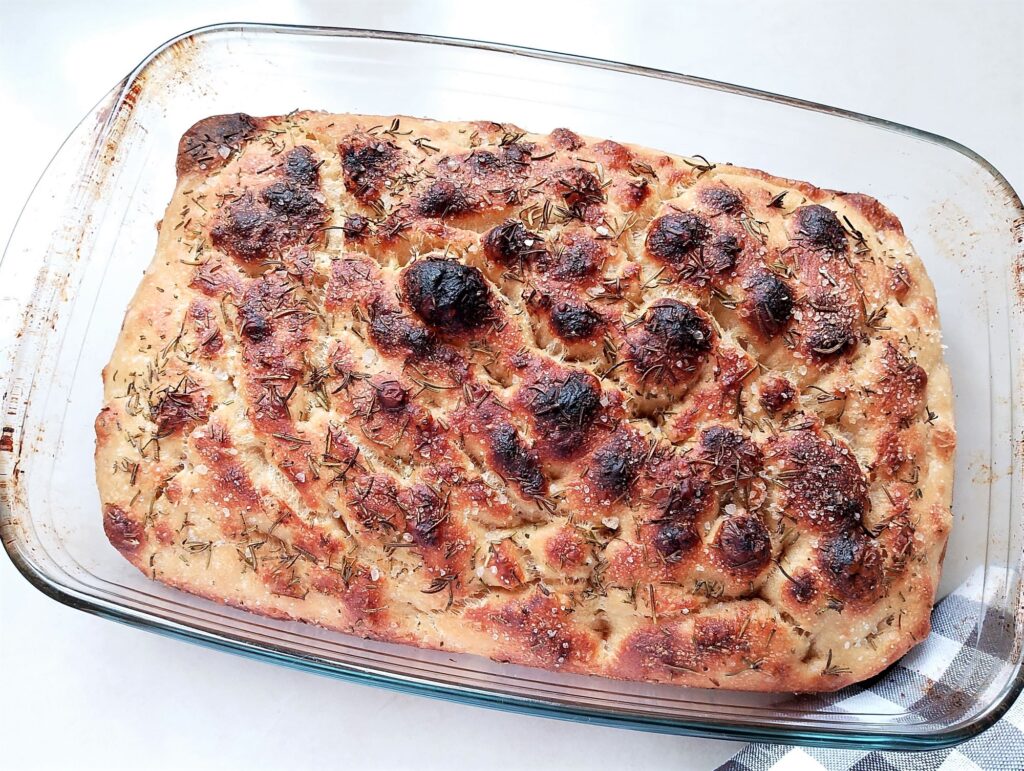
Bake the focaccia for 20–25 minutes, until the top is a deep golden brown, the edges are crisp, and the bottom is nicely colored—you can carefully lift it to check. Once baked, let it cool for at least 20 minutes before slicing.
Avoiding Common Mistakes
- Dough too sticky: Focaccia dough should feel wetter and stickier than regular bread dough — that’s what creates the airy crumb. Instead of adding lots of flour, use wet or well-oiled hands and do gentle stretch-and-folds to build structure.
- Dense focaccia: Density usually comes from underproofing, weak starter, or adding too much flour during handling. Make sure your starter is bubbly and active, and let the dough get visibly puffy before baking so those air pockets have time to develop.
- Uneven rise: An uneven rise often means the dough was handled too roughly or proofed in a spot with inconsistent temperature. Try to degas as little as possible when transferring the dough to the pan, and let it rise in a warm, draft-free place so it puffs evenly across the surface.
Storage & Freezing Tips
- Room temperature: wrap in tea towel or airtight container, 1–2 days.
- Fridge: up to 5 days, wrapped well.
- Freezer: slice first, wrap tightly to prevent freezer burn, then freeze for up to 2 months.
- Reheating: in the oven at 350°F for 5–10 min. You can also toast slices.
Recipe FAQ
Serving Ideas
- With hearty meals: Tear or slice focaccia to serve alongside stews, soups, and fresh salads. Its crispy edges and tender crumb soak up broths and dressings beautifully.
- For breakfast or brunch: Pair slices with scrambled or fried eggs for a quick, satisfying start to your day.
- As a snack or appetizer: Tear into pieces and serve with dips—think my creamy cottage cheese dip, hummus, or olive tapenade. Perfect for little hands or grazing with friends.
- Sandwich style: Split horizontally or slice thickly and fill with cold cuts or cheese for an easy, flavorful lunch.
- Meal prep helper: Make a batch ahead of time, slice, and freeze. Reheat to accompany any meal or snack.
Let’s Bake
I hope you enjoy this easy overnight sourdough focaccia and that it makes meal prep simpler while adding a delicious touch to your dinners. I love working with focaccia dough! It starts as a sticky, wet blob, but after a few gentle stretches and folds and an overnight ferment, it transforms into a spongy, airy flatbread with those signature big holes. Dimpling the dough before baking is one of my favorite, super fun steps that makes it look and taste irresistible.
If you enjoyed this recipe and want more approachable, from-scratch ideas like this, I’d love for you to subscribe to my weekly newsletter for tips, recipes, and kitchen inspiration delivered straight to your inbox.
More Delicious Sourdough Bread Recipes
Sourdough Whole Wheat Blend Naan

Overnight Sourdough Focaccia with Rosemary and Flaky Salt
Equipment
- digital scale
- mixing bowl
- wooden spoon
- 9×13 inch baking pan or similar (metal pan is best)
Ingredients
For the dough
- 375 g bread or strong white flour
- 125 g whole wheat flour
- 400 g water
- 100 g active sourdough starter
- 10 g fine sea salt
For toppings
- Extra virgin olive oil
- 2 Tbsp Finely chopped fresh rosemary
- Flaky salt
Instructions
- Mix starter and water: In a large mixing bowl, combine the water and active sourdough starter. Stir gently until the starter is fully dissolved and the mixture is smooth.
- Add the flour: Add all the flour to the bowl and mix until a shaggy dough forms, making sure there are no dry patches. The dough should look rough and slightly sticky—that’s perfect!
- Rest (autolyse): Let the dough rest for about 30 minutes. This helps the flour fully absorb the water, making the dough easier to handle later.
- Incorporate salt: Sprinkle the fine salt evenly over the dough. Using well-wetted hands, pinch and fold the dough until the salt is fully incorporated. Wetting your hands generously prevents sticking.
- Perform stretches and folds: Over the next 2 hours, perform 3–4 sets of stretches and folds, spacing each about 30 minutes apart. Wet your hands and work surface generously. Lift the top of the dough gently and fold it back over itself, repeating around the dough until all sides have been stretched and folded.
- Bulk rise: Transfer the dough to a clean bowl and cover with plastic wrap or a damp tea towel. Let it rise until it has increased by about 50–70% (don’t let it double). This usually takes around 3 hours, but may take longer in a cooler kitchen.
- Cold ferment: Move the dough to the refrigerator for 12–48 hours. This slow, cold fermentation develops deep flavor and an airy texture.
- Final proof: Remove the dough from the fridge for final proofing. Let it come closer to room temperature while you prepare your pan. (24 hours in the fridge is usually the sweet spot for flavor and easy handling.)
- Prepare the pan: Generously oil your pan with olive oil. Metal pans work best here as focaccia tends to stick to glass.
- Transfer the dough: Gently tip the dough into the pan. Carefully flip it so both sides are coated with oil—this prevents sticking and helps create a golden bottom.
- Rest and puff: Let the dough rest in the pan at room temperature for 2–4 hours, uncovered or lightly covered with a large domed plastic bag (avoid anything that touches the dough). The dough should become puffy, jiggly, and show some visible bubbles.
- Dimple the dough: Preheat your oven to 230°C (450°F). Generously oil your hands and dimple the dough deeply, pressing all the way down. This helps hold olive oil and toppings while giving the focaccia its signature texture.
- Add olive oil and toppings: Drizzle olive oil into the dimples you created. Sprinkle chopped fresh rosemary evenly over the surface. Finally, finish with a generous pinch of flaky sea salt.
- Bake: Bake for 20–25 minutes, until the top is deeply golden, the edges are crisp, and the bottom is nicely colored—you can lift it carefully to check.
- Cool and serve: Let the focaccia cool for at least 20 minutes before slicing. Enjoy as a dinner side, for sandwiches, or simply on its own!
Notes
- Room temperature: wrap in tea towel or airtight container, 1–2 days.
- Fridge: up to 5 days, wrapped well.
- Freezer: slice first, wrap tightly to prevent freezer burn, then freeze for up to 2 months.
- Reheating: in the oven at 350°F for 5–10 min. You can also toast slices.