How to Make Fluffy Sourdough Discard Scones (No Heavy Cream, Easy & Flaky)
These fluffy sourdough discard scones come together in just 40 minutes and make a buttery, tender treat—perfect with jam and cream for an easy afternoon tea or tucked into a picnic basket. They’re also a lovely way to show off your homemade butter or jam! I’ve included my best tips for keeping your sourdough discard scones light and fluffy, plus an overnight option if you’d like to prep ahead, and simple freezing instructions for longer storage. Let’s get baking!

What Are Sourdough Discard Scones?
Scones are a classic British bake—somewhere between a cake and a biscuit, with a tender, lightly crumbly texture. I first fell in love with them while living in Scotland as a student. You’ll find them in just about any old-fashioned tea shop, served simply with butter and jam and, of course, a good cup of tea.
Sourdough discard scones are simply traditional scones made with unfed sourdough starter. The discard adds a subtle tang and a deeper, more complex flavor, without making the scones taste sour. Since the starter isn’t active enough to provide lift on its own, baking powder is still used to help them rise.
Using about 1/2 cup of discard, these sourdough discard scones are a practical and delicious way to use up what might otherwise go to waste. The result is rich, buttery scones with a soft, tender crumb—just as they should be.
Tips For The Best Scones
Sourdough discard scones can be incredible—but they’re also easy to accidentally make dense, flat, or dry. The difference between average scones and bakery-level scones comes down to using a few simple, but powerful techniques. Here they are:
Keep Everything Cold
This is the single most important rule for making truly good sourdough discard scones. Cold ingredients mean better texture—those little pockets of butter create a lighter, more tender crumb. Use frozen, grated butter, and if you want to go a step further, chill your tools too (mixing bowl, pastry cutter, even your flour if your kitchen is warm). If you need to pause while mixing, pop the bowl into the fridge to keep everything cold. Once shaped, chill the scones for 15 minutes before baking. It might feel a bit over the top, but this one step makes the biggest difference in how your scones turn out.
Don’t Overwork the Dough
Mix the dough just until it comes together—it should still look a little rough and shaggy. Give it one or two gentle folds to make it smoother, then lightly pat it into a round before cutting into scones. Overworking the dough will develop the gluten too much, leaving you with sourdough discard scones that are tougher and more bread-like instead of soft and tender.
Make the Dough Thick
Pat the dough to about 1–1½ inches thick before cutting. Thicker sourdough discard scones rise better, with soft, tender centers and lightly crisp edges. If the dough is too thin, the scones are more likely to overbake and turn dry.
Bake Hot and Fast
Chill the shaped sourdough discard scones for at least 15 minutes, then bake in a fully preheated oven at 400°F (204°C). That initial burst of heat helps the scones rise quickly, giving them a better lift and a lighter texture.
Use thick liquid
I use thick clabbered milk or kefir in this recipe, but thick cream also works well as an alternative. Using a thicker liquid helps create richer, more tender sourdough discard scones compared to thinner liquids like regular milk, which can make the dough looser and less rich.
What can I use instead of cream in scones?
In this recipe I use thick clabbered milk, but thick kefir, buttermilk, or pourable yogurt also work well. The key is to use a thick, slightly tangy liquid to keep the texture rich and tender in these sourdough discard scones.
I’ve even blended plain cottage cheese with a little milk to mimic that clabbered consistency, and it worked beautifully. Just avoid thin liquids like regular milk or whey, which can make the dough looser and the scones less rich.
Ingredients For Sourdough Discard Scones

- Flour: All-purpose flour works best for scones, giving them a light, tender crumb. You can also swap up to half with sprouted flour or spelt flour.
- Brown sugar: Adds gentle sweetness and moisture. Rapadura is a great alternative if you prefer an unrefined option.
- Sourdough discard: Unfed sourdough discard straight from the fridge works perfectly in these sourdough discard scones.
- Sour milk: I use thick clabbered milk for richness, but kefir, buttermilk, or pourable yogurt will also work well. The key is to use a thick, tangy liquid rather than thin milk.
- Raisins: Optional, but they add little bursts of sweetness. You can also use chopped dates, or leave them out entirely if you prefer plain scones.
You can find the full list of ingredients with exact amounts in the recipe card below.
Tools
- Mixing bowl
- Large spoon
- Pastry cutter or a knife for cutting in the butter
- Pizza cutter or large knife for slicing the dough
- Baking parchment
- Large baking sheet or tray
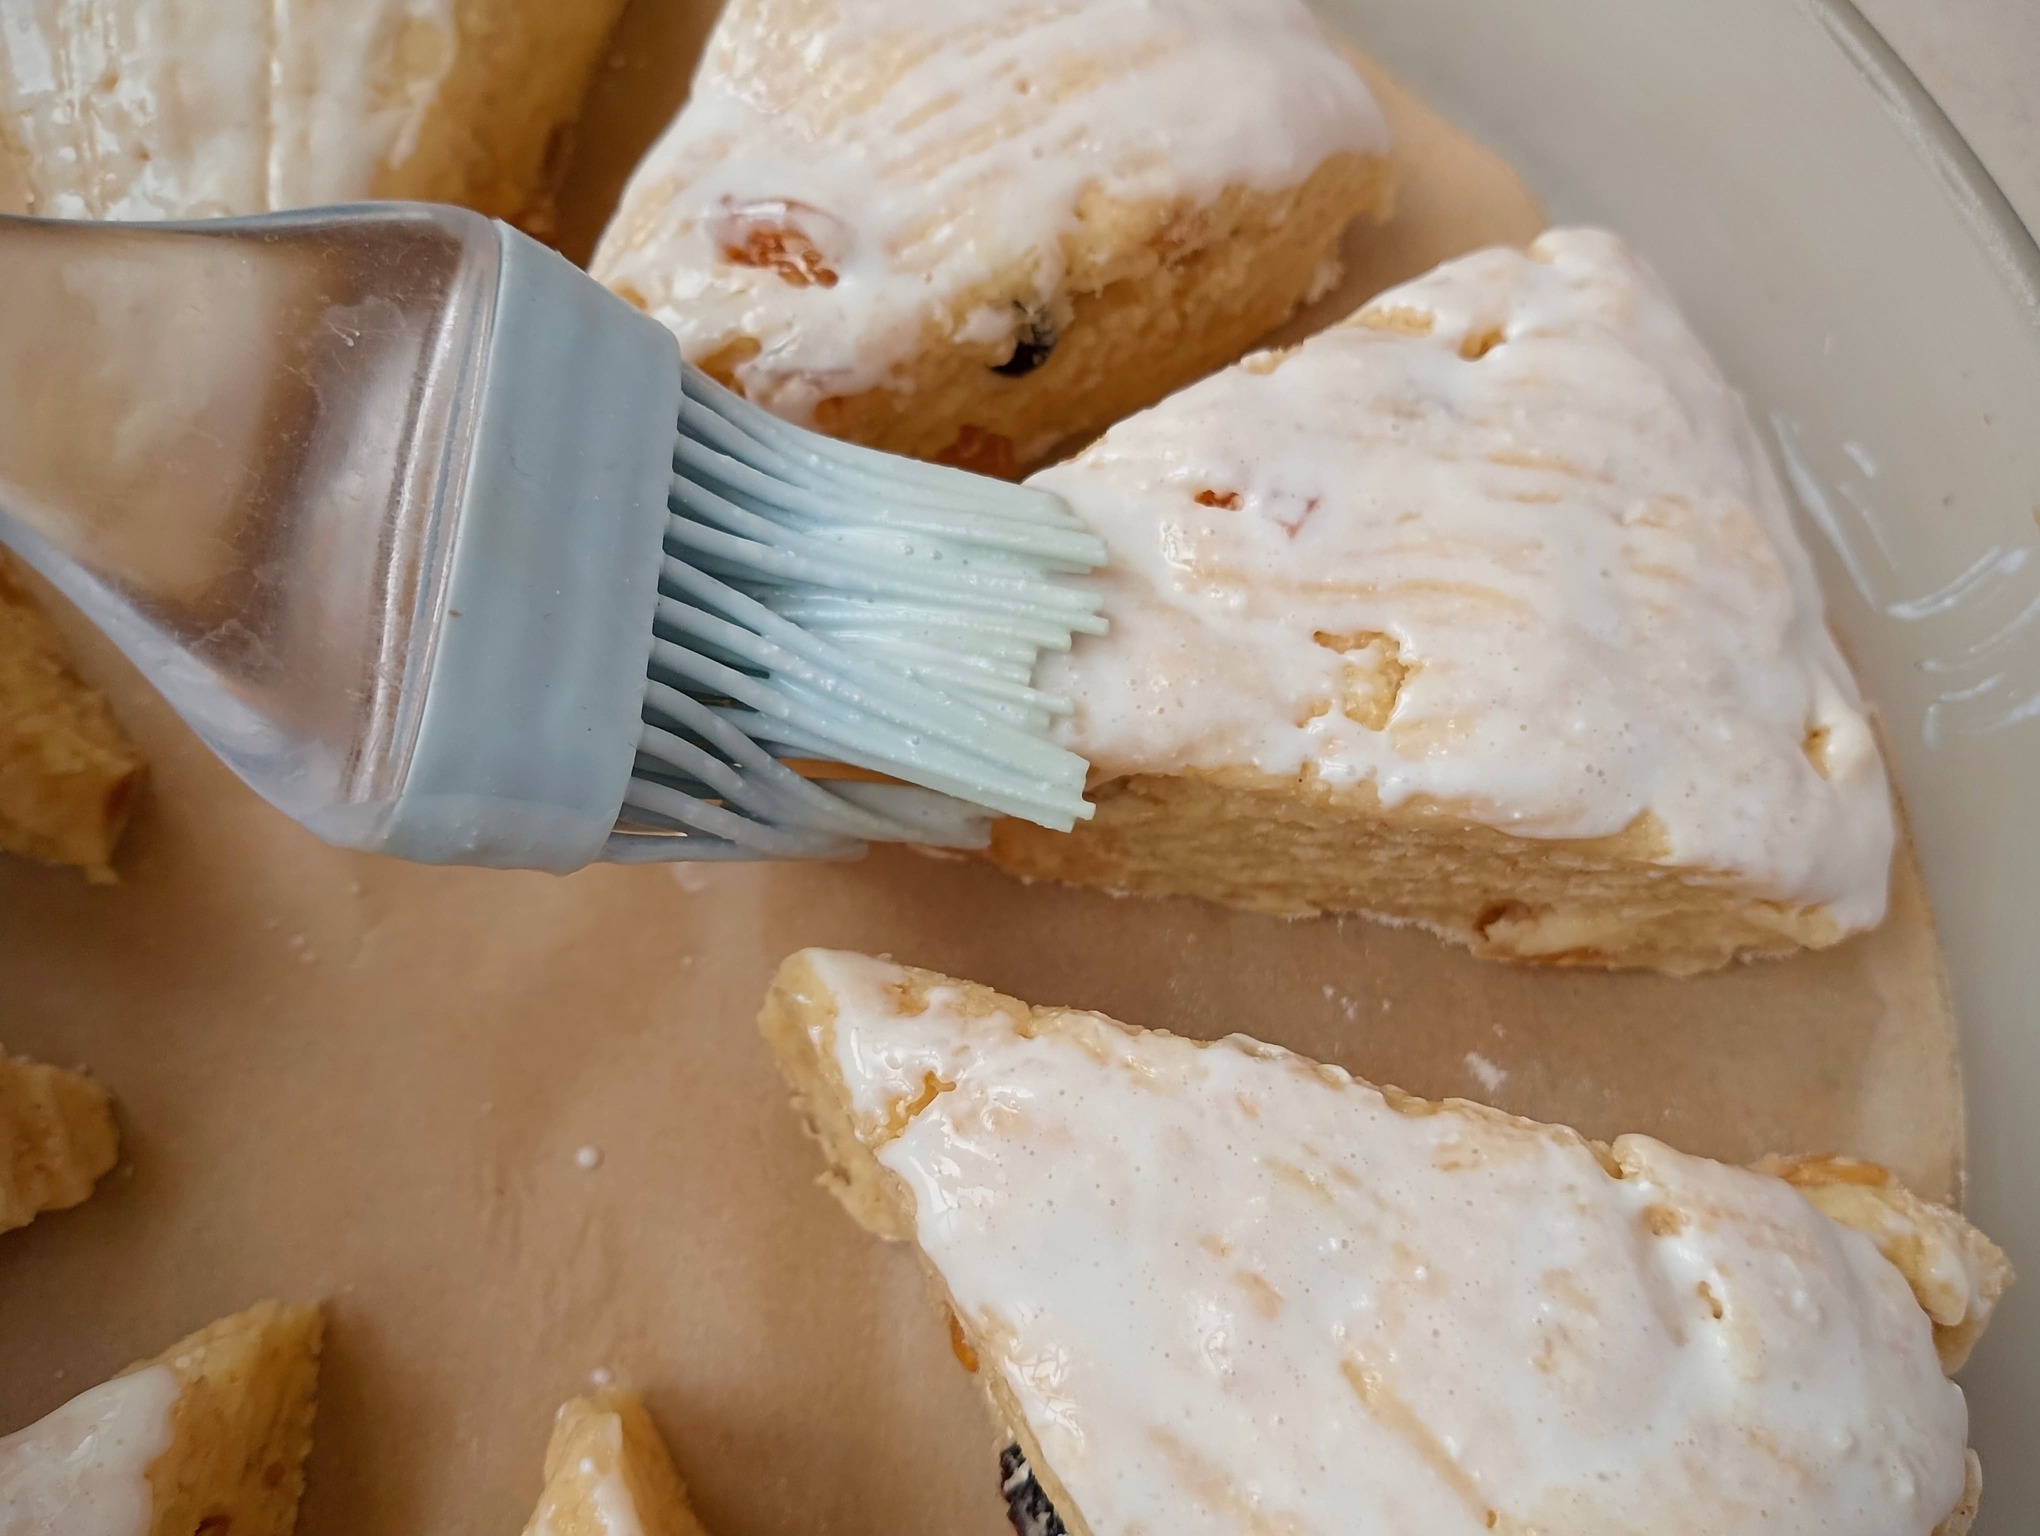
- Pastry brush (optional), for glazing
This recipe doesn’t require any special equipment. A pastry cutter can easily be replaced with two butter knives, and a wooden spoon works just as well as a dough whisk. If you don’t have a pastry brush, you can simply use your fingers to gently apply the glaze.
How to Make Sourdough Discard Scones (Step-by-Step)
Step 1

In a large mixing bowl, whisk together the flour, sugar, salt, and baking powder until evenly combined.
Step 2

Grate the frozen butter directly into the flour mixture, then cut it in with a pastry cutter (or two knives) until the mixture resembles coarse crumbs with some pea-sized pieces remaining. Avoid using your hands, as the heat will soften the butter and affect the texture of your scones.


Step 5

Slowly pour in the sour milk a little at a time, mixing as you go, until the dough just comes together into a shaggy ball. You may not need to use all of the liquid.
Step 6

Turn the dough out onto a lightly floured surface and gently pat it into a round disc, about 1 to 1½ inches thick.

Step 8

Transfer the scones to a baking tray lined with baking parchment, spacing them slightly apart so they don’t stick together as they bake. (A pie dish also works well for this.) Chill in the refrigerator for 15 minutes. Meanwhile, preheat the oven to 400°F (204°C).

Step 11

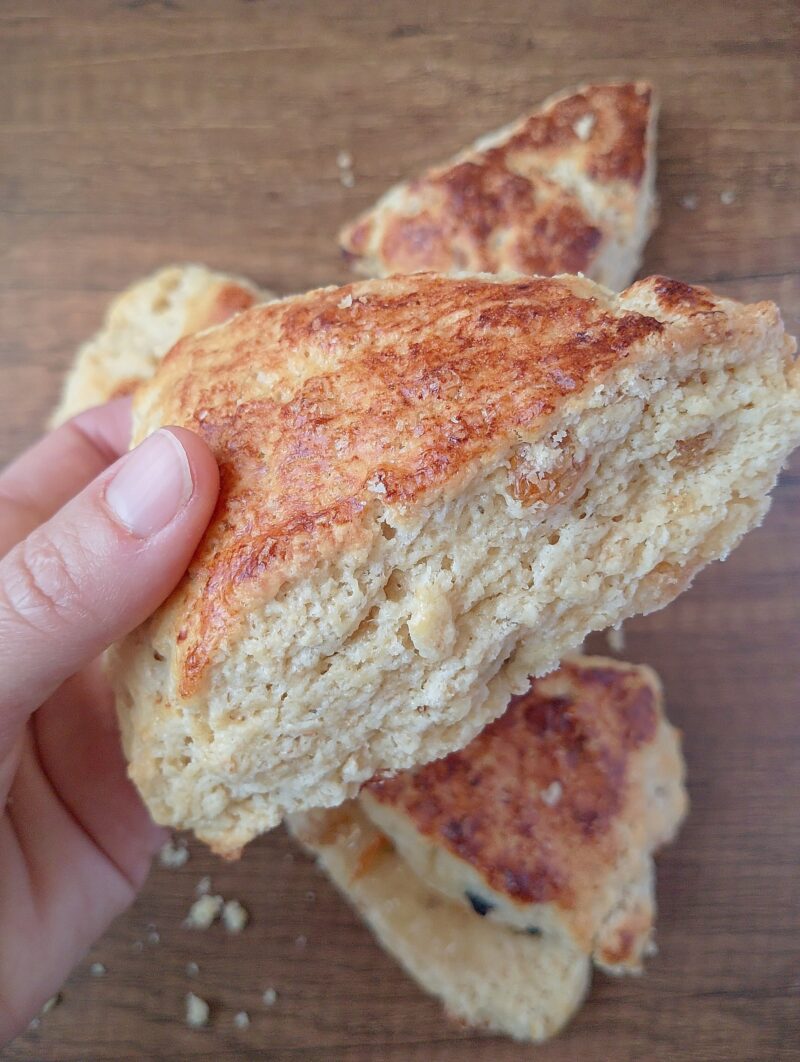
Bake the scones in a fully preheated oven for 10–15 minutes, or until they have risen and the tops are golden brown. Allow them to cool for at least 30 minutes before serving, as they will be too delicate to slice while still warm. Serve with butter and homemade jam.
Overnight Option
Mix your dough and cut into wedges. Place on a lined plate and wrap well to prevent the dough from drying out. Refrigerate overnight (8–18 hours), then bake straight from the fridge on a lined baking sheet in fully preheated oven. Glaze the scones just before baking.
How to Serve Sourdough Discard Scones
Here are some delicious ways to serve your freshly baked sourdough scones:
- Sourdough discard scones are best served warm, when the crumb is soft and the edges are still lightly crisp. They’re delicious split open with butter, raw honey, or homemade jam—especially berry or stone fruit preserves.
- For something a little more indulgent, try them with clotted cream, thick yogurt, or mascarpone, plus a spoonful of fruit compote.
- They also make a simple, satisfying breakfast alongside eggs, or an easy afternoon snack with a cup of tea or coffee.
How to Store Sourdough Scones
There is no denying it – scones taste the best when they are freshly baked. That said, here are storage tips if you have any left:
- Store sourdough scones in an airtight container at room temperature for 1–2 days for best texture.
- For longer storage, refrigerate up to 5 days or freeze for up to 2–3 months, then warm gently in the oven or toaster to bring back their freshness.
- Unbaked sourdough scones can also be frozen after shaping. To freeze, place them on a tray to flash freeze, then transfer to a bag or container for up to 2–3 months. Bake straight from frozen, adding a few extra minutes to the baking time for best rise and texture.
Recipe FAQ
Sourdough scones can be a more nourishing option than regular scones if they are made with real food ingredients and the addition of sourdough discard with its gut healing benefits. That said, they’re still a treat, so their overall “healthiness” depends on ingredients like flour type, sweetener, and fat used.
Yes—sourdough scones freeze beautifully. Freeze them baked or unbaked, well wrapped, and they’ll keep for up to 2–3 months; bake or reheat straight from frozen for best texture.
Poor rise usually comes down to inactive leavening (old baking powder), overworking the dough, or butter that got too warm before baking. For best lift, keep everything cold, handle the dough gently, chill the shaped scones before baking for 15 minutes, then bake in a fully preheated oven.
Yes—in this recipe I use thick sour milk (thick kefir works too) instead of heavy cream in the scones dough, plus plenty of butter for richness.
Sourdough scones are best the day they’re baked, but they’ll keep at room temperature in an airtight container for 1–2 days or in the fridge for up to 5 days. For longer storage, freeze them and reheat to refresh the texture.
All-purpose flour is ideal for tender, classic sourdough scones. You can swap in some whole wheat or einkorn for flavor, but keep at least half all-purpose to avoid a dense, heavy texture.
No, they don’t need refrigeration for short-term storage. You can keep them in an airtight container at room temperature for 1–2 days. Refrigerate only if you need them to last longer, knowing it can dry them out slightly (just rewarm before serving).
Conclusion
These sourdough discard scones are wonderfully versatile and fit easily into all kinds of occasions. They’re perfect for a cozy afternoon tea with butter and jam, a slow weekend brunch, or even tucked into a picnic basket for an easy treat on the go.
They also freeze beautifully when shaped but unbaked, so you can keep a batch on hand in the freezer for whenever you want fresh, homemade scones with minimal effort.
You can also dress them up seasonally with simple add-ins like chopped dried fruit, grated lemon zest, or warm spices for holidays and special occasions.
For more sourdough recipes and simple, old-fashioned family baking inspiration, join my weekly newsletter. You’ll get seasonal recipes, practical tips, and real-food kitchen ideas delivered straight to your inbox.
More Delicious Discard Recipes
Quick and Easy Sourdough Crackers
Sourdough Discard Banana & Coconut Cake

Sourdough Discard Scones
Equipment
- mixing bowl
- pastry cutter or knife
- pizza cutter or large knife
- baking parchment
- baking sheet or tray
Ingredients
For the scones
- 2 cups (250g) white flour
- ½ cup (100g) brown sugar
- 2½ tsp baking powder
- ½ tsp salt
- ½ cup (100g) butter, frozen
- ¾ cup (115g) raisins (optional)
- 1 large egg, lightly beaten
- ½ cup (125g) sourdough discard
- 1 tsp vanilla
- ⅓ cup (80ml) thick sour milk, kefir, or buttermilk
For the glaze
- 2 Tbsp sour milk, kefir, or buttermilk
- 2 Tbsp brown sugar
Instructions
- Whisk together flour, sugar, salt, and baking powder in a large bowl.
- Grate in the frozen butter and cut it into the flour until the mixture resembles coarse crumbs with some pea-sized pieces. Stir in the raisins to coat.
- In a separate bowl, whisk together sourdough discard, egg, and vanilla until smooth, then add to the dry ingredients.
- Slowly pour in the sour milk, mixing just until the dough comes together into a shaggy ball (you may not need all the liquid).
- Turn the dough onto a lightly floured surface and gently pat into a 1–1½ inch thick circle.
- Cut into 8 wedges and place on a parchment-lined baking tray, spacing apart. Chill for 15 minutes while preheating the oven to 400°F (204°C).
- Brush the tops with sour milk, sprinkle with brown sugar, and bake for 10–15 minutes until risen and golden.
- Cool for at least 30 minutes before serving. Serve with butter and jam.
Notes
- Make ahead option: Mix your dough and cut into wedges. Place on a lined plate and wrap well to prevent the dough from drying out. Refrigerate overnight (8–18 hours), then bake straight from the fridge on a lined baking sheet in fully preheated oven. Glaze the scones just before baking.
- These scones can be frozen for up to 3 months in a ziplock bag.
- Find more recipes at heritagemama.com


Hello Marta, I have not made these yet, would like to try the recipe, but have a couple of questions. I normally do sourdough recipes by weight, do you spoon/level the flour? Do you have any idea of weight of starter you use? Thanks a lot.
Hi Beth! When using cup measurements always use level cups of flour, sugar etc. Half a cup of sourdough starter is about 120 grams by weight. You are right, doing sourdough by weight is more precise, but here the exact gram amount of discard is not that important – if you use a little less, you’ll just need to add a little more milk to get the dough to come together into a ball. I hope this answers your questions:)