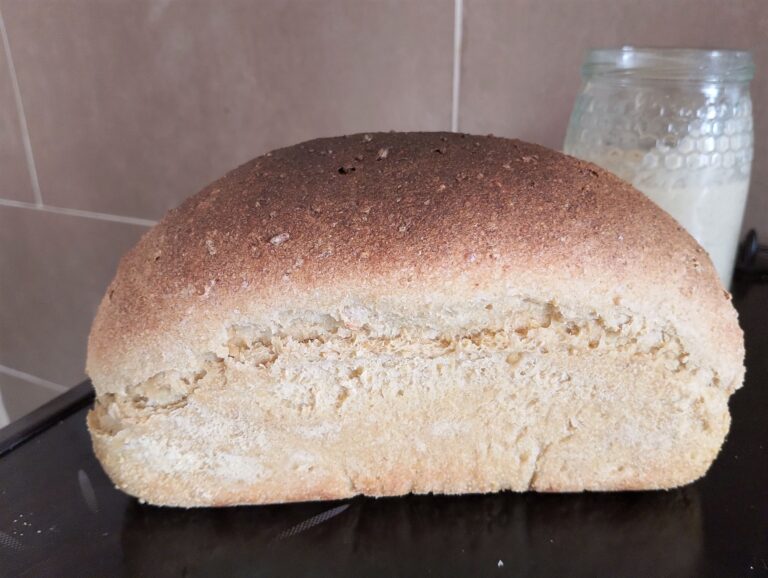
How to Make a Healthy Sourdough Starter from Scratch
There is something magical and deeply satisfying about making a sourdough starter from scratch. Watching a simple mixture of flour and water transform into a bubbly, active culture of wild yeasts and beneficial bacteria capable of raising bread never ceases to amaze me. My sourdough starter is one of the few everyday things in my kitchen that truly feels alive.
It has been my faithful kitchen companion for more than 15 years. With a little care it will be with me for many years to come. There’s something deeply satisfying about nurturing it, watching it grow stronger with each feeding, and then using it to bake nourishing bread for my family. Even after all these years, I still love watching a freshly fed starter slowly bubble, rise, and come to life.
In this easy sourdough starter recipe tutorial, I’ll show you how to make your own starter from scratch using just flour and water. I’ll also walk you through caring for your starter, troubleshooting common problems, and helping it thrive so it can serve you and your family for years to come.
What Is a Sourdough Starter?
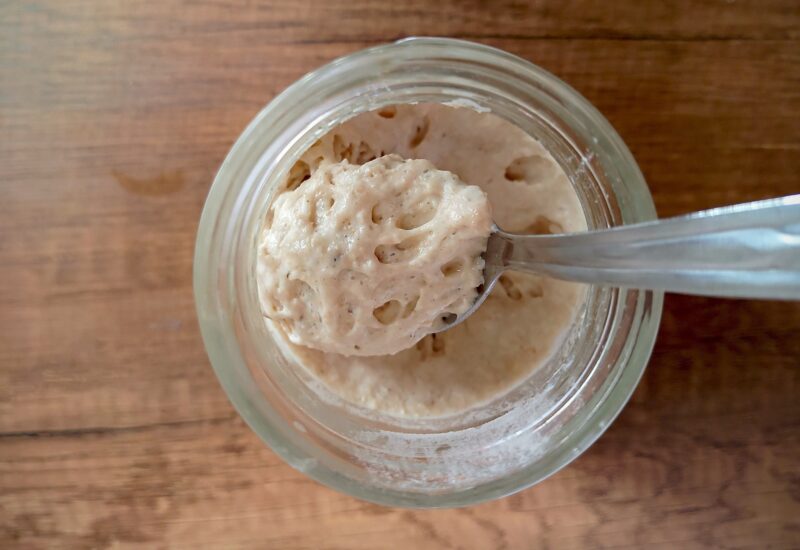
A sourdough starter is a live culture of wild yeast and lactic acid bacteria. It is used to naturally leaven bread and other baked goods, like focaccia, rolls, buns, and even pizza dough. It is kept alive by regularly feeding it fresh flour and water.
When you bake with a sourdough starter, the wild yeasts feed on the carbohydrates in the flour. They also produce carbon dioxide, which makes the dough rise. At the same time, the beneficial bacteria produce lactic and acetic acids, giving sourdough bread its distinctive tangy flavor.
Why Make Your Own Sourdough Starter?
There are plenty of places online where you can buy a mature sourdough starter (one that is ready to bake with). Therefore you might wonder why anyone would bother making their own. It’s true that a purchased starter is usually ready to use after a feeding or two. In contrast a sourdough starter made from scratch typically takes 10–14 days to become ready for baking. That said, making your own starter is quite simple, saves money, and is a fun and deeply rewarding project.
I’ve been baking with sourdough for about 15 years, and during that time I’ve both purchased mature starters and made my own from scratch several times. From my experience, specialty starters from baking suppliers and homemade starters that are cared for properly perform equally well. Unless you’re looking to save the extra week or so it takes to grow your own, there’s really no need to buy one.
If you’re new to sourdough or fermentation in general, I can’t recommend making your own cultures highly enough. Whether it’s a ginger bug, clabbered milk, or a sourdough starter, there’s something incredibly rewarding and confidence-building about creating them yourself. With your own hands—and just flour, water, and a little patience—you can create a living culture of wild yeast and beneficial bacteria that will naturally leaven your bread for years to come.
Ingredients and Tools You’ll Need
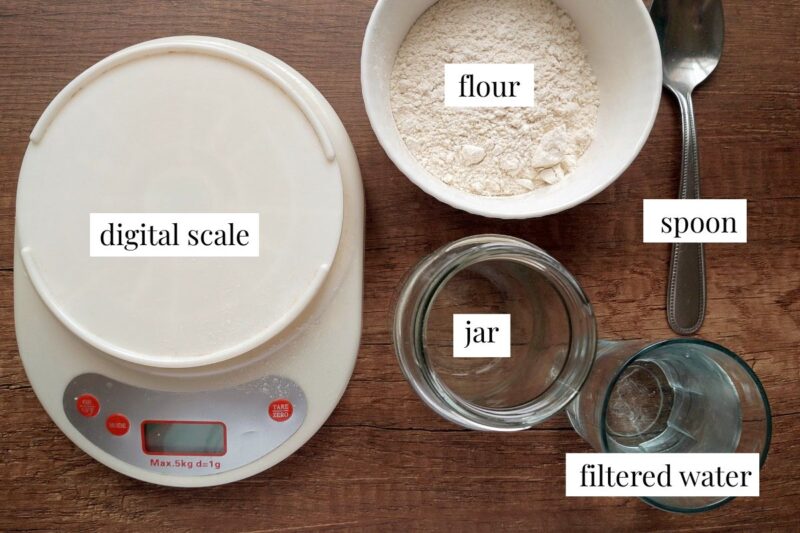
- Flour: I use a mix of bread flour and whole wheat flour. Whole spelt flour, rye flour, or a combination of different flours will also work well. It’s generally recommended to include at least some whole grain flour when making a sourdough starter. It contains more nutrients and naturally occurring microorganisms that help kick-start fermentation. Once your starter is established, you can feed it with bread flour alone if you’d like to keep costs down.
- Filtered water: Chlorine and other chemicals commonly found in tap water can slow down or inhibit fermentation. For this reason I recommend using filtered water whenever possible. Room-temperature or slightly warm water works best, as very cold water can slow your starter’s activity.
- Glass jar: Any clean glass jar with enough room for your starter to expand will work well.
- Spoon or spatula: Use this to thoroughly mix the flour and water together at each feeding.
- Digital kitchen scale. I highly recommend making your starter using equal weights of flour and water rather than measuring by volume. It’s far more accurate, much more beginner-friendly, and helps ensure consistent results.
What Is The Best Flour for a Sourdough Starter?
Whole grain flours—especially whole wheat, spelt, and rye—are generally considered the best choice when making a sourdough starter recipe. They contain more naturally occurring wild yeasts, beneficial bacteria, and nutrients than refined flour. These help encourage a healthy, active fermentation, especially during the first few days.
That said, I’ve successfully made a starter using only bread flour, so don’t worry if that’s all you have on hand. For this tutorial, I use a 50:50 mix of whole wheat flour and bread flour. This gives the starter the benefits of whole wheat while helping keep costs down, as bread flour is often cheaper.
Once your starter is active and well established, you can continue feeding it with bread flour if you prefer. I also recommend using unbleached flour whenever possible, as the bleaching process can reduce the microorganisms that support fermentation.
What Water Should You Use?
The best water for a sourdough starter is filtered or dechlorinated water. Chlorine and chloramine can inhibit the beneficial yeasts and bacteria responsible for fermentation. If your tap water is heavily chlorinated, using filtered water can make it easier for your starter to get established.
For the healthiest fermentation, use room-temperature water. During the colder months, slightly warm water can help keep your starter active. Don’t use cold water. It can slow the growth of the wild yeasts and beneficial bacteria that make your starter thrive.
How to Make a Sourdough Starter (Step-by-Step)
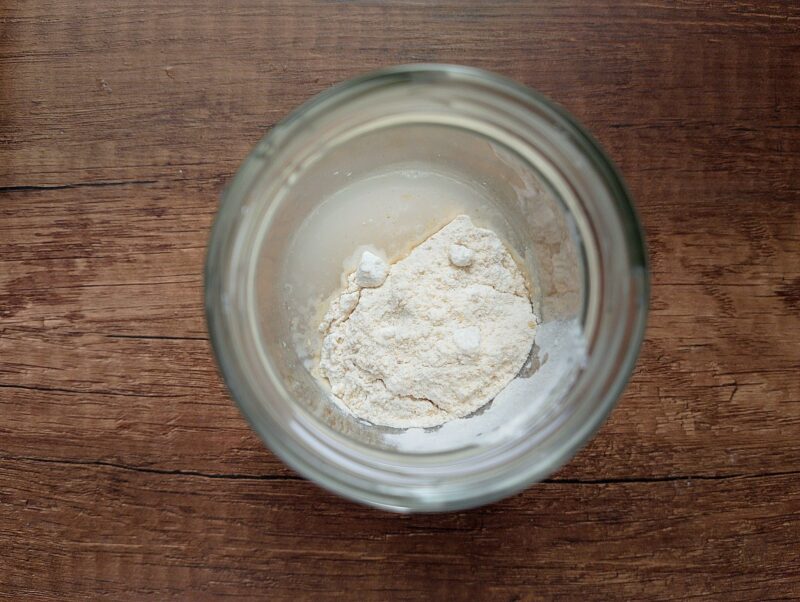
Day 1: In a clean jar, vigorously mix 50 grams of flour and 50 grams of water until no dry flour remains. Scrape down the sides of the jar, then cover it loosely with a lid or a cloth secured with a rubber band. Leave it at warm room temperature—I usually keep mine on the kitchen counter—for 24 hours.
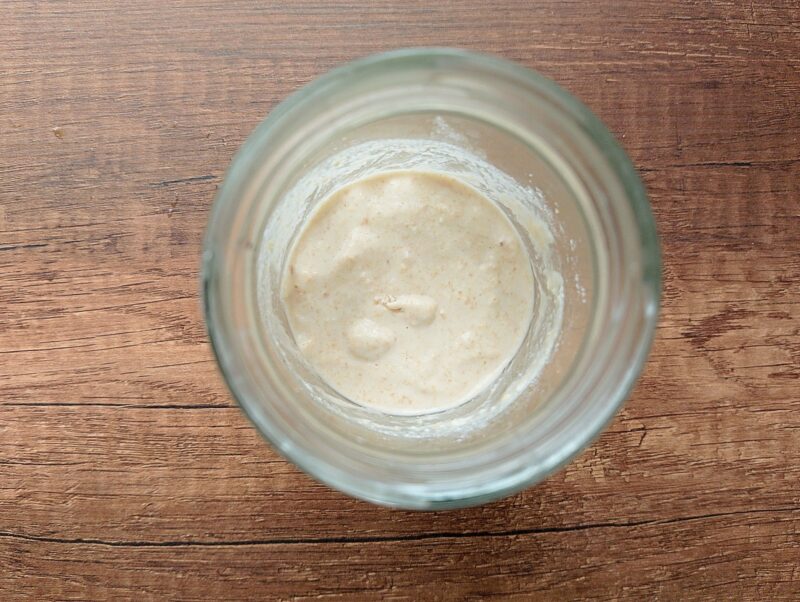
Day 2: Discard about half of the starter, leaving about 50 grams in the jar. Feed it with 50 grams of flour and 50 grams of water, then stir vigorously until smooth. (Your starter loves oxygen, and vigorous stirring helps incorporate it.) Cover the jar loosely and leave it at warm room temperature for another 24 hours.
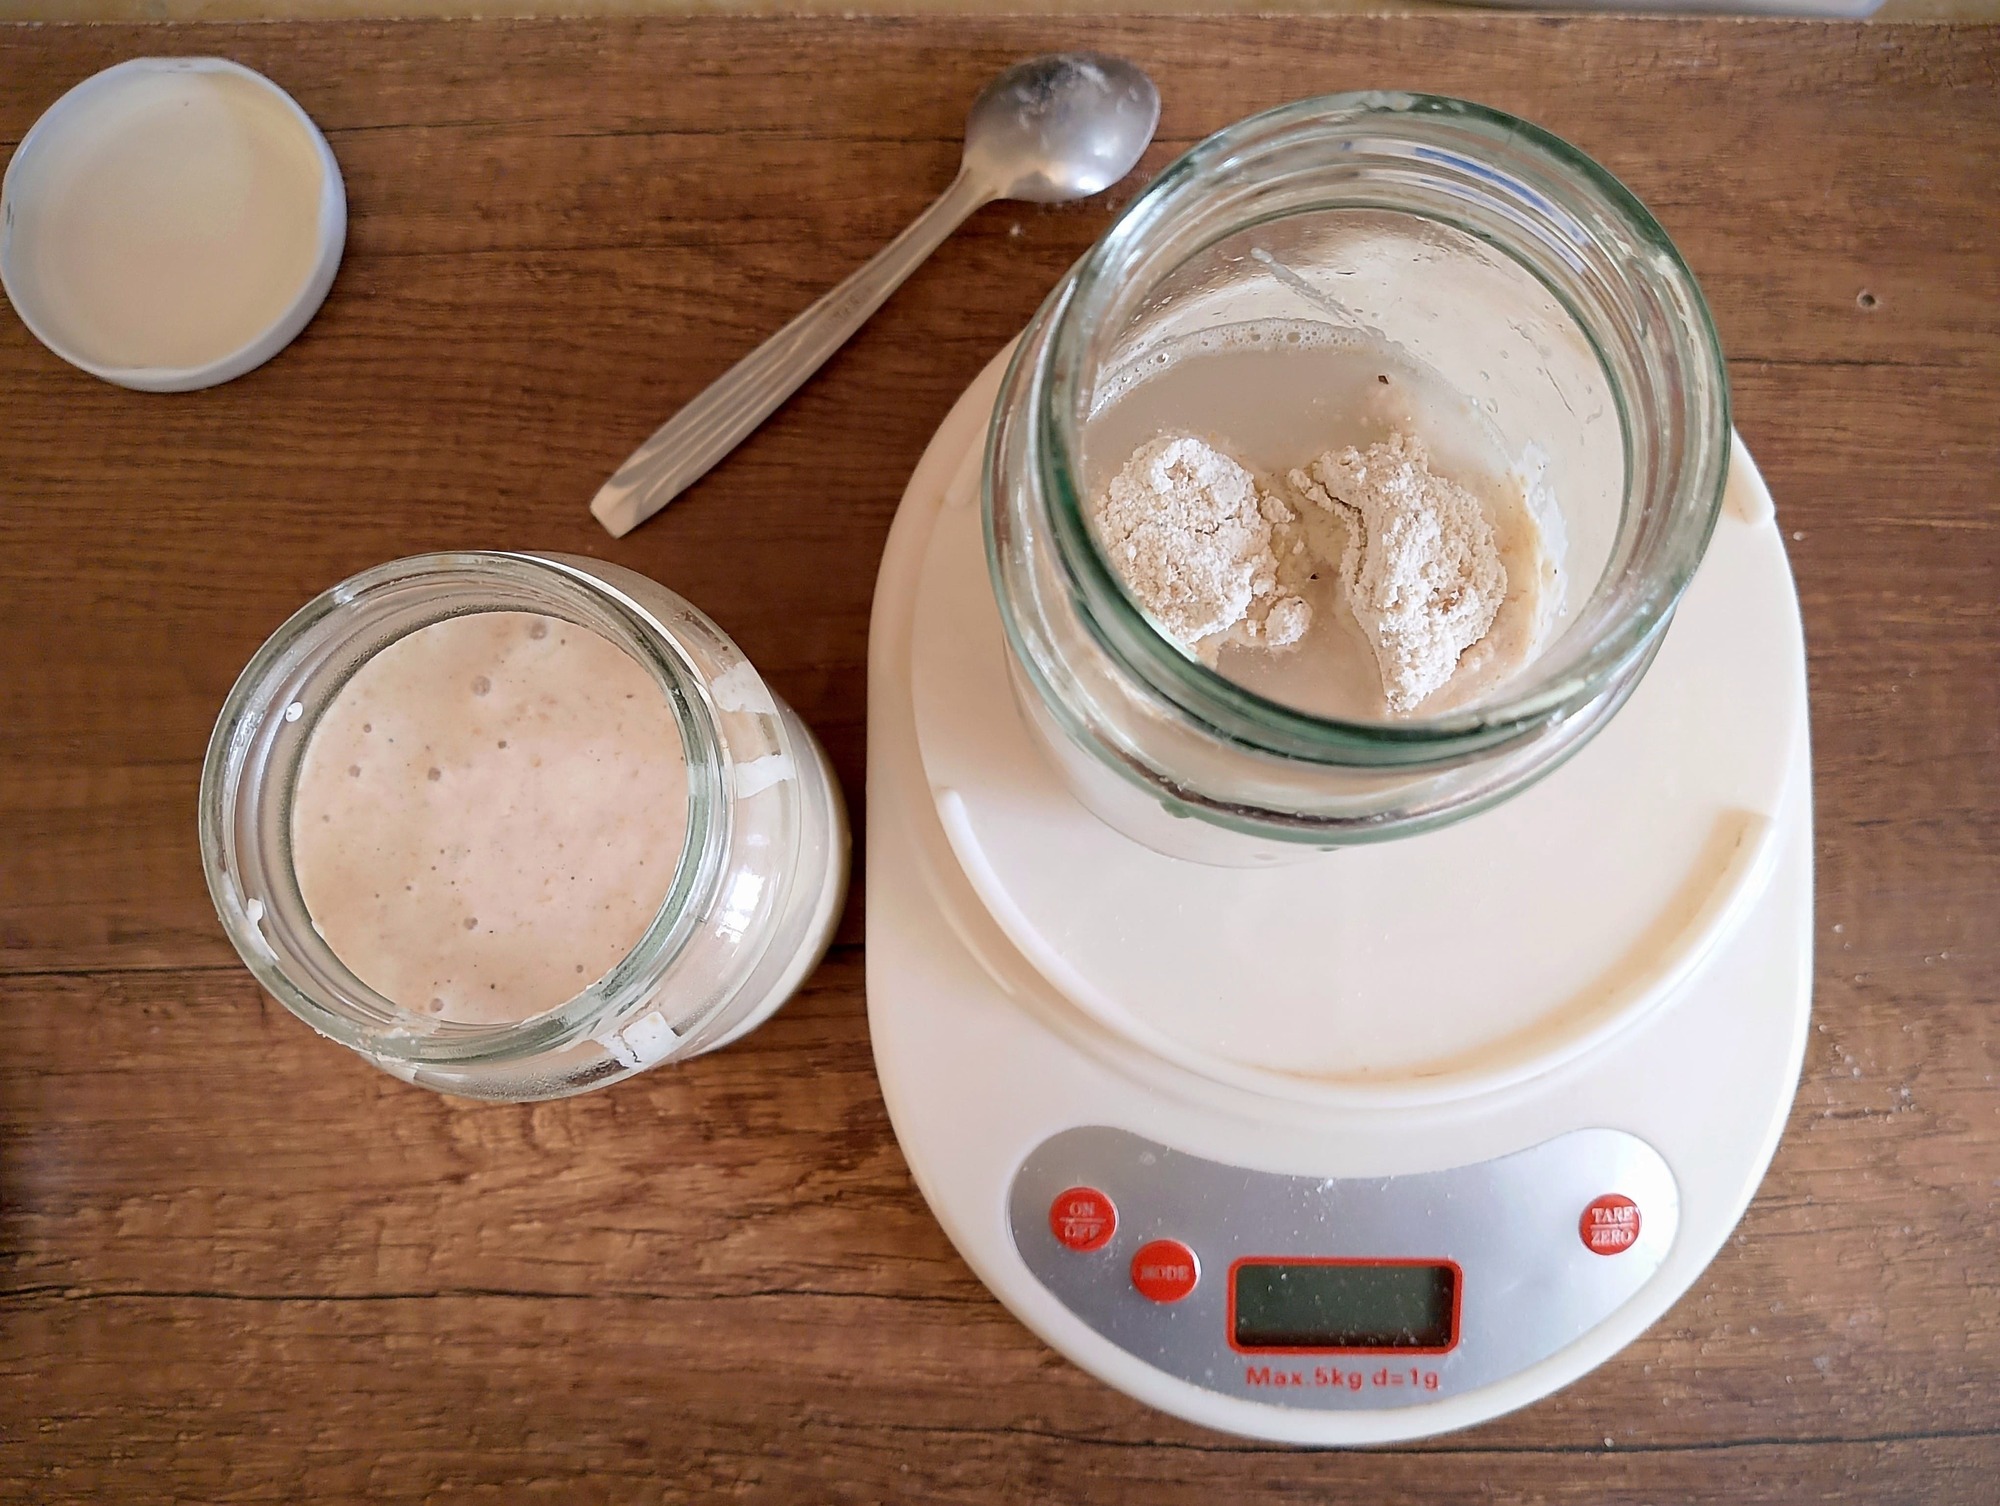
Day 3: Discard about half of the starter, leaving about 50 grams in the jar. Feed it with 50 grams of flour and 50 grams of water, then stir vigorously until smooth. Scrape down the sides of the jar, cover it loosely, and leave it at warm room temperature for another 24 hours.
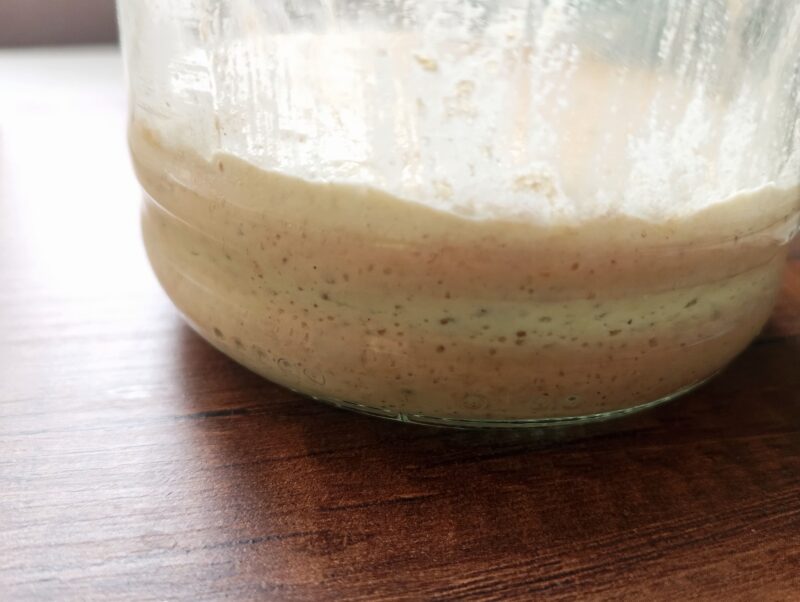
Days 4–6: By now, you should start to see signs of life in your starter—bubbles, a slight rise after feeding, and a pleasantly tangy aroma. Don’t worry if it isn’t doubling yet; at this stage, that’s perfectly normal. Starting on Day 4, you’ll begin feeding your starter twice a day, about 12 hours apart. Try to feed it at roughly the same times each morning and evening.
At each feeding, discard all but 50 grams of starter. Then feed it with 50 grams of flour and 50 grams of water, stir vigorously until smooth, scrape down the sides of the jar, cover it loosely, and leave it at warm room temperature until the next feeding.
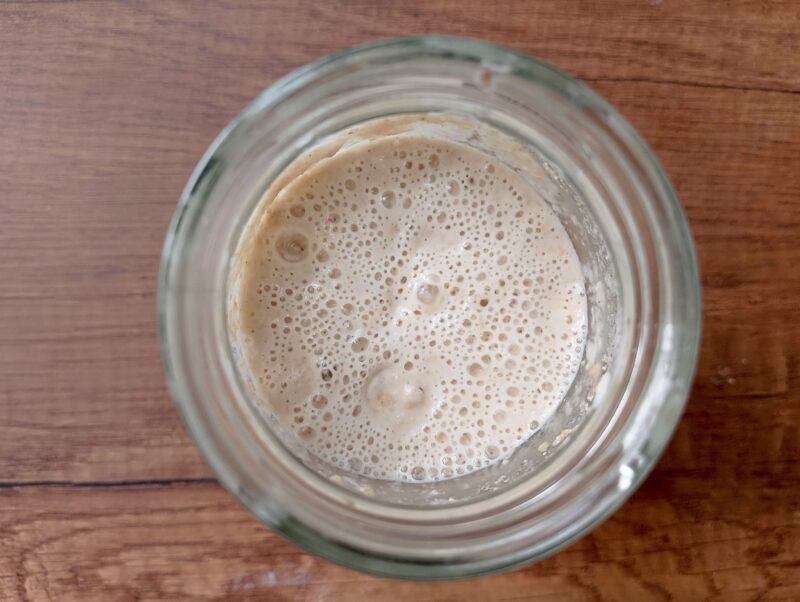
Days 7–14: Continue feeding your starter twice a day, about 12 hours apart, following the same routine. At each feeding, discard all but 50 grams of starter, then feed it with 50 grams of flour and 50 grams of water.
Once your starter reliably doubles in size within 2–4 hours after feeding, it’s ready to bake with. My starters usually begin doubling around Day 8 but often need another couple of days before they do so consistently. Remember, every starter is different—watch your starter, not the calendar.
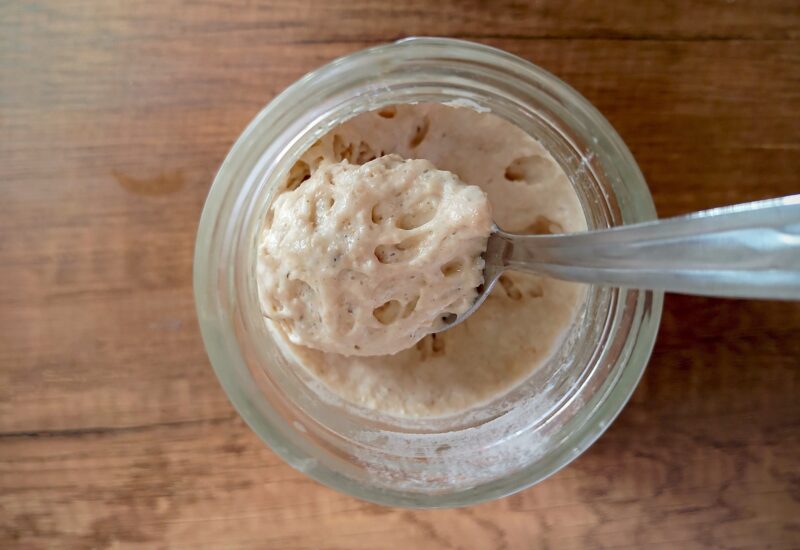
Before your starter is consistently doubling after each feeding, you can still use the discarded portion in recipes that call for sourdough discard. These recipes rely on yeast, baking soda, or baking powder for leavening, so the discard is added primarily for its flavor rather than its rising power.
How to Tell When Your Starter Is Ready
When I first started learning to bake with sourdough, there was very little reliable information online compared to today. These days you can find entire websites dedicated to sourdough baking. Yet I still come across well-established sites claiming that your starter “will be ready to bake with on day 7.” In my experience, that simply isn’t true.
Every sourdough starter you start from scratch is different. Your starter should be judged by how it behaves, not by the calendar. The starters I’ve made from scratch have usually been ready somewhere between days 8 and 10. Yours could take a little more or a little less time. It all depends on your flour, water, and the temperature of your kitchen.
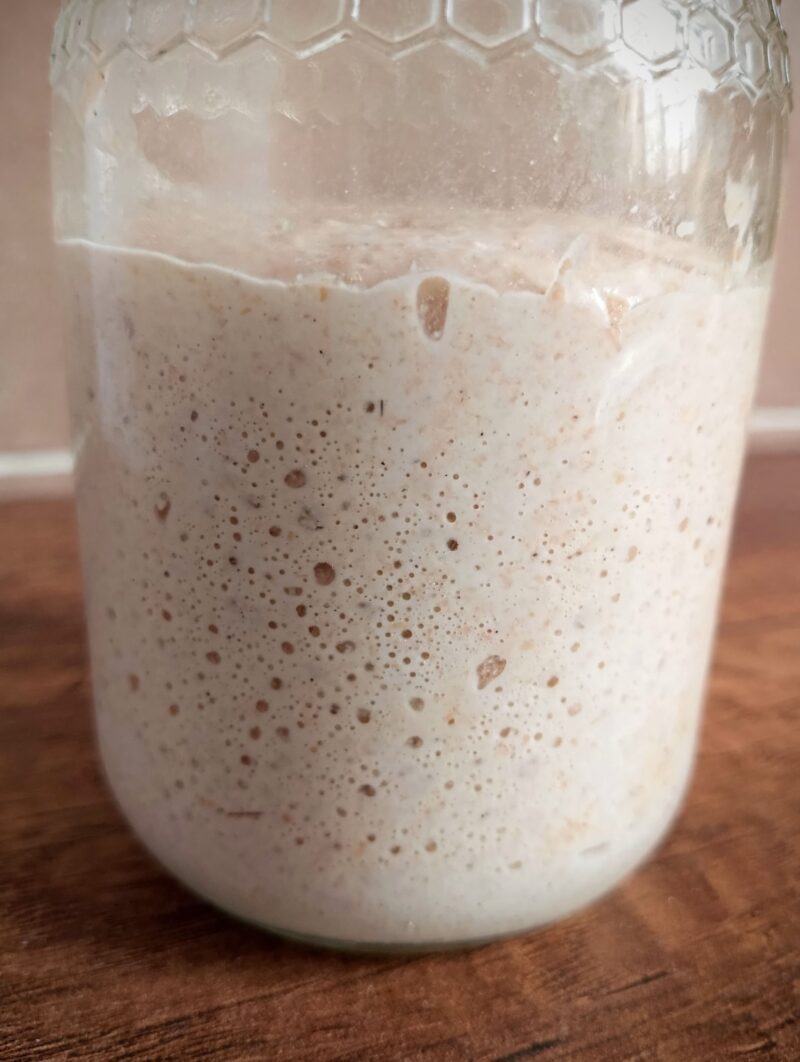
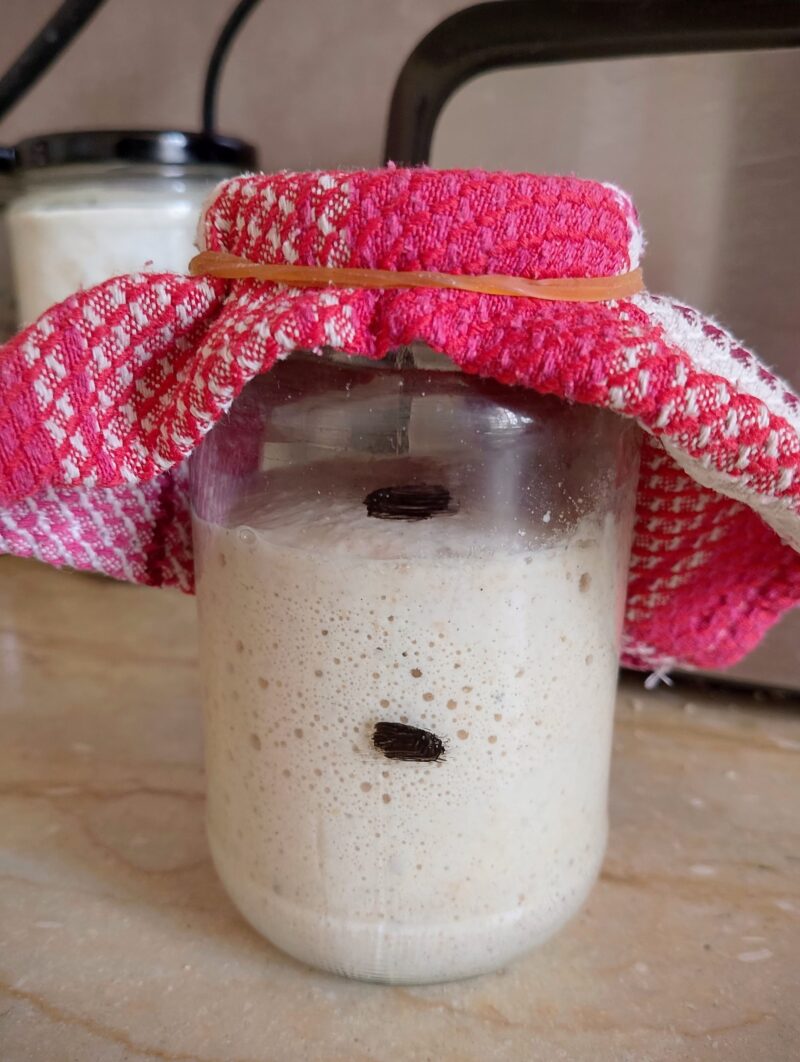
Your homemade starter is ready for baking when it reliably doubles in volume (or even triples) within 2–4 hours after feeding. If your kitchen is very cool, it may take up to 6 hours to reach its peak. It should do so consistently after every feeding. A mature starter will rise and fall predictably after each feeding. This shows that the wild yeasts and beneficial bacteria are healthy, active, and capable of leavening bread.
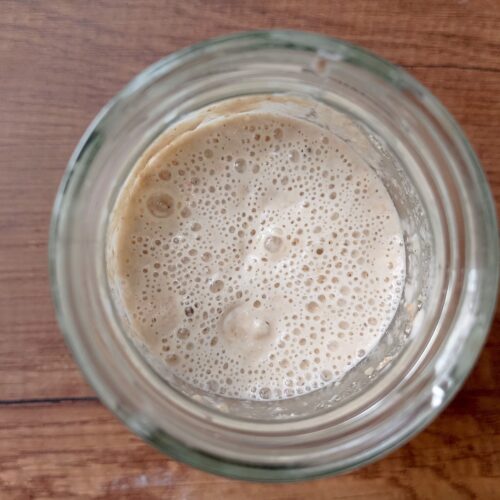
The best time to mix your starter into a bread recipe is at its peak or just after. At this stage, it should be domed on top or just beginning to flatten, and be filled with bubbles throughout. It should smell pleasantly yeasty with a mild tang and be at its most active, making it the ideal time to mix your dough.
What to Do With Sourdough Discard
During the first few days of making a starter from scratch, the different yeasts and bacteria are still becoming established. To put it a little unscientifically, they are “fighting it out” to become the dominant culture. During this stage, your starter may smell a little funky or unpleasant. That’s perfectly normal.
Because of those off flavors, I don’t recommend using the discard from the first few days in baking. It’s best to throw it away or add it to your compost. Once your starter is about 5 days old and smelling pleasantly sour, you can begin using the discard in a variety of recipes.
My favorite way to use up sourdough discard is by making crackers. They’re a great way to use up a week’s worth of accumulated discard, and they’re always a hit with my kids. I also regularly use sourdough discard in burger buns, biscuits, scones, and muffins.
Common Sourdough Starter Problems
Making a sourdough starter from scratch is a straightforward process. Most of the time you won’t run into any problems. The most important thing is to be patient and remember that a new starter can take up to 14 days to become consistently active, bubbly, and reliable enough for baking.
That said, you may encounter a few common issues along the way. Here are the most common sourdough starter problems and how to fix them:
My Starter Isn’t Bubbling
If your young starter isn’t bubbling yet, it’s usually because the wild yeasts and beneficial bacteria are still becoming established. It can take several days before you see the first bubbles, and another few days before your starter becomes active, reliably doubles after each feeding, and is filled with bubbles.
In the meantime, make sure you’re giving your starter the best conditions to thrive. Keep it at a warm room temperature and feed it with unbleached flour and filtered water. With a little patience, the bubbles will come.
My Starter Smells Bad
A strong smell of acetone, alcohol, or vinegar usually means your sourdough starter is hungry and has run out of food. The solution is simple: discard half of the starter, then feed the remaining portion with fresh flour and water.
To prevent this from happening again, don’t skip feedings. Feed a new starter according to the schedule in this tutorial. Once it’s mature, feed it every 24 hours if you keep it on the counter or about once a week if you store it in the refrigerator.
After a feeding, your starter should gradually return to a pleasant, yeasty aroma.
What Is Hooch?
Hooch is a layer of dark liquid that forms on top of your sourdough starter. This happens when it hasn’t been fed for a while and has run out of food. It’s a sign that your starter is hungry, not dead.
You can either pour off the hooch or stir it back into the starter—both methods work. Then discard at least half of the starter and feed the remainder with fresh flour and water.
To help keep your starter healthy, try not to skip feedings regularly. While an occasional layer of hooch won’t ruin your starter, repeatedly letting it go hungry can weaken the wild yeasts and beneficial bacteria over time. If you want your starter to stay active and reliable for years to come, give it the regular care it needs.
Why Isn’t My Starter Rising?
If your young starter is bubbly but doesn’t rise very much, it usually just needs a few more days to build up a strong population of wild yeasts. While bubbles are a good sign that fermentation is happening, a strong rise takes a little longer to develop.
Remember that most new starters need 7–14 days before they reliably double after feeding. In some cases, it may simply be that the conditions aren’t ideal. Keep your starter in a warm spot, feed it regularly, and give it a little more time. Patience is often the missing ingredient.
Mold On Sourdough Starter
If you see fuzzy mold or pink, orange, or green streaks on your starter, it has become contaminated and should be discarded. Unfortunately, there is no safe way to remove mold from a starter and continue using it.
If this happens, simply start again with a clean jar and fresh flour and water. Don’t worry too much, though. Mold is quite rare as long as you use clean equipment, follow good hygiene practices, and feed your starter regularly instead of leaving it unfed for long periods.
How to Feed and Maintain Your Sourdough Starter
There are two places you can keep your sourdough starter: on the counter or in the refrigerator. Both have their advantages, and the best choice depends on how often you bake and what fits your routine.
Before you decide, make sure your starter is fully established. I don’t recommend refrigerating a new starter until it is at least 14 days old and has been reliably doubling after every feeding for several days.
On The Counter
Keeping your starter on the counter is the best option if you bake frequently. I once heard someone say that unless you’re running a bakery, there’s no reason to keep a starter at room temperature. I simply don’t agree. Because I bake bread, rolls, and other sourdough recipes for my family two or three times a week, I like to keep my starter on the counter year-round. It means I can bake whenever I like, and I find it encourages a strong, vigorous starter.
When I keep my starter on the counter, I feed it every 24 hours—or every 12 hours during very hot weather—discarding part of it before each feeding.
I also keep only a small amount of starter. I usually save 25 grams and feed it with 50 grams of flour and 50 grams of water (a 1:2:2 feeding ratio). Because my kitchen is very warm, feeding equal weights of starter, flour, and water (1:1:1) doesn’t provide enough food for a full day. If your kitchen is cool, feeding a 1:1:1 ratio every 24 hours is enough. I also find that keeping around 100 grams of starter works well. Smaller amounts can begin to dry out in hot weather.
In The Refrigerator
If you bake only occasionally, storing your starter in the refrigerator is a better option. It greatly reduces maintenance and flour waste because you only need to feed it about once a week. As always, discard part of it beforehand. The trade-off is that you’ll usually need to bring it back to room temperature and feed it one or two times—sometimes even three—before it’s bubbly, active, and ready to bake with again.
Whichever method you choose, try to discard before every feeding, or at least most feedings, to keep your starter healthy. This also prevents it from growing too large. I collect all of my discard in a closed jar in the refrigerator. Once a week or so I use it up in discard recipes. It also makes a great emergency backup in case you accidentally use all of your active starter in a recipe. This has happened to me more than once!
How to Use Your Sourdough Starter
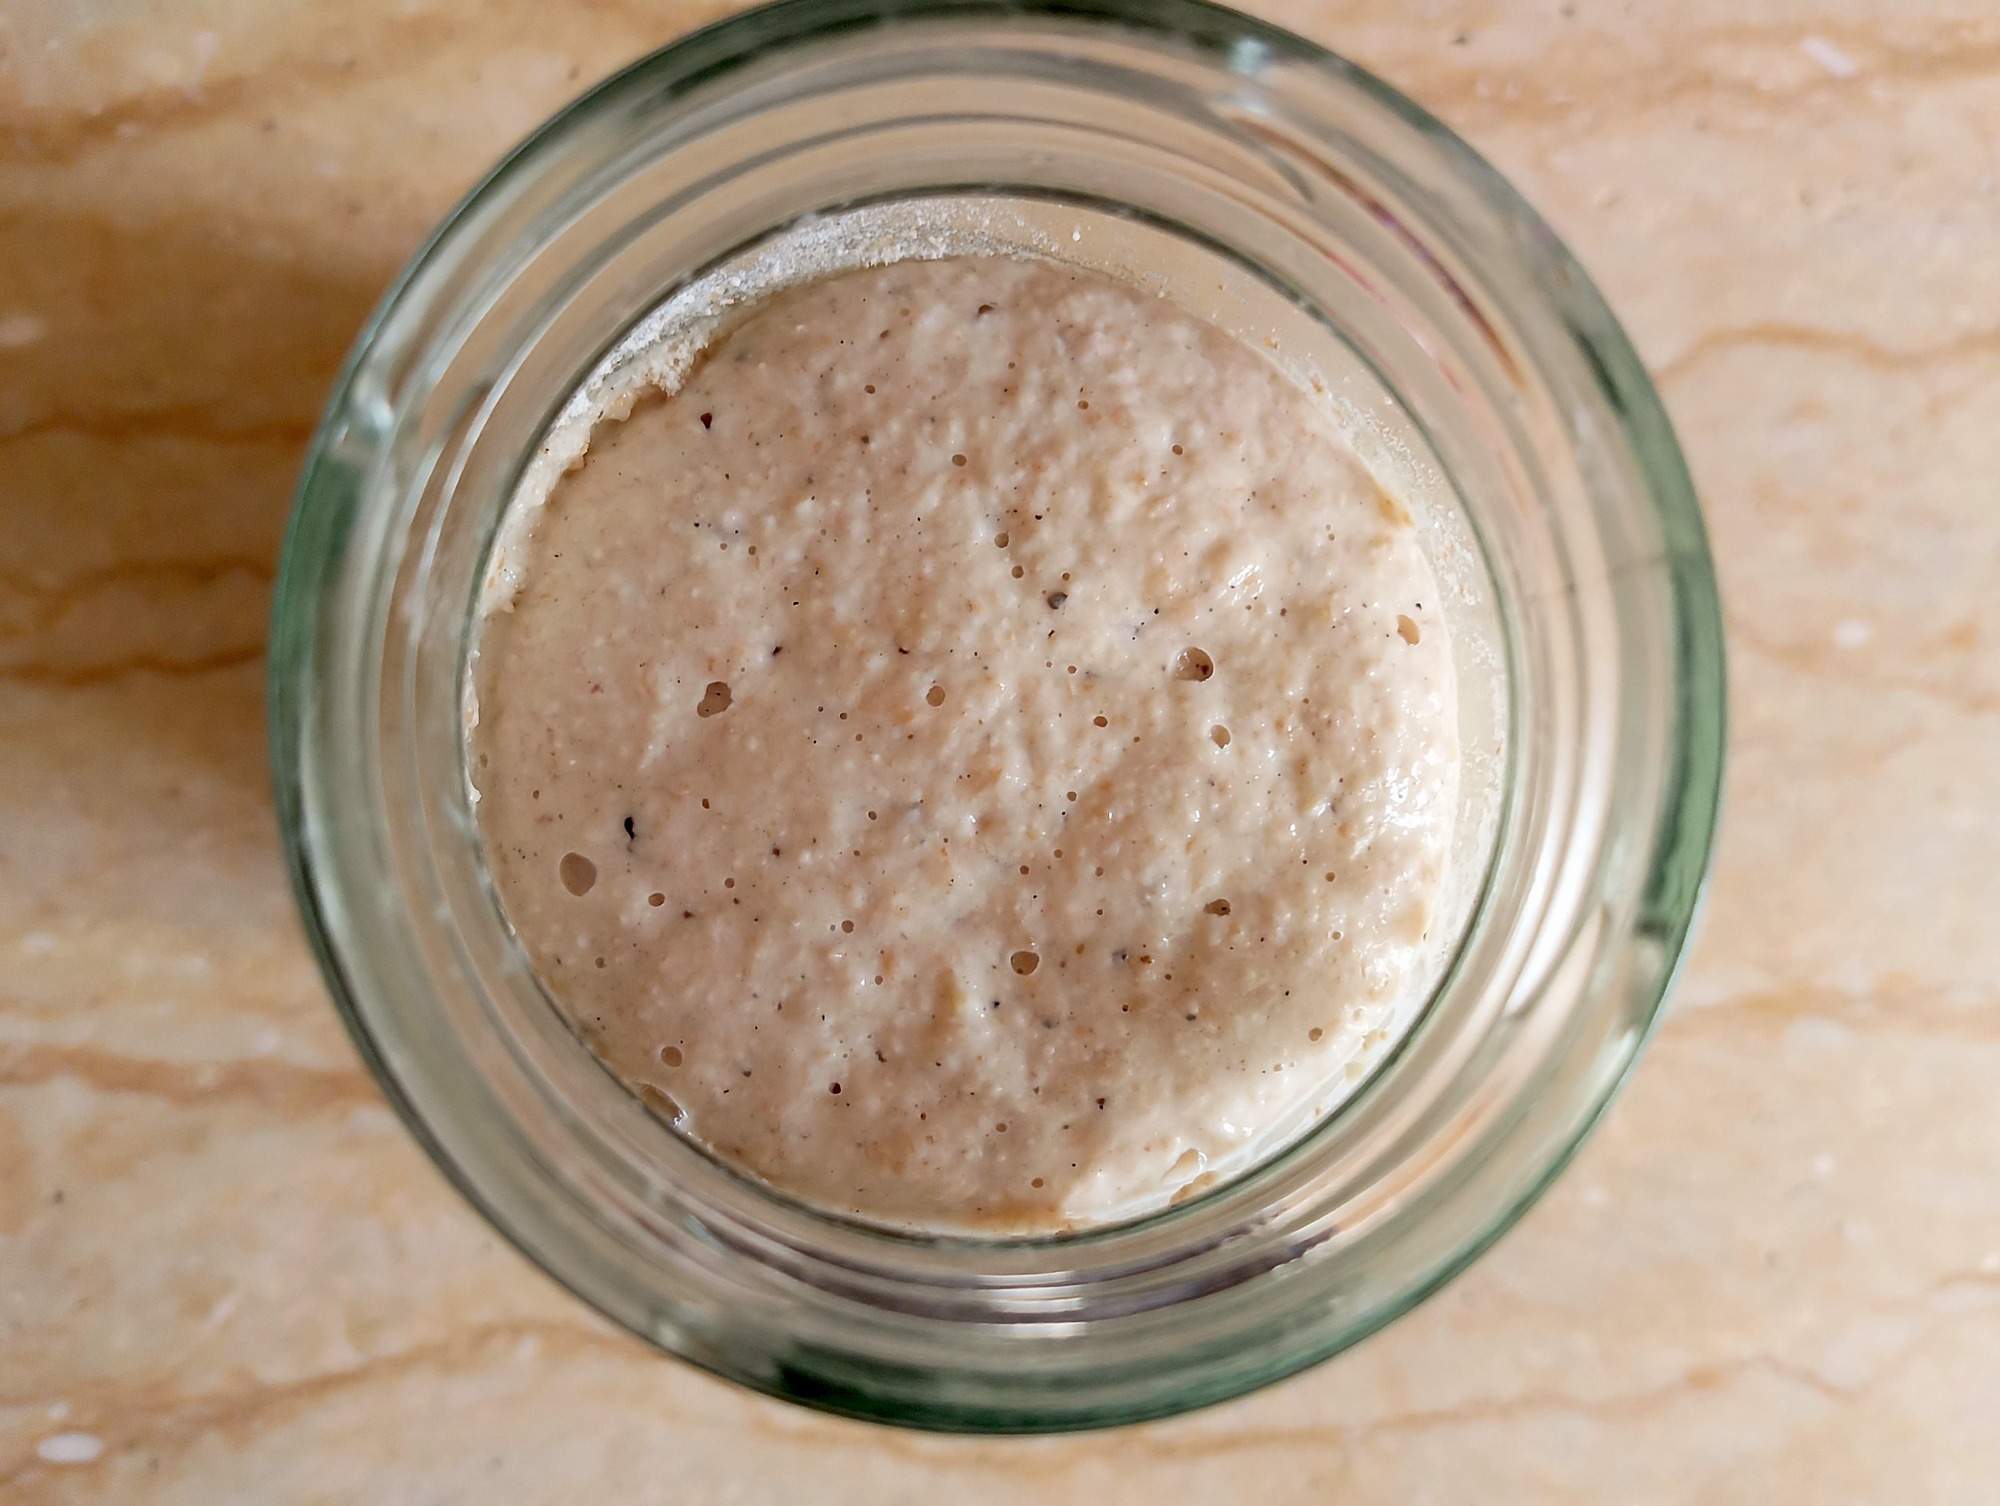
For the best results, use your sourdough starter when it is active and at its peak. Starter at peak is one that has doubled in size, is full of bubbles, and the top is slightly domed or just beginning to flatten. A starter that is just past its peak will still raise your bread well. However, try not to use it once it has fully collapsed, as it will be less active.
If you miss the ideal window, don’t worry. Discard half of the starter, feed the remainder with flour and water, and wait for it to double again before mixing your dough. In a warm kitchen, this can take as little as 2 hours.
Once you’ve measured the amount of starter needed for your recipe, feed the remaining starter with fresh flour and water. This way it will be ready for your next baking session.
Best Feeding Ratio For Your Starter
To keep your sourdough starter healthy, I feed it with at least its own weight in both flour and water. For example, if you have 50 grams of starter, feed it with 50 grams of flour and 50 grams of water. This is known as a 1:1:1 feeding ratio (equal weights of starter, flour, and water). It is generally considered the minimum recommended ratio for routine maintenance. It provides enough fresh food for the wild yeasts and beneficial bacteria to thrive.
Feeding significantly less than this doesn’t provide enough nutrients. It causes your starter to become overly acidic and gradually weaken over time. A weak starter won’t ferment as efficiently or raise your bread as well.
A 1:1:1 feeding is perfect for everyday maintenance. However, there are plenty of times when a higher feeding ratio is beneficial. I often use a 1:2:2 or even a 1:3:3 ratio when I want to slow fermentation, refresh my starter before baking, or build up a larger quantity of active starter.
Because I only keep a small amount of starter on my counter, I’ll often increase the feeding ratio when I need more for a recipe. For example, if I’m baking three loaves of sourdough bread, I’ll keep 60 grams of starter and feed it with 180 grams of flour and 180 grams of water (a 1:3:3 ratio). Since there’s much more fresh food available, it takes longer for the starter to reach its peak. However, by lunchtime I’ll have plenty of active starter ready to mix into my dough.
When to Use A Higher Feeding Ratio
Here are some other reasons you might choose to feed your starter at a higher ratio:
- To extend the time between feedings. A larger feeding gives your starter more food to work through. It takes longer to reach its peak and stays active for longer before becoming hungry again. This is helpful if, for example, you feed your starter early in the morning but won’t have time to mix your dough until mid-afternoon.
- To strengthen a sluggish starter. Giving the microorganisms more fresh flour and water over several feedings can help revive a weak or neglected starter. This is especially useful if you’ve forgotten your starter at the back of the refrigerator for a few weeks and need to bring it back into good shape for baking.
- In warm weather. If your kitchen is very warm, a higher feeding ratio slows fermentation. it also helps prevent your starter from becoming overly acidic too quickly. My kitchen gets very warm in the summer. If I fed my starter at a 1:1:1 ratio, it would run out of food by the middle of the day and need feeding again.
- When needing a larger amount of starter. If a recipe calls for more starter than you have on hand, feeding at a higher ratio is an easy way to increase the quantity. I often bake three loaves of bread at a time, so this is something I do regularly.
- To reduce acidity. Higher-ratio feedings dilute the acids that have built up in your starter. This results in a milder flavor while maintaining strong yeast activity. Not everyone enjoys a pronounced sourdough tang. My kids much prefer a milder flavor, so this approach works well for our family.
What Is Starter Hydration and Why It Matters
Starter hydration simply refers to the ratio of water to flour in your sourdough starter, measured by weight. A 100% hydration starter contains equal weights of flour and water—for example, 50 grams of flour and 50 grams of water. This is the type of starter most commonly used in home baking.
I recommend using a 100% hydration starter because it’s the simplest and most reliable approach. It creates a starter with a thick pancake-batter consistency that’s easy to mix, monitor as it rises, and use in recipes. It’s also the hydration assumed in most sourdough recipes, making it the easiest option for beginners.
Sourdough Starter FAQ
Why I Love My Sourdough Starter
A sourdough starter is wonderful proof that some of the most remarkable things begin with the simplest ingredients. With nothing more than flour, water, and patience, you can create a living culture capable of nourishing your family for years to come.
My grandmother baked sourdough bread for us when we were children, and the smell of a freshly baked loaf is still one of my favorite childhood memories. Now I have the joy of continuing that tradition with my own children. I hope this sourdough starter recipe inspires you to begin your own deeply satisfying sourdough journey and create traditions your family will treasure for years to come.
And if you enjoy old-fashioned cooking, baking, and natural living as much as I do, I’d love for you to join my weekly newsletter, written with love for real food moms like you.
Easy Beginner Sourdough Recipes To Try
How to Make Sourdough Starter
Equipment
- digital kitchen scale
- 500 ml (1-pint) glass jar
- Spoon or spatula
- Rubber band or marker (optional, to mark the starter's level)
Ingredients
- 625 g whole grain flour whole wheat, spelt, or rye
- 625 g bread flour
- 1.25 kg filtered water
Instructions
- Day 1: In a clean jar, vigorously mix 50 grams of flour and 50 grams of water until no dry flour remains. Scrape down the sides of the jar, cover it loosely with a lid or a cloth secured with a rubber band, and leave it at warm room temperature for 24 hours.
- Day 2: Discard about half of the starter, leaving about 50 grams in the jar. Feed it with 50 grams of flour and 50 grams of water, then stir vigorously until smooth. Cover the jar loosely and leave it at warm room temperature for another 24 hours.
- Day 3: Discard about half of the starter, leaving about 50 grams in the jar. Feed it with 50 grams of flour and 50 grams of water, then stir vigorously until smooth. Scrape down the sides of the jar, cover it loosely, and leave it at warm room temperature for another 24 hours.
- Days 4–6: By now, you should start to see bubbles, a slight rise after feeding, and a pleasantly tangy aroma. Begin feeding your starter twice a day, about 12 hours apart. At each feeding, discard all but 50 grams of starter, then feed it with 50 grams of flour and 50 grams of water. Stir vigorously until smooth, scrape down the sides of the jar, cover loosely, and leave at warm room temperature until the next feeding.
- Days 7–14: Continue feeding your starter twice a day, about 12 hours apart, following the same routine. At each feeding, discard all but 50 grams of starter, then feed it with 50 grams of flour and 50 grams of water. Once your starter reliably doubles in size within 2–4 hours after feeding, it's ready to bake with. My starters usually begin doubling around Day 8 but often need another couple of days before they do so consistently. Remember, watch your starter, not the calendar.
Notes
- Use filtered or dechlorinated water whenever possible, as chlorine can slow fermentation.
- Whole wheat, rye, or spelt flour helps encourage fermentation during the first few days. Once your starter is established, you can feed it with bread flour or all-purpose flour if you prefer.
- Keep your starter in a warm place (around 24–27°C / 75–80°F) for the best results.
- Every starter develops at its own pace. Most are ready to bake with between 8 and 14 days, but rely on your starter’s behavior rather than the calendar. It is ready when it reliably doubles in size within 2–4 hours after feeding.
- The flour and water listed in this recipe include the amounts used during regular feedings over the 14-day process, including the portion that is discarded.
- Once your starter is mature, you can store it on the counter and feed it daily, or keep it in the refrigerator and feed it about once a week.